LG WM2233HW Owner's Manual - Page 7
Minimum installation spacing for, recessed area installation. - vibration
 |
View all LG WM2233HW manuals
Add to My Manuals
Save this manual to your list of manuals |
Page 7 highlights
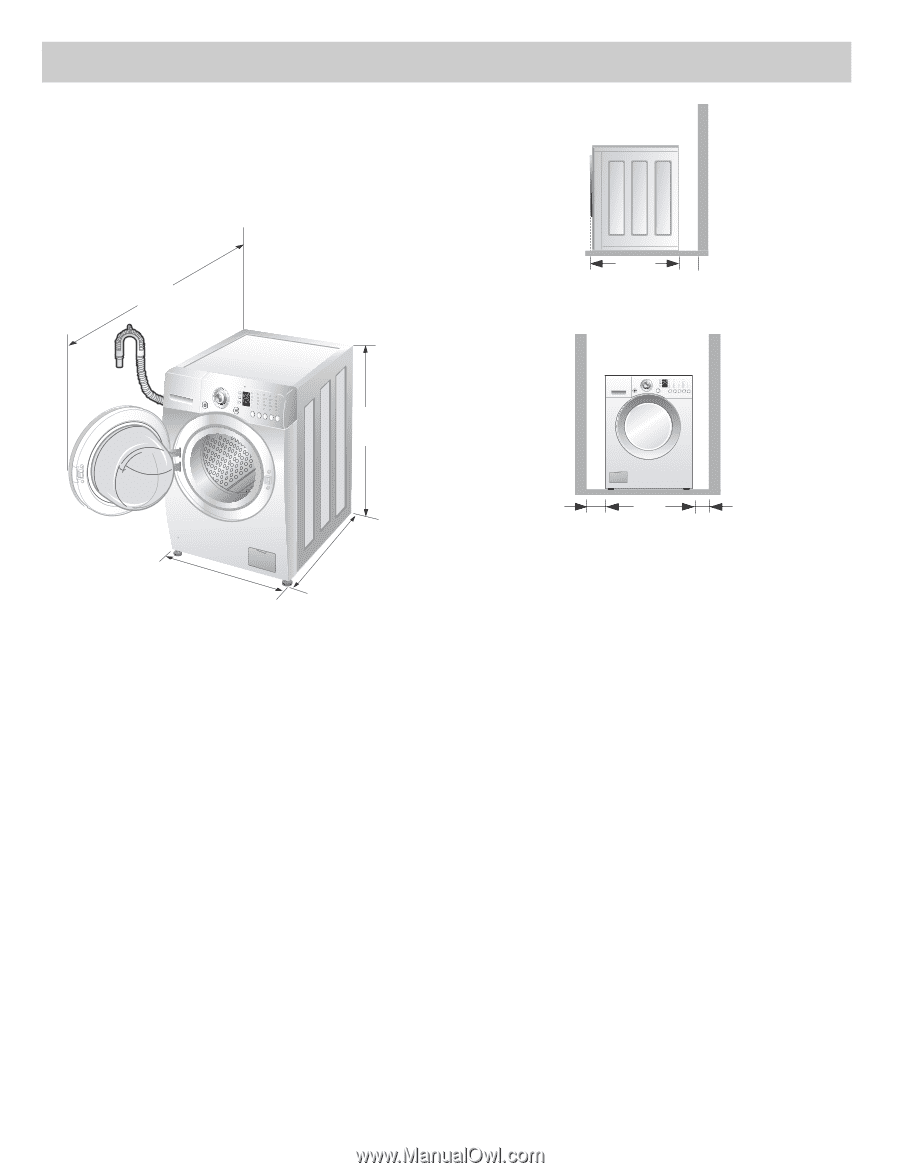
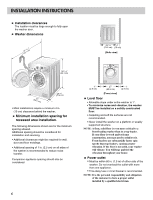
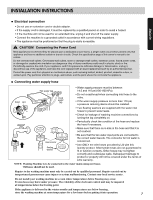
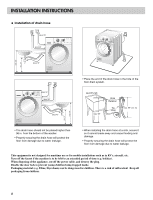
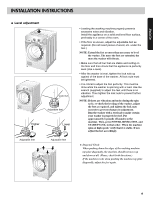
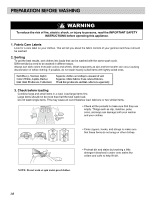
INSTALLATION INSTRUCTIONS Installation clearances The location must be large enough to fully open the washer door. Washer dimensions (152091.13/1c6m" ) 29 3/4" 4" (75.6 cm) (10 cm) [Side view] 3811/16" (98.3 cm) (68.267c" m) 29 3/4" (75.6 cm) • Most installations require a minimum 4 in. (10 cm) clearance behind the washer. Minimum installation spacing for recessed area installation. The following dimensions shown are for the minimum spacing allowed. Additional spacing should be considered for installation and servicing. • Additional clearances might be required for wall, door and floor moldings. • Additional spacing of 1 in. (2.5 cm) on all sides of the washer is recommended to reduce noise transfer. Companion appliance spacing should also be considered. 6 1" (2.5 cm) 27" (68.6 cm) [Front view] 1" (2.5 cm) Level floor • Allowable slope under entire washer is 1°. • To minimize noise and vibration, the washer MUST be installed on a solidly constructed floor. • Carpeting and soft tile surfaces are not recommended. • Never install the washer on a platform or weakly supported structure. NOTE: A firm, solid floor is even more critical to a front-loading washer than to a top-loader. If your floor is wood and/or frame construction, you may need to reinforce it. Front-loaders use substantially faster spin speeds than top-loaders, causing greater vibration. If the floor is not solid, your washer will vibrate. You will hear and feel the vibration throughout your house. Power outlet • Must be within 60 in. (1.5 m) of either side of the washer. Do not overload the outlet with more than one appliance. • Time-delay fuse or circuit breaker is recommended. NOTE: It is the personal responsibility and obligation of the customer to have a proper outlet installed by a qualified electrician.
-
 1
1 -
 2
2 -
 3
3 -
 4
4 -
 5
5 -
 6
6 -
 7
7 -
 8
8 -
 9
9 -
 10
10 -
 11
11 -
 12
12 -
13
-
14
-
15
-
16
-
17
-
18
-
19
-
20
-
21
-
22
-
23
-
24
-
25
-
26
-
27
-
28
-
29
-
30
-
31
-
32
-
33
-
34
-
35
-
36
-
37
-
38
-
39
-
40
-
41
-
42
-
43
-
44
-
45
-
46
-
47
-
48
 |
 |