LG WM2450HRA Owner's Manual - Page 16
Warning - front load washer
 |
View all LG WM2450HRA manuals
Add to My Manuals
Save this manual to your list of manuals |
Page 16 highlights
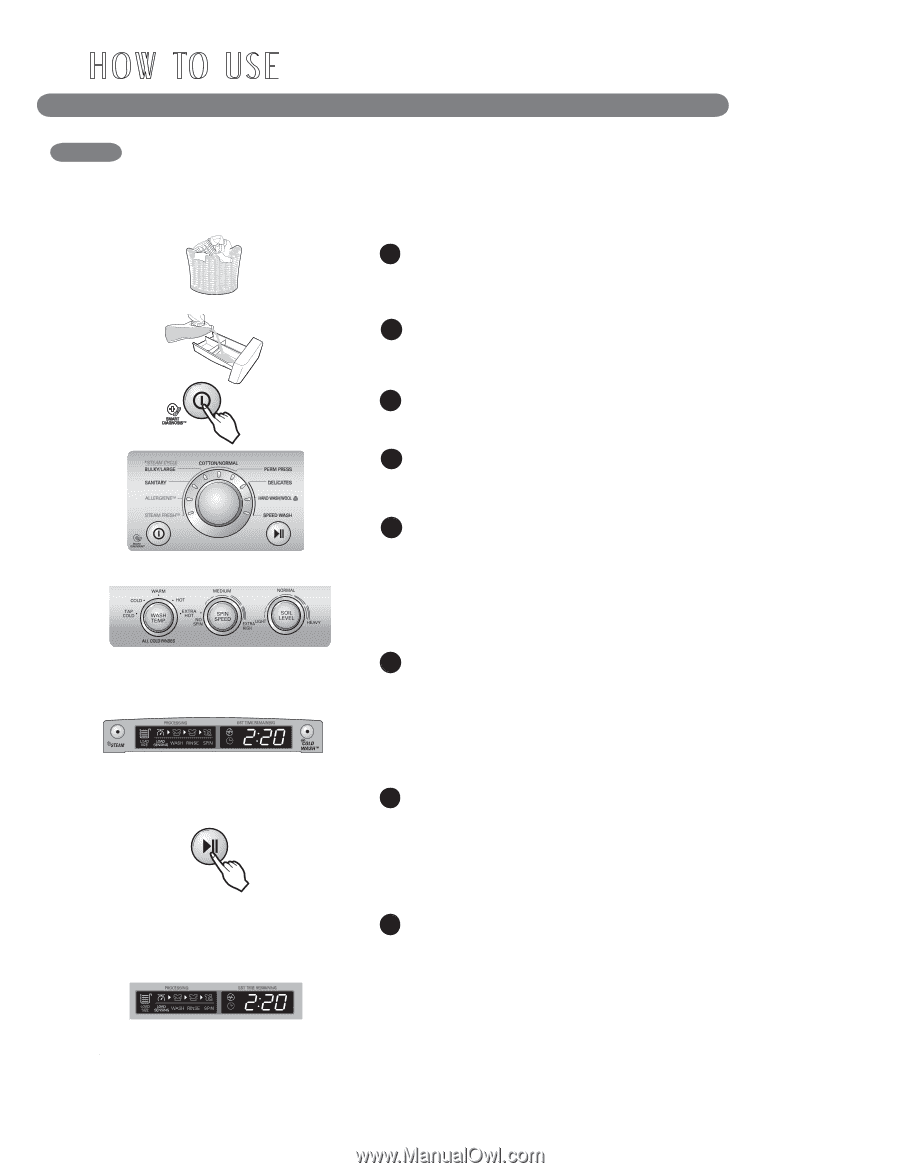
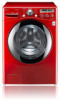
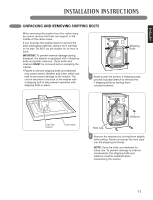
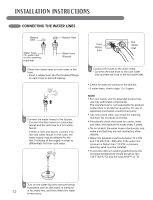
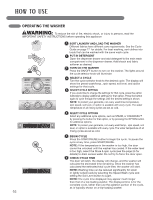
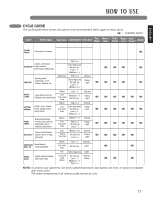
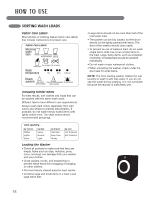
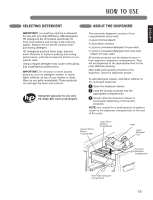
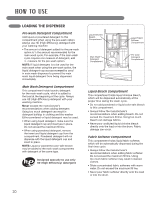
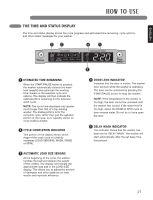
HOW TO USE OPERATING THE WASHER wWARNING: To reduce the risk of fire, electric shock, or injury to persons, read the IMPORTANT SAFETY INSTRUCTIONS before operating this appliance 1 SORT LAUNDRY AND LOAD THE WASHER Different fabrics have different care requirements. See the Cycle Guide on page 17 for details. For best washing, sort clothes into loads that can be washed with the same wash cycle. 2 PUT IN DETERGENT Open the dispenser drawer and add detergent to the main wash compartment in the dispenser drawer. Add bleach and fabric softener as desired. 3 TURN ON THE WASHER Press the ON/OFF button to turn on the washer. The lights around the cycle selector knob will illuminate. 4 SELECT A CYCLE Turn the cycle selector knob to the desired cycle. The display will show the preset wash/temp., spin speed, soil level, and option settings for that cycle. 5 SELECT CYCLE SETTING If you would like to change the settings for that cycle, press the option button(s) to display additional settings for that option. Press the button again to cycle through the settings until the desired setting is shown. NOTE: To protect your garments, not every wash/rinse temperature, spin speed, soil level, or option is available with every cycle. The water temperature of all rinsing cycles are set as cold. 6 SELECT CYCLE OPTIONS Select any additional cycle options, such as STEAM, or COLDWASH™ by pressing the button for that option, or by pressing the OPTION button for additional options. NOTE: To protect your garments, not every wash/temp., spin speed, soil level, or option is available with every cycle. The water temperature of all rinsing cycles are set as cold. 7 BEGIN CYCLE Press the START/PAUSE button to begin the cycle. To pause the cycle at any time, press START/PAUSE. NOTE: If the temperature in the washer is too high, the door cannot be unlocked until the washer has cooled. If the water level is too high, select the Rinse & spin cycle (see the page 25 for details) to drain excess water. Do not try to force the door open. 8 CHECK CYCLE TIME The door will latch, the display will change, and the washer will calculate the estimated time remaining. Once the washer has calculated the estimated total cycle time, the washer will start. NOTE: Washing time can be reduced significantly for small or lightly soiled loads by selecting the Speed Wash cycle and setting the Soil Level button to Light. NOTE: The cycle time displayed may appear much longer than that of a top loading washer. The displayed time is for the complete cycle, rather than just the agitation portion of the cycle, as is typically shown on a top-loading washer. 16
-
 1
1 -
2
-
3
-
4
-
5
-
6
-
7
-
8
-
9
-
10
-
 11
11 -
 12
12 -
 13
13 -
 14
14 -
 15
15 -
 16
16 -
 17
17 -
 18
18 -
 19
19 -
 20
20 -
 21
21 -
22
-
23
-
24
-
25
-
26
-
27
-
28
-
29
-
30
-
31
-
32
-
33
-
34
-
35
-
36
-
37
-
38
-
39
-
40
-
41
-
42
-
43
-
44
-
45
-
46
-
47
-
48
-
49
-
50
-
51
-
52
-
53
-
54
-
55
-
56
-
57
-
58
-
59
-
60
-
61
-
62
-
63
-
64
-
65
-
66
-
67
-
68
-
69
-
70
-
71
-
72
 |
 |