Lacie 2big Quadra USB 3.0 User Manual - Page 19
Manage RAID, Modify RAID Mode
 |
View all Lacie 2big Quadra USB 3.0 manuals
Add to My Manuals
Save this manual to your list of manuals |
Page 19 highlights
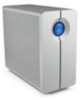
MANAGE RAID MODIFY RAID MODE Important info: Changing the RAID mode destroys data stored on the 2big. If you have saved data on the drives, back up data before following these steps. 1. Make sure that the 2big is turned off but that its power supply is connected and that it's connected to a computer via an interface cable. 2. Use the sharp end of the RAID selection tool (A) to press and hold down the select button (B). 3. Without releasing the select button, turn on the product. 4. Once the RAID mode LEDs (D and E) start blinking (takes five seconds), release the select button. 5. The LED for the current RAID mode (D or E) will blink. Using the RAID selection tool, press the select button (B) to toggle between the two different modes. 6. Once the LED for the RAID mode you want is blinking, press the confirm button (C). RAID initialization will begin and will take less than one minute. 7. Next you must format the volume before it will mount on your computer. For instructions, refer to Formatting Instructions. LaCie 2big Quadra USB 3.0 User Manual 19
-
 1
1 -
2
-
3
-
4
-
5
-
6
-
7
-
8
-
9
-
10
-
11
-
12
-
13
-
 14
14 -
 15
15 -
 16
16 -
 17
17 -
 18
18 -
 19
19 -
 20
20 -
 21
21 -
 22
22 -
 23
23 -
 24
24 -
25
-
26
-
27
-
28
-
29
-
30
-
31
-
32
-
33
-
34
-
35
-
36
-
37
-
38
-
39
-
40
 |
 |
