Lantronix N-GXE-xx-02 Series N-GXE-xx-02 Series User Guide Rev C - Page 8
Hardware Install Procedure, Caution, Warning
 |
View all Lantronix N-GXE-xx-02 Series manuals
Add to My Manuals
Save this manual to your list of manuals |
Page 8 highlights
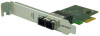
Lantronix N-GXE-xx-02 User Guide Hardware Install Procedure Warning: PCI Express cards, like all computer equipment, can be badly damaged by static electricity. Be sure that you are properly grounded before opening your computer case or touching your NIC. We recommend that you wear an anti-static strap when installing any computer component. If an anti-static strap is unavailable, discharge yourself of any static electricity build-up by touching a large grounded metal surface (such as the computer case) for several seconds. Also, be careful to handle the NIC by its edges and not by the gold connectors. Caution: Only qualified persons should install the NIC. Failure to observe this caution could result in poor performance or damage to the equipment. Before installing the NIC, review the System Requirements and the Installation Overview. Caution: Wear a grounding device and observe electrostatic discharge precautions when installing the NIC in a system. Failure to observe this caution could result in damage to the NIC. Before installing the NIC, ensure that system power is OFF, the power cord is unplugged from the power outlet, and that proper electrical grounding procedure has been followed. Warning: High voltage inside the system may present a safety hazard. Make sure that the system power is off before removing the cover. Unplug and disconnect the PC and then wait for 15-20 seconds before plugging the NIC into the PC. When removing the NIC, unplug the Ethernet cable before removing the PC cover. To install the N-GXE NIC, do the following: 1. Turn Off power to the PC or file server and unplug the power cord. 2. Turn Off any peripherals connected to the computer (Printers, external hard drives, etc.). 3. Remove the cover from the computer case. See your computer system documentation for details. Keep all screws. 4. Locate an open PCI Express slot and remove the metal cover plate on the rear of the computer case See system documentation for PCIe slot location. Remove and retain the faceplate. 5. Remove the network N-GXE NIC from the shipping package and store the packaging material in a safe place. 6. Gently insert the NIC into the open PCI Express slot and fasten the bracket to the rear of the case. Note: Replacing the pre-installed installation bracket may be required now depending on the profile of the system it is being installed in. Apply even pressure on the corners of the N-GXE NIC, pushing down until it seats firmly into the PCIe slot. 7. Replace the PC or file server cover and secure it with the screws removed in Step 3 above. 8. Insert the power cable into the socket on the power supply and reconnect all other connectors removed in Step 2. 9. Disconnect any antistatic devices. 10. Power up the PC or file server. Windows Device Manager reports the fixed optic version NIC as "i210 Gigabit Fiber Connection" in Windows 7, 8, 10. Windows Device Manager reports the SFP version NIC as "i210 Gigabit Network Connection. 33748 Rev. C https://www.lantronix.com/ 8
-
 1
1 -
2
-
 3
3 -
 4
4 -
 5
5 -
 6
6 -
 7
7 -
 8
8 -
 9
9 -
 10
10 -
 11
11 -
 12
12 -
 13
13 -
14
-
15
-
16
-
17
-
18
-
19
-
20
-
21
-
22
-
23
-
24
-
25
-
26
-
27
-
28
-
29
 |
 |
