Lantronix Spider KVM Over IP Switch User Guide - Page 29
Network Environment, Spider Power, Interfaces > Network
 |
View all Lantronix Spider KVM Over IP Switch manuals
Add to My Manuals
Save this manual to your list of manuals |
Page 29 highlights
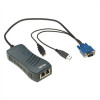
3: Installing the Spider Device Guide at http://www.lantronix.com/support/documentation.html for instructions on installation and operation of Spider View software. Platform-independent management-Each Spider device contains an embedded web server that delivers web pages, a KVM Remote Console program, and a terminal program. To access and manage the client server, a web browser running the latest version is required (Chrome, Edge, Firefox, Safari). Network Environment The connection between the client and Spider device must be open to IP traffic and use TCP port 443 (HTTPS). Firewalls and NAT devices should be configured to support this configuration. The TCP port can be changed by accessing Interfaces > Network. Lantronix recommends using Fast Ethernet connections and a switched network environment because In a LAN, traffic affects the responsiveness of the Remote Console window. Spider Power The Spider device consumes under 10 watts of power that it draws from the attached computer. It requires all cables to be plugged in to receive sufficient power. Plug in both USB cables or a USB and a PS/2 cable. Pwr1 and Pwr2 LEDs indicate that power is available. Pwr1 indicates that power is available only on the first USB port. Pwr2 indicates that power is available on the second USB port or the PS/2 port. When both LEDs are lit, the Spider device is powered and can boot. The Spider device can also get power from an external DC power supply. DC power supplies are available from Lantronix (part number 520-085-R). The DC power supply acts as a backup, because the Spider device loses power when the attached computer goes down. Use the power-on reset to reboot the Spider device or reboot from the user interface, from the serial port, or by clicking the reset switch through the pinhole on the back of the body. Spider™ and SpiderDuo® KVM-over-IP Device User Guide 29
-
 1
1 -
2
-
3
-
4
-
5
-
6
-
7
-
8
-
9
-
10
-
11
-
12
-
13
-
14
-
15
-
16
-
17
-
18
-
19
-
20
-
21
-
22
-
23
-
 24
24 -
 25
25 -
 26
26 -
 27
27 -
 28
28 -
 29
29 -
 30
30 -
 31
31 -
 32
32 -
 33
33 -
 34
34 -
35
-
36
-
37
-
38
-
39
-
40
-
41
-
42
-
43
-
44
-
45
-
46
-
47
-
48
-
49
-
50
-
51
-
52
-
53
-
54
-
55
-
56
-
57
-
58
-
59
-
60
-
61
-
62
-
63
-
64
-
65
-
66
-
67
-
68
-
69
-
70
-
71
-
72
-
73
-
74
-
75
-
76
-
77
-
78
-
79
-
80
-
81
-
82
-
83
-
84
-
85
-
86
-
87
-
88
-
89
-
90
-
91
-
92
-
93
-
94
-
95
-
96
-
97
-
98
-
99
 |
 |
