Lantronix TN-QSFP-100G Series TN-QSFP-100G User Guide Rev C - Page 9
Attaching the Optical Network Cable, Removing the TN-QSFP-100G-xxxxx, Lantronix
 |
View all Lantronix TN-QSFP-100G Series manuals
Add to My Manuals
Save this manual to your list of manuals |
Page 9 highlights
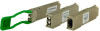
Lantronix TN-QSFP-100G-xxxxx User Guide Attaching the Optical Network Cable Before removing the dust plugs and making any optical connections, follow these guidelines: • Keep the protective dust plugs installed in the unplugged fiber-optic cable connectors and in the transceiver optical bores until you are ready to make a connection. • Inspect and clean the MPO connector or the duplex LC connector end faces just before you make any connections. • Grasp the MPO or the duplex LC connector only by the connector housing to plug or unplug a fiber- optic cable. Note: The MPO connectors on the TN-QSFP-40G-SR4 are keyed to prevent incorrect insertion. Note: The multiple-fiber push-on (MPO) connectors and the duplex LC connectors on the TN-QSFP100G-xxxxx support network interface cables with either Physical contact (PC) or Ultra-Physical Contact (UPC) flat-polished face types. The MPO connectors and the duplex LC connectors on the TN-QSFP100G-xxxxx do not support network interface cables with an angle-polished contact (APC) face type. 1. Remove the dust plugs from the optical network interface cable MPO connectors. Save the dust plugs for future use. 2. Inspect and clean the MPO or duplex LC connector's fiber-optic end faces. 3. Remove the dust plugs from the TN-QSFP-100G-xxxxx optical bores. 4. Immediately attach the network interface cable MPO connector or duplex LC connector to the TNQSFP-100G-xxxxx. 5. Verify that the optical network cable is fully seated by pulling gently on the cable's MPO or duplex LC connector boot. If the network cable disconnects, reinstall it and make sure that the cable connector is fully seated and that the connector latch engages. Removing the TN-QSFP-100G-xxxxx Caution: Be careful when removing the SFP or SFP+ from a device. Some SFP transceiver module temperatures may exceed 160°F (70°C) and be too hot to touch with bare hands. Note: Do not remove and replace the SFP modules more often than necessary; excessive SFP removing and replacing can shorten the SFPs useful life. Caution: The TN-QSFP-100G-xxxxx is a static-sensitive device. Always use an ESD wrist strap or similar individual grounding device when handling or coming into contact with a TN-QSFP-100G-xxxxx. To remove a QSFP+ transceiver, follow these steps: 1. Disconnect the network interface cable from the TN-QSFP-100G-xxxxx. 2. Pivot the bail-clasp down to the horizontal position. 3. Immediately install the dust plug into the transceivers optical bore. 4. Grasp the sides of the QSFP+ transceiver and slide it out of the module socket. 5. Place the TN-QSFP-100G-xxxxx into an antistatic bag. 33765 Rev. C http://www.lantronix.com/ Page 9 of 15
-
 1
1 -
2
-
3
-
 4
4 -
 5
5 -
 6
6 -
 7
7 -
 8
8 -
 9
9 -
 10
10 -
 11
11 -
 12
12 -
 13
13 -
 14
14 -
15
 |
 |
