Lenovo C365 Lenovo C3/C4/C5 Series User Guide - Page 51
then secure it with the two screws. For C560 model only.
 |
View all Lenovo C365 manuals
Add to My Manuals
Save this manual to your list of manuals |
Page 51 highlights
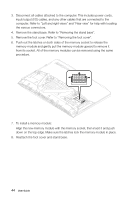
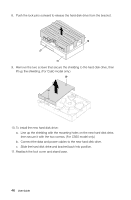
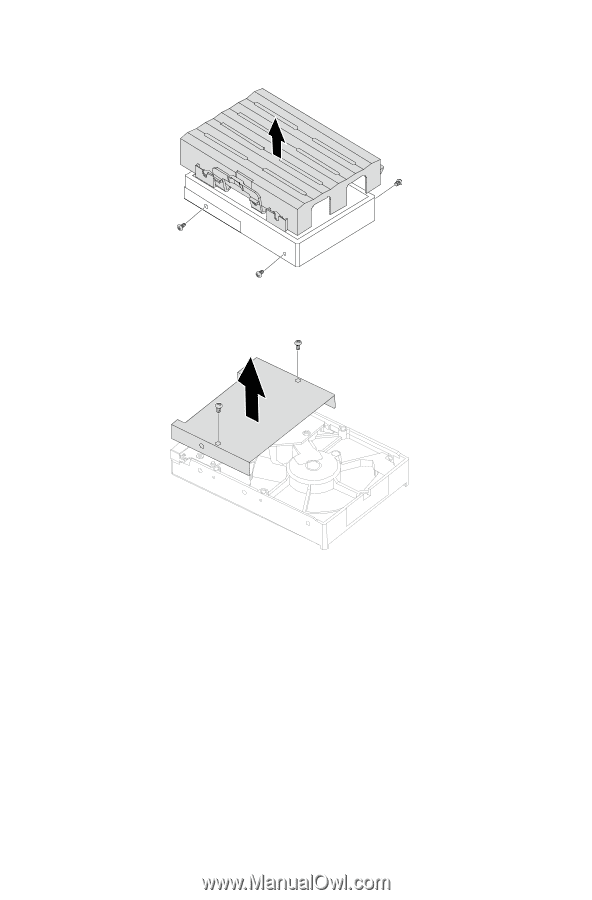
8. Push the lock pins outward to release the hard disk drive from the bracket. 9. Remove the two screws that secure the shielding to the hard disk drive, then lift up the shielding. (For C560 model only.) 10. To install the new hard disk drive: a. Line up the shielding with the mounting holes on the new hard disk drive, then secure it with the two screws. (For C560 model only.) b. Connect the data and power cables to the new hard disk drive. c. Slide the hard disk drive and bracket back into position. 11. Reattach the foot cover and stand base. 46 User Guide
-
 1
1 -
2
-
3
-
4
-
5
-
6
-
7
-
8
-
9
-
10
-
11
-
12
-
13
-
14
-
15
-
16
-
17
-
18
-
19
-
20
-
21
-
22
-
23
-
24
-
25
-
26
-
27
-
28
-
29
-
30
-
31
-
32
-
33
-
34
-
35
-
36
-
37
-
38
-
39
-
40
-
41
-
42
-
43
-
44
-
45
-
 46
46 -
 47
47 -
 48
48 -
 49
49 -
 50
50 -
 51
51 -
 52
52 -
 53
53 -
 54
54 -
 55
55 -
 56
56 -
57
-
58
-
59
-
60
-
61
 |
 |
46
User Guide
8.
Push the lock pins outward to release the hard disk drive from the bracket.
9.
Remove the two screws that secure the shielding to the hard disk drive, then
lift up the shielding. (For C560 model only.)
10. To install the new hard disk drive:
a.
Line up the shielding with the mounting holes on the new hard disk drive,
then secure it with the two screws. (For C560 model only.)
b.
Connect the data and power cables to the new hard disk drive.
c.
Slide the hard disk drive and bracket back into position.
11. Reattach the foot cover and stand base.