Lenovo C560 Lenovo C3/C4/C5 Series User Guide - Page 54
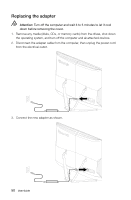
into position., b. Attach the bracket to the optical disk drive.
 |
View all Lenovo C560 manuals
Add to My Manuals
Save this manual to your list of manuals |
Page 54 highlights
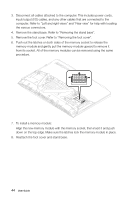
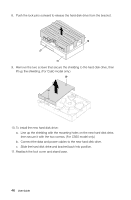
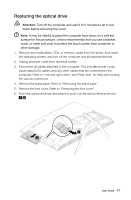
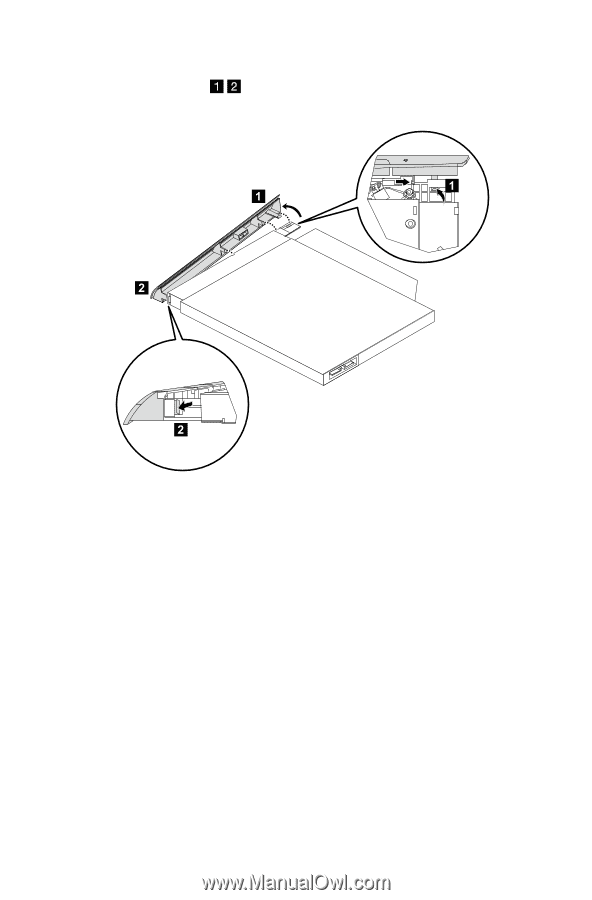
9. Use a small flat head screwdriver to press and push out the pins that secure the cover to the disk. 10. Separate the cover from the defective optical drive. 11. To install the new optical drive: a. Align the new optical drive with the cover, and then push the cover back into position. b. Attach the bracket to the optical disk drive. b. Slide the new optical drive into the drive bay. 12. Reattach the foot cover and stand base. User Guide 49
-
 1
1 -
2
-
3
-
4
-
5
-
6
-
7
-
8
-
9
-
10
-
11
-
12
-
13
-
14
-
15
-
16
-
17
-
18
-
19
-
20
-
21
-
22
-
23
-
24
-
25
-
26
-
27
-
28
-
29
-
30
-
31
-
32
-
33
-
34
-
35
-
36
-
37
-
38
-
39
-
40
-
41
-
42
-
43
-
44
-
45
-
46
-
47
-
48
-
 49
49 -
 50
50 -
 51
51 -
 52
52 -
 53
53 -
 54
54 -
 55
55 -
 56
56 -
 57
57 -
 58
58 -
 59
59 -
60
-
61
 |
 |
49
User Guide
9.
Use a small flat head screwdriver to press and push out the pins that secure
the cover to the disk.
10. Separate the cover from the defective optical drive.
11. To install the new optical drive:
a.
Align the new optical drive with the cover, and then push the cover back
into position.
b. Attach the bracket to the optical disk drive.
b. Slide the new optical drive into the drive bay.
12. Reattach the foot cover and stand base.