Lenovo Horizon 2e Table PC Lenovo HORIZON 2e All-In-One PC Hardware Maintenanc - Page 35
Removing the rear cover, Line up the holes on the new battery with mounting holes on the rear cover
 |
View all Lenovo Horizon 2e Table PC manuals
Add to My Manuals
Save this manual to your list of manuals |
Page 35 highlights
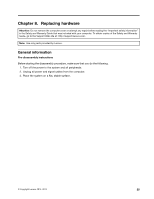
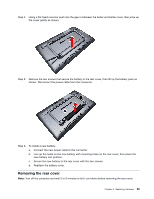
Step 4. Using a flat head crow bar push into the gap in-between the batter and batter cover, then prise up the cover gently as shown. Step 5. Remove the two screws that secure the battery to the rear cover, then lift up the battery pack as shown. Disconnect the power cable from the connector. Step 6. To install a new battery: a. Connect the new power cable to the connector. b. Line up the holes on the new battery with mounting holes on the rear cover, then place the new battery into position. c. Secure the new battery to the rear cover with the two screws. d. Reattach the battery cover. Removing the rear cover Note: Turn off the computer and wait 3 to 5 minutes to let it cool down before removing the rear cover. Chapter 8. Replacing hardware 29
-
 1
1 -
2
-
3
-
4
-
5
-
6
-
7
-
8
-
9
-
10
-
11
-
12
-
13
-
14
-
15
-
16
-
17
-
18
-
19
-
20
-
21
-
22
-
23
-
24
-
25
-
26
-
27
-
28
-
29
-
 30
30 -
 31
31 -
 32
32 -
 33
33 -
 34
34 -
 35
35 -
 36
36 -
 37
37 -
 38
38 -
 39
39 -
 40
40 -
41
-
42
-
43
-
44
-
45
-
46
-
47
-
48
-
49
-
50
-
51
-
52
-
53
-
54
-
55
 |
 |
