Lenovo IdeaCentre K320 Lenovo IdeaCentre K320 Hardware Replacement Guide V3.0 - Page 35
User Guide or in the Hardware Maintenance Manual.
 |
View all Lenovo IdeaCentre K320 manuals
Add to My Manuals
Save this manual to your list of manuals |
Page 35 highlights
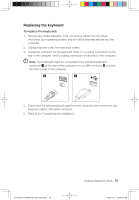
3. Position the computer cover on the chassis so that the rail guides on the bottom of the computer cover engage the rails. Then, push the computer cover closed until it snaps into position. 4. Reconnect the external cables and power cords into the computer. Refer to "Locating connectors on the front of the computer" and "Locating connectors on the rear of the computer". 5. To update your configuration settings, refer to "Starting the Setup Utility" in the User Guide or in the Hardware Maintenance Manual. Note: In most areas of the world, Lenovo requires the return of the defective CRU. Information about this will come with the CRU or will come a few days after the CRU arrives. 32 Hardware Replacement Guide 31041595_K3_HRG(H57)_EN_V3.0.ind32 32 2009.11.17 10:55:25 AM
-
 1
1 -
2
-
3
-
4
-
5
-
6
-
7
-
8
-
9
-
10
-
11
-
12
-
13
-
14
-
15
-
16
-
17
-
18
-
19
-
20
-
21
-
22
-
23
-
24
-
25
-
26
-
27
-
28
-
29
-
 30
30 -
 31
31 -
 32
32 -
 33
33 -
 34
34 -
 35
35 -
 36
36 -
 37
37
 |
 |
