Lenovo J200 (English) Hardware replacement guide - Page 52
rubber, mounts, until, assembly, place., Connect, cable, system, connector, board.,
 |
View all Lenovo J200 manuals
Add to My Manuals
Save this manual to your list of manuals |
Page 52 highlights
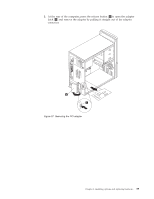
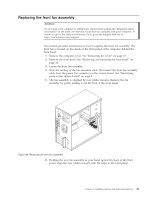
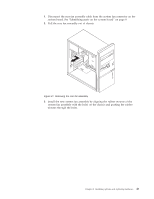
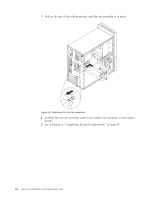
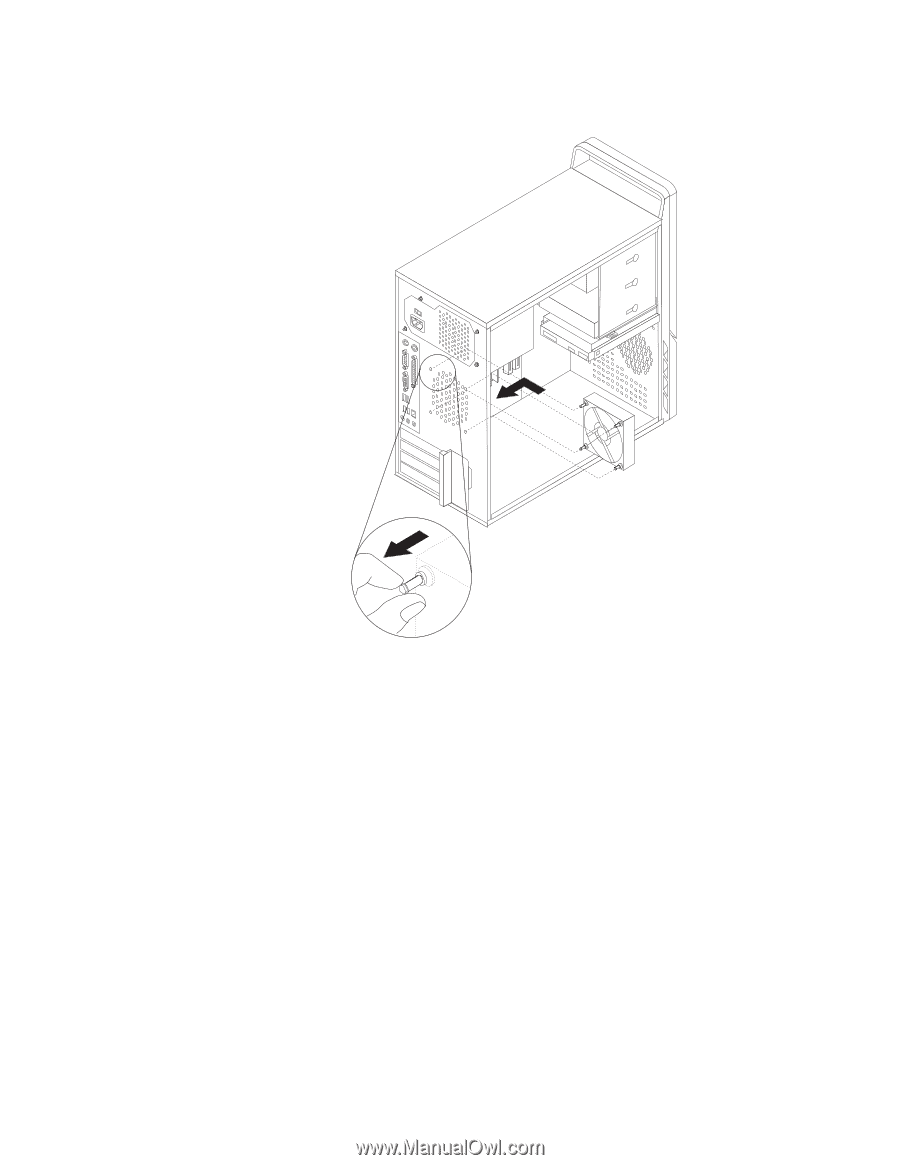
7. Pull on the tips of the rubber mounts until the fan assembly is in place. Figure 42. Replacing the rear fan assembly 8. Connect the rear fan assembly cable to the system fan connector on the system board. 9. Go to Chapter 4, "Completing the parts replacement," on page 47. 44 Hardware Installation and Replacement Guide
-
 1
1 -
2
-
3
-
4
-
5
-
6
-
7
-
8
-
9
-
10
-
11
-
12
-
13
-
14
-
15
-
16
-
17
-
18
-
19
-
20
-
21
-
22
-
23
-
24
-
25
-
26
-
27
-
28
-
29
-
30
-
31
-
32
-
33
-
34
-
35
-
36
-
37
-
38
-
39
-
40
-
41
-
42
-
43
-
44
-
45
-
46
-
 47
47 -
 48
48 -
 49
49 -
 50
50 -
 51
51 -
 52
52 -
 53
53 -
 54
54 -
 55
55 -
 56
56 -
 57
57 -
58
-
59
-
60
-
61
-
62
-
63
-
64
-
65
-
66
 |
 |
7.
Pull
on
the
tips
of
the
rubber
mounts
until
the
fan
assembly
is
in
place.
8.
Connect
the
rear
fan
assembly
cable
to
the
system
fan
connector
on
the
system
board.
9.
Go
to
Chapter
4,
“Completing
the
parts
replacement,”
on
page
47.
Figure
42.
Replacing
the
rear
fan
assembly
44
Hardware
Installation
and
Replacement
Guide