Lenovo L2062 Wide Flat Panel Monitor Lenovo L2062 Wide Flat Panel Monitor User - Page 5
Getting started, Shipping contents, Attaching the base and handling your monitor
 |
View all Lenovo L2062 Wide Flat Panel Monitor manuals
Add to My Manuals
Save this manual to your list of manuals |
Page 5 highlights
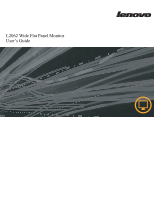
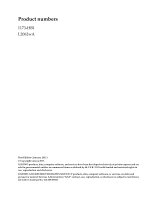
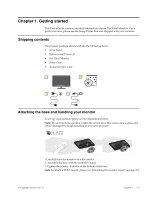
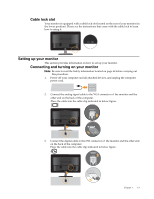
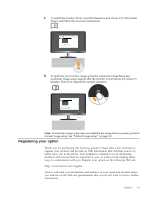
Chapter 1. Getting started This User's Guide contains detailed information of your Flat Panel Monitor. For a quick overview, please see the Setup Poster that was shipped with your monitor. Shipping contents The product package should include the following items: • Setup Poster • Reference and Driver CD • Flat Panel Monitor • Power Cord • Analog Interface Cable Attaching the base and handling your monitor To set up your monitor, please see the illustrations below. Note: Do not touch the monitor within the screen area. The screen area is glass and can be damaged by rough handling or excessive pressure. 1.Carefully lays the monitor on a flat surface. 2.Assemble the base with the monitor's stand. 3.Tighten the screws clockwise at the bottom of the base. Note:To attach a VESA mount, please see "Detaching the monitor stand" on page 2-9. © Copyright Lenovo 2011. © Chapter 1. 1-1
-
 1
1 -
 2
2 -
 3
3 -
 4
4 -
 5
5 -
 6
6 -
 7
7 -
 8
8 -
 9
9 -
 10
10 -
 11
11 -
12
-
13
-
14
-
15
-
16
-
17
-
18
-
19
-
20
-
21
-
22
-
23
-
24
-
25
-
26
-
27
 |
 |