Lenovo ThinkPad 770X ThinkPad 770 User's Guide - Page 88
Go to Testing Your Computer on Removing a Memory Option
 |
View all Lenovo ThinkPad 770X manuals
Add to My Manuals
Save this manual to your list of manuals |
Page 88 highlights
Title: C79DMMST CreationDate: 07/16/97 13:09:22 6 If you have another DIMM, install it into the vacant socket. Removing a Memory Option To remove the DIMM from its socket, push out the left and right latches. 7 Replace the bottom cover and the screw, and turn the computer rightside up. 8 Connect the AC Adapter to the computer. 9 Power on the computer and confirm the new memory size. For example, information such as the following appears: 32384 KB OK 10 Is the new memory size what you expected? Yes You have installed the DIMM successfully. Go to the next step. No Go to "Testing Your Computer" on page 4-32. 11 Turn off the computer and reconnect all cables. 3-4
-
 1
1 -
2
-
3
-
4
-
5
-
6
-
7
-
8
-
9
-
10
-
11
-
12
-
13
-
14
-
15
-
16
-
17
-
18
-
19
-
20
-
21
-
22
-
23
-
24
-
25
-
26
-
27
-
28
-
29
-
30
-
31
-
32
-
33
-
34
-
35
-
36
-
37
-
38
-
39
-
40
-
41
-
42
-
43
-
44
-
45
-
46
-
47
-
48
-
49
-
50
-
51
-
52
-
53
-
54
-
55
-
56
-
57
-
58
-
59
-
60
-
61
-
62
-
63
-
64
-
65
-
66
-
67
-
68
-
69
-
70
-
71
-
72
-
73
-
74
-
75
-
76
-
77
-
78
-
79
-
80
-
81
-
82
-
 83
83 -
 84
84 -
 85
85 -
 86
86 -
 87
87 -
 88
88 -
 89
89 -
 90
90 -
 91
91 -
 92
92 -
 93
93 -
94
-
95
-
96
-
97
-
98
-
99
-
100
-
101
-
102
-
103
-
104
-
105
-
106
-
107
-
108
-
109
-
110
-
111
-
112
-
113
-
114
-
115
-
116
-
117
-
118
-
119
-
120
-
121
-
122
-
123
-
124
-
125
-
126
-
127
-
128
-
129
-
130
-
131
-
132
-
133
-
134
-
135
-
136
-
137
-
138
-
139
-
140
-
141
-
142
-
143
-
144
-
145
-
146
-
147
-
148
-
149
-
150
-
151
-
152
-
153
-
154
-
155
-
156
-
157
-
158
-
159
-
160
-
161
-
162
-
163
-
164
-
165
-
166
-
167
-
168
-
169
-
170
-
171
-
172
-
173
-
174
-
175
-
176
-
177
-
178
-
179
-
180
-
181
-
182
 |
 |

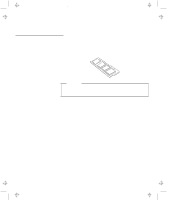
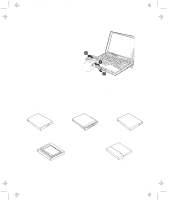
6
If you have another DIMM, install it into the vacant socket.
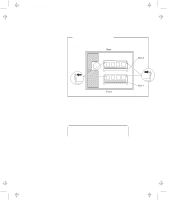
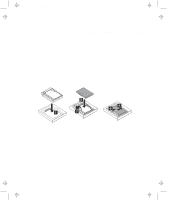
Removing a Memory Option
To remove the DIMM from its socket, push out the left and
right latches.
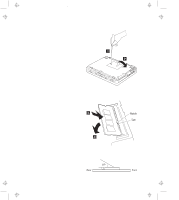
7
Replace the bottom cover and the screw, and turn the
computer rightside up.
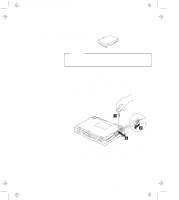
8
Connect the AC Adapter to the computer.
9
Power on the computer and confirm the new memory size.
For
example, information such as the following appears:
32384 KB OK
10
Is the new memory size what you expected?
Yes
You have installed the DIMM successfully.
Go to the
next step.
No
Go to “Testing Your Computer” on page
4-32.
11
Turn off the computer and reconnect all cables.
3-4
Title: C79DMMST CreationDate: 07/16/97 13:09:22