Lenovo ThinkPad 770Z TP 770X User's Reference that shipped with the system - Page 70
Turn the computer over again., tighten the screw.
 |
View all Lenovo ThinkPad 770Z manuals
Add to My Manuals
Save this manual to your list of manuals |
Page 70 highlights
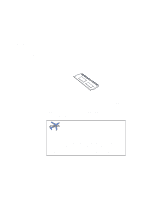
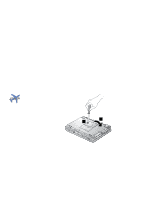
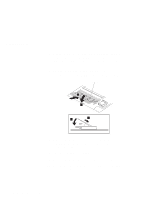
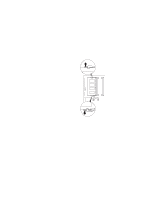
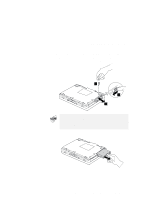
Increasing Memory 6 With the notched end of the DIMM toward the right side of the socket, insert the DIMM, at an angle of approximately 20°, into the socket; then press it firmly 1. 7 Pivot the DIMM until it snaps into place 2 . If you want to install two DIMMs, repeat steps 5 through 7. Notch 1 2 2 1 8 Replace the memory slot cover over the memory slot, aligning the back side of the cover first as shown; then tighten the screw. 9 Turn the computer over again. 10 Replace the battery pack and power on the computer. 11 Confirm that the new memory size appears at the upper left corner of the screen. 56 IBM ThinkPad 770X User's Reference
-
 1
1 -
2
-
3
-
4
-
5
-
6
-
7
-
8
-
9
-
10
-
11
-
12
-
13
-
14
-
15
-
16
-
17
-
18
-
19
-
20
-
21
-
22
-
23
-
24
-
25
-
26
-
27
-
28
-
29
-
30
-
31
-
32
-
33
-
34
-
35
-
36
-
37
-
38
-
39
-
40
-
41
-
42
-
43
-
44
-
45
-
46
-
47
-
48
-
49
-
50
-
51
-
52
-
53
-
54
-
55
-
56
-
57
-
58
-
59
-
60
-
61
-
62
-
63
-
64
-
 65
65 -
 66
66 -
 67
67 -
 68
68 -
 69
69 -
 70
70 -
 71
71 -
 72
72 -
 73
73 -
 74
74 -
 75
75 -
76
-
77
-
78
-
79
-
80
-
81
-
82
-
83
-
84
-
85
-
86
-
87
-
88
-
89
-
90
-
91
-
92
-
93
-
94
-
95
-
96
-
97
-
98
-
99
-
100
-
101
-
102
-
103
-
104
-
105
-
106
-
107
-
108
-
109
-
110
-
111
-
112
-
113
-
114
-
115
-
116
-
117
-
118
-
119
-
120
-
121
-
122
-
123
-
124
-
125
-
126
-
127
-
128
-
129
-
130
-
131
-
132
-
133
-
134
-
135
-
136
-
137
-
138
-
139
-
140
-
141
-
142
-
143
-
144
-
145
-
146
-
147
-
148
-
149
-
150
-
151
-
152
-
153
-
154
-
155
-
156
-
157
-
158
-
159
-
160
-
161
-
162
-
163
-
164
-
165
-
166
-
167
-
168
-
169
-
170
-
171
-
172
-
173
-
174
-
175
-
176
-
177
-
178
-
179
-
180
-
181
-
182
-
183
-
184
-
185
-
186
-
187
-
188
-
189
-
190
-
191
-
192
-
193
-
194
-
195
-
196
-
197
-
198
-
199
-
200
-
201
 |
 |

Increasing Memory
6
With the notched end of the DIMM toward the right side
of the socket, insert the DIMM, at an angle of
approximately 20°, into the socket; then press it firmly
1
.
7
Pivot the DIMM until it snaps into place
2
.
If you want to install two DIMMs, repeat steps 5 through 7.
1
2
1
2
Notch
8
Replace the memory slot cover over the memory slot,
aligning the back side of the cover first as shown; then
tighten the screw.
9
Turn the computer over again.
10
Replace the battery pack and power on the computer.
11
Confirm that the new memory size appears at the upper
left corner of the screen.
56
IBM ThinkPad 770X User's Reference