Lenovo ThinkPad Yoga 14 (English) Hardware Maintenance Manual - ThinkPad Yoga - Page 62
Retaining serial numbers, Restoring the serial number of the system unit
 |
View all Lenovo ThinkPad Yoga 14 manuals
Add to My Manuals
Save this manual to your list of manuals |
Page 62 highlights
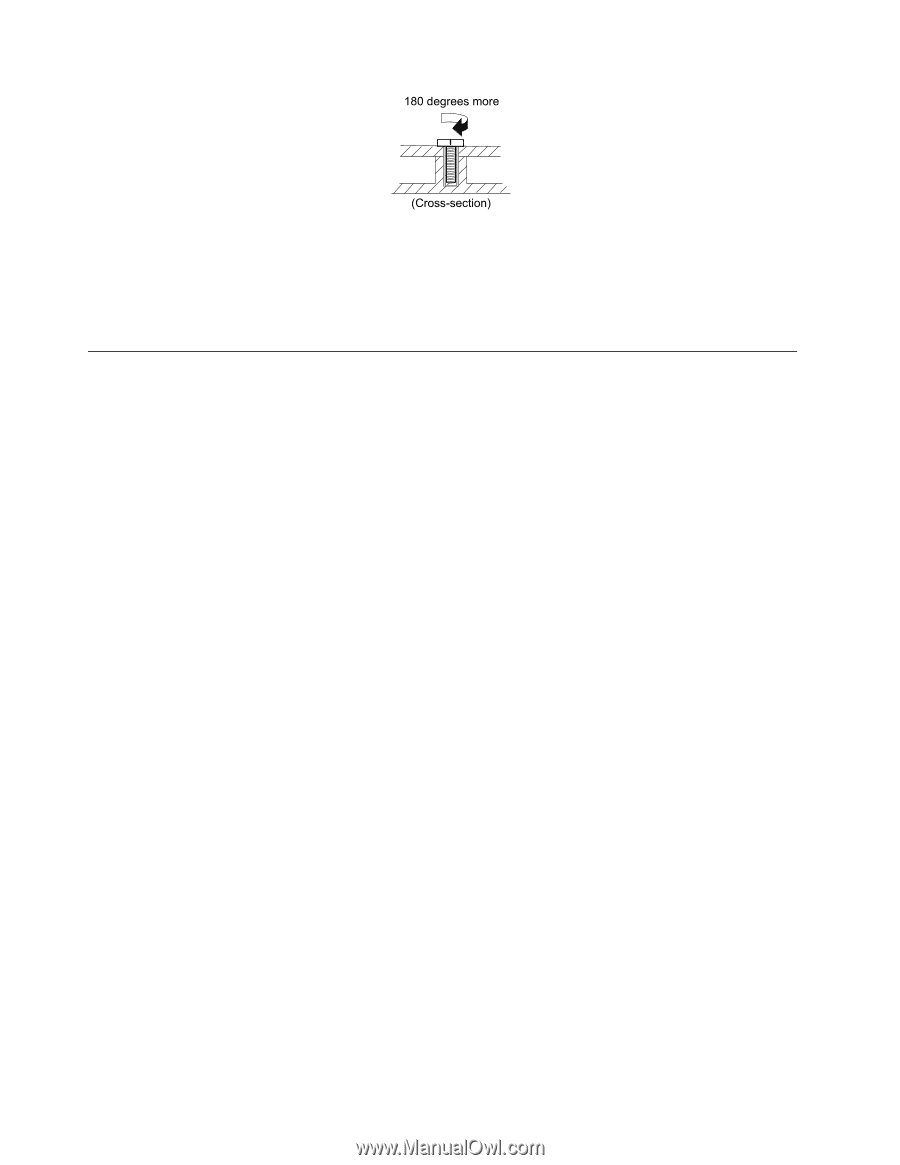
180 degrees more (Cross-section) Notes: • Ensure that you use the correct screw. It is recommended to use new screws for replacements. If you have a torque screwdriver, tighten all screws firmly to the torque specified in the screw information table for each step. • Ensure that torque screwdrivers are calibrated correctly following country specifications. Retaining serial numbers This topic provides instructions on the following: • "Restoring the serial number of the system unit" on page 56 • "Retaining the UUID" on page 57 Restoring the serial number of the system unit When the computer was manufactured, the EEPROM on the system board was loaded with the serial numbers of the system and all major components. These numbers need to remain the same throughout the life of the computer. If you replace the system board, you must restore the serial number of the system unit to its original value. The serial number of the system unit is written on the label attached to the bottom of the computer. If you can not find the serial number of the system unit on the bottom of the computer, try the following method to get the number: Note: Before you perform the operation, ensure that the UEFI/Legacy setting within the Startup menu in the ThinkPad Setup program is set to UEFI Only. 1. Connect a USB memory key to the computer. 2. Go to http://www.lenovo.com/maintenanceutilities and follow the instructions on the screen to create a Maintenance Key. Note: Only an authorized Lenovo service technician can access the above Web site. 3. Restart the computer. 4. When the logo screen is displayed, press Esc. The ThinkPad Config Information Update Utility interface is displayed. 5. Type 1 under Enter the action desired, then press Enter. The ThinkPad Serial Number Update Utility for Asset ID screen is displayed. 6. Type 2 under Enter the action desired, then press Enter. The serial number of each device in your computer is displayed; the serial number of the system unit is listed as follow: 20- Serial number 7. Record the serial number of the system unit. After you replace the system board, do the following to restore the serial number of the system unit: 1. Connect the Maintenance Key to the computer. 56 Hardware Maintenance Manual
-
 1
1 -
2
-
3
-
4
-
5
-
6
-
7
-
8
-
9
-
10
-
11
-
12
-
13
-
14
-
15
-
16
-
17
-
18
-
19
-
20
-
21
-
22
-
23
-
24
-
25
-
26
-
27
-
28
-
29
-
30
-
31
-
32
-
33
-
34
-
35
-
36
-
37
-
38
-
39
-
40
-
41
-
42
-
43
-
44
-
45
-
46
-
47
-
48
-
49
-
50
-
51
-
52
-
53
-
54
-
55
-
56
-
 57
57 -
 58
58 -
 59
59 -
 60
60 -
 61
61 -
 62
62 -
 63
63 -
 64
64 -
 65
65 -
 66
66 -
 67
67 -
68
-
69
-
70
-
71
-
72
-
73
-
74
-
75
-
76
-
77
-
78
-
79
-
80
-
81
-
82
-
83
-
84
-
85
-
86
-
87
-
88
-
89
-
90
-
91
-
92
-
93
-
94
-
95
-
96
-
97
-
98
-
99
-
100
-
101
-
102
 |
 |