Lenovo ThinkStation C30 Hardware Maintenance Manual - ThinkStation C30 - Page 110
the system board
 |
View all Lenovo ThinkStation C30 manuals
Add to My Manuals
Save this manual to your list of manuals |
Page 110 highlights
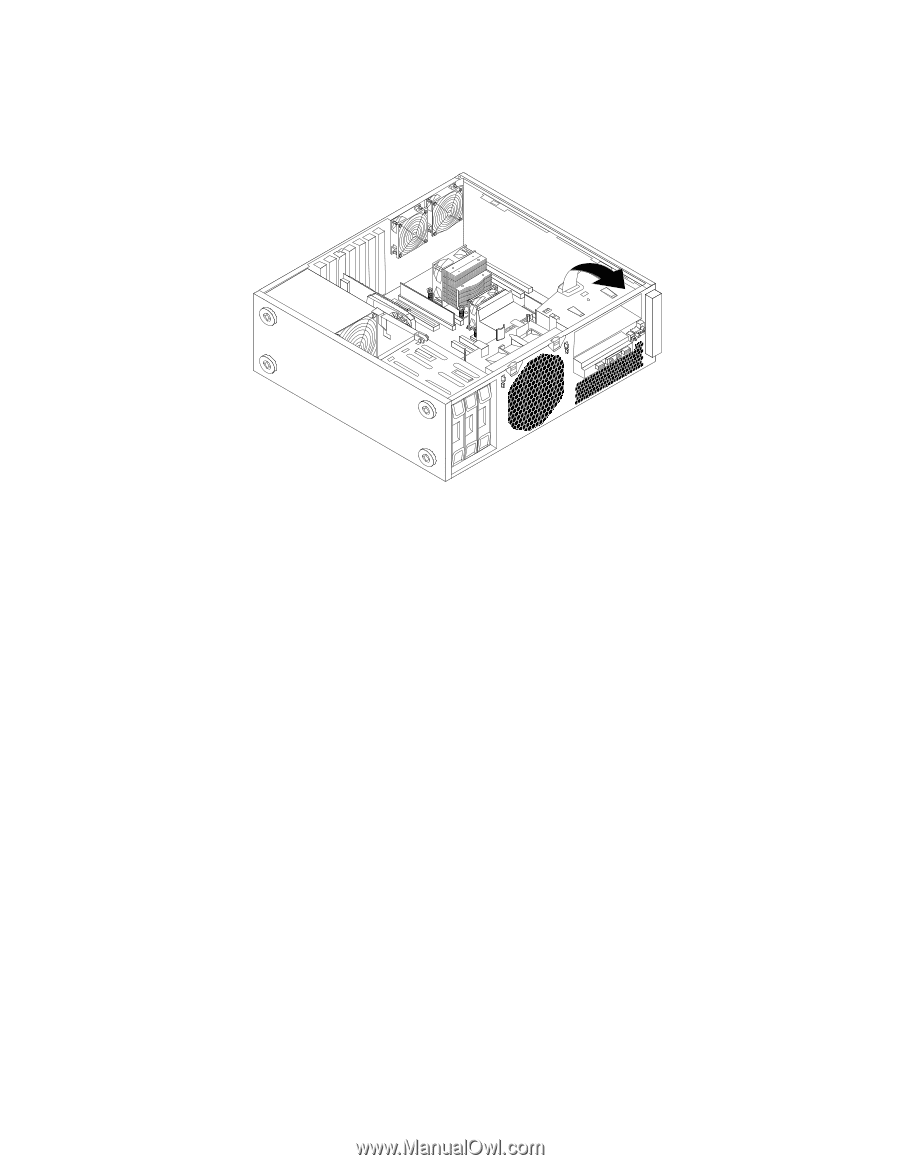
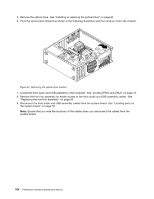
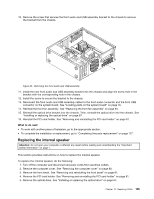
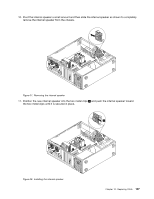
5. Remove the optical drive. See "Installing or replacing the optical drive" on page 87. 6. Pivot the optical drive bracket as shown in the following illustration and then remove it from the chassis. Figure 34. Removing the optical drive bracket 7. Locate the front audio and USB assembly in the computer. See "Locating FRUs and CRUs" on page 73. 8. Remove the front fan assembly for easier access to the front audio and USB assembly cables. See "Replacing the front fan assembly" on page 93. 9. Disconnect the front audio and USB assembly cables from the system board. See "Locating parts on the system board" on page 76. Note: Ensure that you note the locations of the cables when you disconnect the cables from the system board. 104 ThinkStation Hardware Maintenance Manual
-
 1
1 -
2
-
3
-
4
-
5
-
6
-
7
-
8
-
9
-
10
-
11
-
12
-
13
-
14
-
15
-
16
-
17
-
18
-
19
-
20
-
21
-
22
-
23
-
24
-
25
-
26
-
27
-
28
-
29
-
30
-
31
-
32
-
33
-
34
-
35
-
36
-
37
-
38
-
39
-
40
-
41
-
42
-
43
-
44
-
45
-
46
-
47
-
48
-
49
-
50
-
51
-
52
-
53
-
54
-
55
-
56
-
57
-
58
-
59
-
60
-
61
-
62
-
63
-
64
-
65
-
66
-
67
-
68
-
69
-
70
-
71
-
72
-
73
-
74
-
75
-
76
-
77
-
78
-
79
-
80
-
81
-
82
-
83
-
84
-
85
-
86
-
87
-
88
-
89
-
90
-
91
-
92
-
93
-
94
-
95
-
96
-
97
-
98
-
99
-
100
-
101
-
102
-
103
-
104
-
 105
105 -
 106
106 -
 107
107 -
 108
108 -
 109
109 -
 110
110 -
 111
111 -
 112
112 -
 113
113 -
 114
114 -
 115
115 -
116
-
117
-
118
-
119
-
120
-
121
-
122
-
123
-
124
-
125
-
126
-
127
-
128
-
129
-
130
-
131
-
132
-
133
-
134
-
135
-
136
-
137
-
138
-
139
-
140
-
141
-
142
-
143
-
144
 |
 |