Lenovo ThinkVision LT1423p 13.3-inch IPS LED Backlit LCD Wireless Touch Monitor - Page 24
Installing the Lenovo, USB Graphics Software, USB Monitor Display Information settings
 |
View all Lenovo ThinkVision LT1423p 13.3-inch IPS LED Backlit LCD Wireless Touch Monitor with pen manuals
Add to My Manuals
Save this manual to your list of manuals |
Page 24 highlights
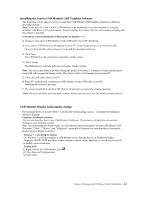
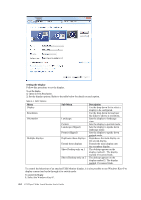
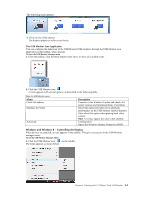
Installing the Lenovo USB Monitor USB Graphics Software The following section shows you how to install the USB Monitor USB Graphics software on different operating systems. Note: If you have v3.x, R4.1 or R4.2 USB Monitor software installed you must uninstall it, using the Windows Add/Remove Programs feature, before installing this release. Devices will continue working after this release is installed. To Install the Lenovo USB Monitor USB Graphics on Windows 7 / 8 1. Connect your Lenovo USB Monitor via the USB cable to your PC/Notebook. 2. The Lenovo USB Monitor will appear to your PC's operating system as an external disk. Open it, then double click Setup.exe to install the monitor software. 3. Click Yes. The USB Monitor end user licence agreement window opens. 4. Click I accept. The USB Monitor software and Lenovo Display Adapter installs. Note: The screen may flash or go black during the install. It will take 2~5 minutes to finish install, please keep USB cable connected during install. After finish install, it will remand you to restart PC 5. Unfix the USB cable, then restart PC. 6. When PC working well, connect your USB Monitor via the USB cable to your PC. Installing device driver message. 7. The screen should flash and the USB Monitor should start to extend the windows desktop. Note: On some machines you may need to reboot before you can use your USB Monitor enabled device. USB Monitor Display Information settings The language shown in pictures below is decided by youroperating system : (Unsupported languages default to English) Using the USB Monitor Software This section describes how to use USB Monitor's Software. The section is divided into sub-sections relating to your operating system. Note: The terminology for mirror mode, can vary between operating systems and the USB Monitor GUI. The terms "Clone", "Mirror" and "Duplicate" essentially all provide the same function of cloning the pixels from one display to another. Windows 7 - Controlling the Display On Windows 7, you can configure a USB Monitor device through the use of Windows Display Properties (WDP). WDP provides a simple method to attach, rotate, duplicate or extend screens as well as modify screen resolution. To open WDP 1. Right click on the USB Monitor icon . 2. Click Advanced Configuration. 3. WDP opens. Chapter 4. Working with LT1423pwC Wide USB Monitor 4-3
-
 1
1 -
2
-
3
-
4
-
5
-
6
-
7
-
8
-
9
-
10
-
11
-
12
-
13
-
14
-
15
-
16
-
17
-
18
-
 19
19 -
 20
20 -
 21
21 -
 22
22 -
 23
23 -
 24
24 -
 25
25 -
 26
26 -
 27
27 -
 28
28 -
 29
29 -
30
-
31
-
32
-
33
-
34
-
35
-
36
-
37
-
38
 |
 |
