Lenovo V560 Lenovo IdeaPad V560 User Guide V1.0 - Page 38
Tighten the screws.
 |
View all Lenovo V560 manuals
Add to My Manuals
Save this manual to your list of manuals |
Page 38 highlights
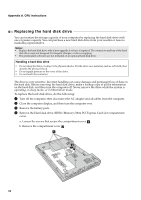
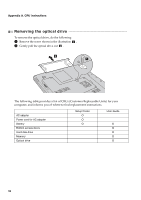
Appendix A. CRU instructions 0 Put the hard disk drive gently into the hard disk drive bay with the tab facing upwards and the connectors facing each other; then push it firmly into space. A Reinstall the frame fixing screw. B After aligning the attachment clips with their matching gaps, reinstall the compartment cover. C Tighten the screws. D Reinstall the battery pack. E Turn the computer over again. Connect the AC adapter and the cables to the computer again. 34
-
 1
1 -
2
-
3
-
4
-
5
-
6
-
7
-
8
-
9
-
10
-
11
-
12
-
13
-
14
-
15
-
16
-
17
-
18
-
19
-
20
-
21
-
22
-
23
-
24
-
25
-
26
-
27
-
28
-
29
-
30
-
31
-
32
-
 33
33 -
 34
34 -
 35
35 -
 36
36 -
 37
37 -
 38
38 -
 39
39 -
 40
40 -
 41
41 -
 42
42 -
 43
43 -
44
-
45
-
46
-
47
-
48
-
49
-
50
-
51
-
52
-
53
-
54
-
55
-
56
-
57
-
58
-
59
-
60
 |
 |

34
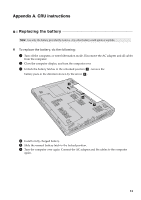
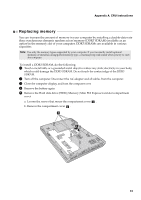
Appendix A. CRU instructions
0
Put the hard disk drive gently into the hard disk drive bay with the tab facing upwards and
the connectors facing each other; then push it firmly into space.
A
Reinstall the frame fixing screw.
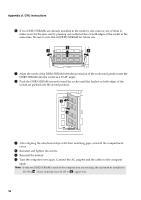
B
After aligning the attachment clips with their matching gaps, reinstall the compartment
cover.
C
Tighten the screws.
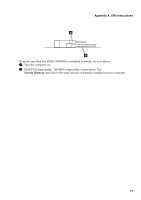
D
Reinstall the battery pack.
E
Turn the computer over again. Connect the AC adapter and the cables to the computer
again.