LevelOne FSW-1671 Manual - Page 9
Desktop Installation, Rack-mounted Installation, Power - level one
 |
View all LevelOne FSW-1671 manuals
Add to My Manuals
Save this manual to your list of manuals |
Page 9 highlights
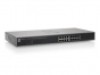
Desktop Installation Set the switch on a sufficiently large flat space with a power outlet nearby. The surface where the user put the switch should be clean, smooth, level and sturdy. Make sure there is enough clearance around the switch to allow attachment of cables, power cord and allow air circulation. Rack-mounted Installation The FSW-1671 Web Smart Switch comes with a rack-mounted kit and can be mounted in an EIA standard size, 19-inch Rack. The switch can be placed in a wiring closet with other equipment. Perform the following steps to rack mount the switch: A. Position one bracket to align with the holes on one side of the switch and secure it with the smaller bracket screws. Then attach the remaining bracket to the other side of the switch. B. After having attached mounting brackets, position the FSW-1671 Web Smart Switch in the rack by lining up the holes in the brackets with the appropriate holes on the rack. Secure the switch to the rack with a screwdriver and the rack-mounting screws. [NOTE] For proper ventilation, it allows about at least 4 inches (10 cm) of clearance on the front and 3.4 inches (8 cm) on the back of the Switch. This is especially important for enclosed rack installation. Power On Connect the power cord to the power socket on the rear panel of the Switch. The other side of power cord connects to the power outlet. The internal power supply of the Switch works with voltage in the range of 90-260VAC and Frequency of 50~60Hz. Check the power indicator on the front panel to see if power is properly supplied. 5
-
 1
1 -
2
-
3
-
 4
4 -
 5
5 -
 6
6 -
 7
7 -
 8
8 -
 9
9 -
 10
10 -
 11
11 -
 12
12 -
 13
13 -
 14
14 -
15
-
16
-
17
-
18
-
19
-
20
-
21
-
22
-
23
-
24
-
25
-
26
-
27
-
28
-
29
-
30
-
31
-
32
-
33
-
34
-
35
-
36
-
37
-
38
-
39
-
40
-
41
-
42
-
43
-
44
-
45
-
46
 |
 |
