Lexmark 22R0010 User's Guide - Page 17
Printing, Tips for successful printing, Tips on storing media, Avoiding jams, Sending a job to print
 |
UPC - 734646009553
View all Lexmark 22R0010 manuals
Add to My Manuals
Save this manual to your list of manuals |
Page 17 highlights
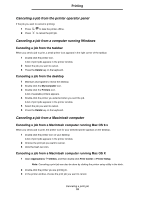
3 Printing This chapter covers tips for printing, how to print certain lists of information from your printer, and how to cancel a job. Tips for successful printing Tips on storing media Store your media properly. For more information, see Storing media. Avoiding jams If you select appropriate paper or specialty media (transparencies, labels, and card stock), you are assisting in trouble-free printing. For more information, see Hints for avoiding jams. Note: We recommend that you try limited samples of any paper or specialty media you are considering using with the printer before purchasing large quantities. By selecting appropriate paper or specialty media and loading it properly, you are able to avoid most jams. See Loading the trays for instructions on loading paper and specialty media into the standard tray, the optional 250-sheet legal size tray, and the optional 530-sheet tray. If you experience a jam, see Clearing jams for instructions. For hints to help you avoid jams, see Hints for avoiding jams. Sending a job to print To print a job from a typical Windows application: 1 Open the file you want to print. 2 From the File menu, select Print. 3 Verify that the correct printer is selected in the dialog box. 4 Modify the printer settings as appropriate (such as the pages you want to print or the number of copies). Note: Click Properties or Setup to adjust printer settings not available from the first screen, and click OK. 5 Click OK or Print to send the job to the selected printer. Canceling a print job There are several methods for canceling a print job. Printing 15
-
 1
1 -
2
-
3
-
4
-
5
-
6
-
7
-
8
-
9
-
10
-
11
-
 12
12 -
 13
13 -
 14
14 -
 15
15 -
 16
16 -
 17
17 -
 18
18 -
 19
19 -
 20
20 -
 21
21 -
 22
22 -
23
-
24
-
25
-
26
-
27
-
28
-
29
-
30
-
31
-
32
-
33
-
34
-
35
-
36
-
37
-
38
-
39
-
40
-
41
-
42
-
43
-
44
-
45
-
46
-
47
-
48
-
49
-
50
-
51
-
52
-
53
-
54
-
55
-
56
-
57
-
58
-
59
-
60
-
61
-
62
-
63
-
64
-
65
-
66
-
67
-
68
-
69
-
70
-
71
-
72
-
73
-
74
-
75
-
76
-
77
-
78
-
79
-
80
-
81
-
82
-
83
-
84
 |
 |