Lexmark 22S0502 User's Guide - Page 94
How to print a network setup How to print a test Finish, Continue, Start, Settings
 |
UPC - 734646017022
View all Lexmark 22S0502 manuals
Add to My Manuals
Save this manual to your list of manuals |
Page 94 highlights
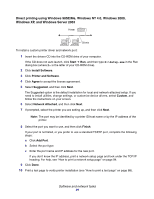
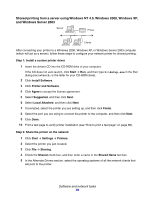
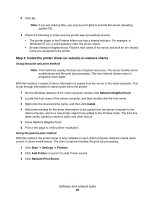
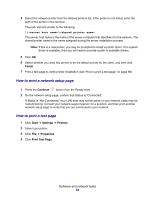
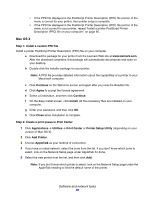
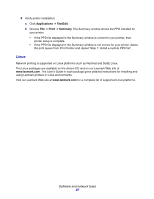
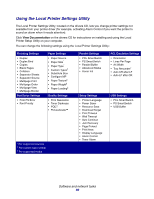
4 Select the network printer from the Shared printers list. If the printer is not listed, enter the path of the printer in the text box. The path will look similar to the following: \\\ The server host name is the name of the server computer that identifies it to the network. The shared printer name is the name assigned during the server installation process. Note: If this is a new printer, you may be prompted to install a printer driver. If no system driver is available, then you will need to provide a path to available drivers. 5 Click OK. 6 Select whether you want this printer to be the default printer for the client, and then click Finish. 7 Print a test page to verify printer installation (see "How to print a test page" on page 88). How to print a network setup page 1 Press the Continue button from the Ready state. 2 On the network setup page, confirm that Status is "Connected." If Status is "Not Connected," your LAN drop may not be active or your network cable may be malfunctioning. Consult your network support person for a solution, and then print another network setup page to verify that you are connected to your network. How to print a test page 1 Click Start Æ Settings Æ Printers. 2 Select your printer. 3 Click File Æ Properties. 4 Click Print Test Page. Software and network tasks 94
-
 1
1 -
2
-
3
-
4
-
5
-
6
-
7
-
8
-
9
-
10
-
11
-
12
-
13
-
14
-
15
-
16
-
17
-
18
-
19
-
20
-
21
-
22
-
23
-
24
-
25
-
26
-
27
-
28
-
29
-
30
-
31
-
32
-
33
-
34
-
35
-
36
-
37
-
38
-
39
-
40
-
41
-
42
-
43
-
44
-
45
-
46
-
47
-
48
-
49
-
50
-
51
-
52
-
53
-
54
-
55
-
56
-
57
-
58
-
59
-
60
-
61
-
62
-
63
-
64
-
65
-
66
-
67
-
68
-
69
-
70
-
71
-
72
-
73
-
74
-
75
-
76
-
77
-
78
-
79
-
80
-
81
-
82
-
83
-
84
-
85
-
86
-
87
-
88
-
 89
89 -
 90
90 -
 91
91 -
 92
92 -
 93
93 -
 94
94 -
 95
95 -
 96
96 -
 97
97 -
 98
98 -
 99
99 -
100
-
101
-
102
-
103
-
104
-
105
-
106
-
107
-
108
-
109
-
110
-
111
-
112
-
113
-
114
-
115
-
116
-
117
-
118
-
119
-
120
-
121
-
122
-
123
 |
 |