Lexmark 3200 Setup Guide - Page 16
Positioning the printer, Drivers CD - printer driver
 |
UPC - 734646383127
View all Lexmark 3200 manuals
Add to My Manuals
Save this manual to your list of manuals |
Page 16 highlights
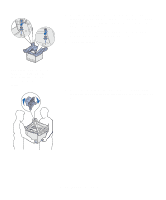
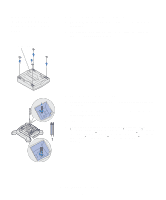
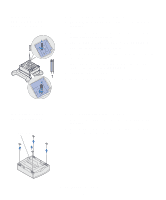
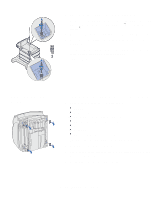
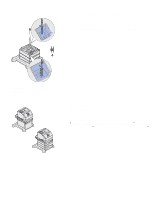
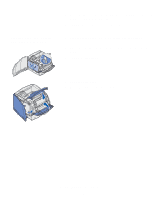
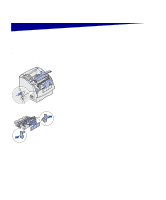
4 Place the duplex unit on top of any installed drawers. If you are not using a caster base, place the duplex unit on a table or optional printer stand and go to "Positioning the printer." 5 Make sure the drawers and duplex unit lock together securely. 6 Insert two long stabilizer posts (3) into the pockets of the duplex unit. The posts go through the duplex unit and into the top of the screws of the previously installed drawer. 7 Tighten the posts securely. Positioning the printer 1 Open the printer box and then remove all items from the box. 2 Make sure you have the following items: • Printer • Power cord • Setup Guide with a publications CD • Operator panel language overlays • Drivers CD • Wire bail • Operator panel protector overlay 3 Place all items except the printer aside for later use. 4 Gently place the printer on its back. 5 Use a flat tip screwdriver to remove the rubber feet from the bottom of the printer. 6 Gently place the printer right side up. Assemble paper handling options 12
-
 1
1 -
2
-
3
-
4
-
5
-
6
-
7
-
8
-
9
-
10
-
 11
11 -
 12
12 -
 13
13 -
 14
14 -
 15
15 -
 16
16 -
 17
17 -
 18
18 -
 19
19 -
 20
20 -
 21
21 -
22
-
23
-
24
-
25
-
26
-
27
-
28
-
29
-
30
-
31
-
32
-
33
-
34
-
35
-
36
-
37
-
38
-
39
-
40
-
41
-
42
-
43
-
44
-
45
-
46
-
47
-
48
-
49
-
50
-
51
-
52
-
53
-
54
-
55
 |
 |