Lexmark Apps Multi Send Administrator's Guide - Page 5
In the Share Folder
 |
View all Lexmark Apps manuals
Add to My Manuals
Save this manual to your list of manuals |
Page 5 highlights
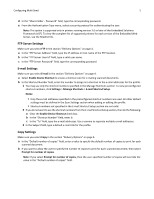
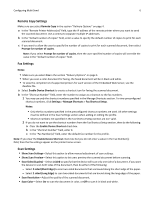
Configuring Multi Send 5 d In the "Share Folder ‑ Password" field, type the corresponding password. e From the Authentication Type menu, select a security protocol for authenticating the user. Note: This option is supported only in printers running version 2.0 or later of the Embedded Solutions Framework (eSF). To view the complete list of supported printers for each version of the Embedded Web Server, see the Readme file. FTP Server Settings Make sure you select FTP in the section "Delivery Options" on page 4. a In the "FTP Server Address" field, type the IP address or host name of the FTP location. b In the "FTP Server User Id" field, type a valid user name. c In the "FTP Server Password" field, type the corresponding password. E‑mail Settings Make sure you select E‑mail in the section "Delivery Options" on page 4. a Select Enable Device Shortcut to create a shortcut icon for e-mailing scanned documents. b In the Shortcut Number field, enter the number to assign as a shortcut to the e-mail addresses for the profile. 1 You may use only the shortcut numbers specified in the Manage Shortcuts section. To view preconfigured shortcut numbers, click Settings > Manage Shortcuts > E-mail Shortcut Setup. Notes: • Only the e-mail addresses specified in the preconfigured shortcut numbers are used. All other default settings must be defined in the Scan Settings section when adding or editing the profile. • Shortcut numbers not specified in the E-mail Shortcut Setup section are not valid. 2 If you do not want to use the shortcut numbers from the E-mail Shortcut Setup section, then do the following: a Clear the Enable Device Shortcut check box. b In the "Shortcut Number" field, enter 0. c In the "To" field, type the e-mail addresses. Use a comma to separate multiple e-mail addresses. 3 In the Subject field, type a default e-mail title for the profile. Copy Settings Make sure you select Copy in the section "Delivery Options" on page 4. a In the "Default number of copies" field, enter a value to specify the default number of copies to print for each scanned document. b If you want to allow the user to specify the number of copies to print for each scanned document, then select Prompt for number of copies. Note: If you select Prompt for number of copies, then the user‑specified number of copies will override the value in the "Default number of copies" field.
-
 1
1 -
 2
2 -
 3
3 -
 4
4 -
 5
5 -
 6
6 -
 7
7 -
 8
8 -
 9
9 -
 10
10 -
 11
11 -
12
-
13
-
14
-
15
-
16
-
17
 |
 |
