Lexmark Apps Remote Copy - Page 11
Configuring Remote Copy, Configuring application settings
 |
View all Lexmark Apps manuals
Add to My Manuals
Save this manual to your list of manuals |
Page 11 highlights
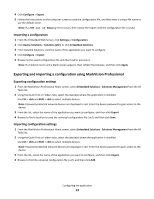
Updating the network license Using the Embedded Web Server 1 Click Solutions. 2 Under Installed Solutions, click the appropriate application link. 3 Click License > Update License. 4 Select Network. 5 Click Update License. Using MarkVision Professional 1 In MarkVision Professional, select the device where the application is installed. 2 Click Settings > Embedded Solutions > Solutions Management. 3 Under the appropriate application, click Update License. 4 In the Update License window, select Use a network license server. 5 Click Update License. Configuring Remote Copy Configuring application settings 1 Access the application configuration settings from the Embedded Web Server or MarkVision Professional. 2 Change the settings, as necessary: • Customize the display text and icons. For more information, see "Changing display icons and labels" on page 6. • Select Always show button on home screen to always show the application button on the printer home screen. If the check box is cleared, then a button is shown only if there is at least one remote printer that is active and ready. 3 Do one of the following: Using the Embedded Web Server • Click Restore Defaults to return all fields to factory default settings. • Click Reset to cancel changes to all fields and begin again. • Click Apply to save changes to the profile. Note: Reset and Apply are the only options available on certain devices. Using MarkVision Professional • Click OK to save changes. • Click Cancel to exit without saving changes. Configuring the application 11
-
 1
1 -
2
-
3
-
4
-
5
-
 6
6 -
 7
7 -
 8
8 -
 9
9 -
 10
10 -
 11
11 -
 12
12 -
 13
13 -
 14
14 -
 15
15 -
 16
16 -
17
-
18
-
19
-
20
 |
 |