Lexmark C510 User's Reference - Page 137
Config Menu, Toner, Darkness, Auto Size, Sense, Prt Quality, Tray Insert, Insert, Tray <x>
 |
View all Lexmark C510 manuals
Add to My Manuals
Save this manual to your list of manuals |
Page 137 highlights
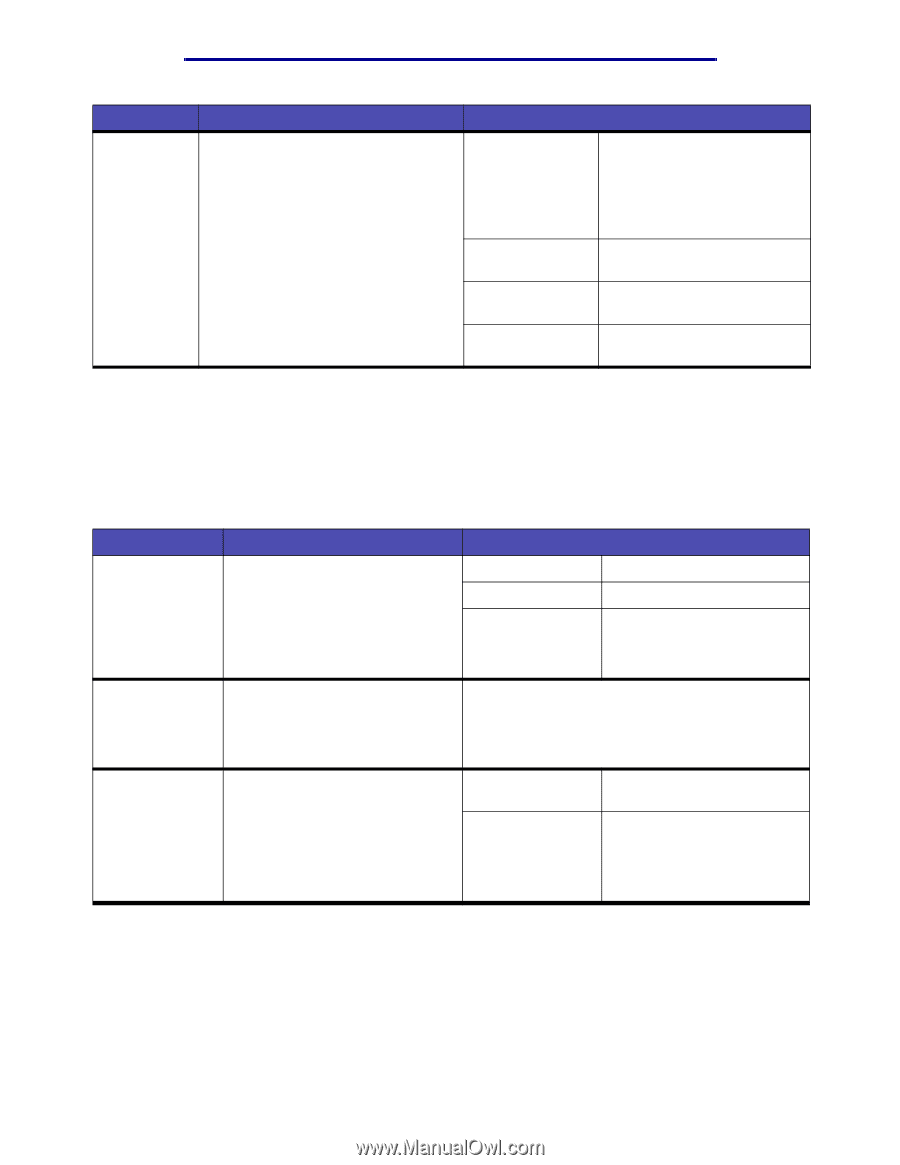
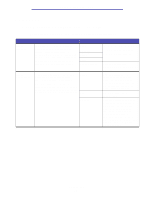
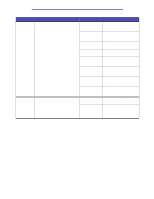
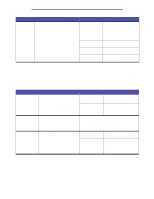
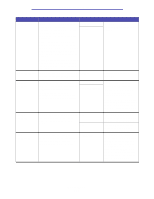
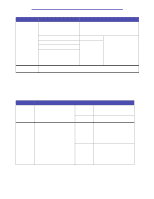
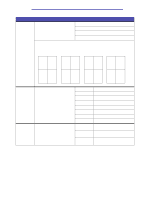
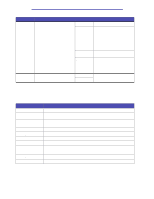
Using printer menus Menu Item Toner Darkness Purpose Values To lighten or darken printed output, or 5 conserve toner. 4* Setting Toner Darkness to values of 1, 2, or 3 is only effective when using the PostScript driver. 3 2 1 Either setting gives you the maximum expenditure in toner consumption; however, 4 is the default toner darkness setting since only one could be the default. Reduction in toner consumption. Further reduction in toner consumption. Maximum reduction in toner consumption. Config Menu To gain access to the Config Menu, you must press and hold the Select and Return buttons as you turn the printer on. The Configuration Menu contains a set of menus, settings, and operations which are infrequently required, but beneficial to you. Menu Item Auto Size Sense Prt Quality Pgs Tray Insert Msg Purpose Values To set tray 1 into a non-auto size sensing mode. This enables the printer to print media sizes not specifically supported by any of the trays, such as envelope sizes other than 10 and DL. It also allows the Universal setting. Tray1 Auto Size Auto Off Sets auto size sensing on. Sets auto size sensing off. To print the Printer Quality Test Pages which help isolate print quality problems by looking at the text and graphics on the pages. No selections exist for this operation. Press Select to initiate the operation. For more complete instructions, see Printing the Print Quality Test Pages. Indicates the delay in seconds for how long it takes for the Insert Tray message to appear on the operator panel once a tray is removed from the printer or support unit. x represents the number of the tray. Disabled 1 - 90 (5*) Disables the tray insert message. Specifies the number of seconds that pass before the Insert Tray message appears on the operator panel. Config Menu 137
-
 1
1 -
2
-
3
-
4
-
5
-
6
-
7
-
8
-
9
-
10
-
11
-
12
-
13
-
14
-
15
-
16
-
17
-
18
-
19
-
20
-
21
-
22
-
23
-
24
-
25
-
26
-
27
-
28
-
29
-
30
-
31
-
32
-
33
-
34
-
35
-
36
-
37
-
38
-
39
-
40
-
41
-
42
-
43
-
44
-
45
-
46
-
47
-
48
-
49
-
50
-
51
-
52
-
53
-
54
-
55
-
56
-
57
-
58
-
59
-
60
-
61
-
62
-
63
-
64
-
65
-
66
-
67
-
68
-
69
-
70
-
71
-
72
-
73
-
74
-
75
-
76
-
77
-
78
-
79
-
80
-
81
-
82
-
83
-
84
-
85
-
86
-
87
-
88
-
89
-
90
-
91
-
92
-
93
-
94
-
95
-
96
-
97
-
98
-
99
-
100
-
101
-
102
-
103
-
104
-
105
-
106
-
107
-
108
-
109
-
110
-
111
-
112
-
113
-
114
-
115
-
116
-
117
-
118
-
119
-
120
-
121
-
122
-
123
-
124
-
125
-
126
-
127
-
128
-
129
-
130
-
131
-
 132
132 -
 133
133 -
 134
134 -
 135
135 -
 136
136 -
 137
137 -
 138
138 -
 139
139 -
 140
140 -
 141
141 -
 142
142 -
143
-
144
-
145
-
146
-
147
-
148
-
149
-
150
-
151
-
152
-
153
-
154
-
155
-
156
-
157
-
158
-
159
-
160
-
161
-
162
-
163
-
164
-
165
-
166
-
167
-
168
-
169
-
170
-
171
-
172
-
173
-
174
-
175
-
176
-
177
-
178
-
179
-
180
-
181
-
182
-
183
-
184
-
185
-
186
-
187
-
188
-
189
-
190
-
191
-
192
-
193
-
194
-
195
-
196
-
197
-
198
 |
 |