Lexmark C748 User's Guide - Page 226
Too many trays attached, 59 Incompatible tray [x], 61 Remove defective disk, 62 Disk full, 80.xx
 |
View all Lexmark C748 manuals
Add to My Manuals
Save this manual to your list of manuals |
Page 226 highlights
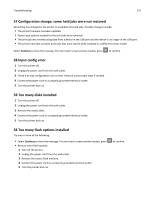
Troubleshooting 226 58 Too many trays attached 1 Turn the printer off. 2 Unplug the power cord from the wall outlet. Note: Optional trays lock together when stacked. Remove stacked trays one at a time from the top down. 3 Remove the additional trays. 4 Connect the power cord to a properly grounded outlet. 5 Turn the printer back on. 59 Incompatible tray [x] Only options designed specifically for this printer are supported. Try one or more of the following: • Remove the specified tray. • Select Continue to clear the message and continue printing without using the specified tray. For non‑touch‑screen printer models, press to confirm. 61 Remove defective disk Try one or more of the following: • Remove the defective printer hard disk. • Install a different printer hard disk before performing any operations that require a printer hard disk. 62 Disk full Try one or more of the following: • Select Continue to clear the message and continue processing. For non‑touch‑screen printer models, press to confirm. • Delete fonts, macros, and other data stored in the printer hard disk. • Install a printer hard disk with larger capacity. 80.xx Fuser near life warning 1 Order a replacement fuser immediately. When print quality is reduced, install the new fuser, following the instruction sheet that came with the replacement part. 2 Select Continue to clear the message and continue printing. For non‑touch‑screen printer models, press to confirm.
-
 1
1 -
2
-
3
-
4
-
5
-
6
-
7
-
8
-
9
-
10
-
11
-
12
-
13
-
14
-
15
-
16
-
17
-
18
-
19
-
20
-
21
-
22
-
23
-
24
-
25
-
26
-
27
-
28
-
29
-
30
-
31
-
32
-
33
-
34
-
35
-
36
-
37
-
38
-
39
-
40
-
41
-
42
-
43
-
44
-
45
-
46
-
47
-
48
-
49
-
50
-
51
-
52
-
53
-
54
-
55
-
56
-
57
-
58
-
59
-
60
-
61
-
62
-
63
-
64
-
65
-
66
-
67
-
68
-
69
-
70
-
71
-
72
-
73
-
74
-
75
-
76
-
77
-
78
-
79
-
80
-
81
-
82
-
83
-
84
-
85
-
86
-
87
-
88
-
89
-
90
-
91
-
92
-
93
-
94
-
95
-
96
-
97
-
98
-
99
-
100
-
101
-
102
-
103
-
104
-
105
-
106
-
107
-
108
-
109
-
110
-
111
-
112
-
113
-
114
-
115
-
116
-
117
-
118
-
119
-
120
-
121
-
122
-
123
-
124
-
125
-
126
-
127
-
128
-
129
-
130
-
131
-
132
-
133
-
134
-
135
-
136
-
137
-
138
-
139
-
140
-
141
-
142
-
143
-
144
-
145
-
146
-
147
-
148
-
149
-
150
-
151
-
152
-
153
-
154
-
155
-
156
-
157
-
158
-
159
-
160
-
161
-
162
-
163
-
164
-
165
-
166
-
167
-
168
-
169
-
170
-
171
-
172
-
173
-
174
-
175
-
176
-
177
-
178
-
179
-
180
-
181
-
182
-
183
-
184
-
185
-
186
-
187
-
188
-
189
-
190
-
191
-
192
-
193
-
194
-
195
-
196
-
197
-
198
-
199
-
200
-
201
-
202
-
203
-
204
-
205
-
206
-
207
-
208
-
209
-
210
-
211
-
212
-
213
-
214
-
215
-
216
-
217
-
218
-
219
-
220
-
 221
221 -
 222
222 -
 223
223 -
 224
224 -
 225
225 -
 226
226 -
 227
227 -
 228
228 -
 229
229 -
 230
230 -
 231
231 -
232
-
233
-
234
-
235
-
236
-
237
-
238
-
239
-
240
-
241
-
242
-
243
-
244
-
245
-
246
-
247
-
248
-
249
-
250
-
251
-
252
-
253
-
254
-
255
-
256
-
257
-
258
-
259
-
260
-
261
-
262
-
263
-
264
-
265
-
266
-
267
-
268
-
269
-
270
-
271
-
272
-
273
-
274
 |
 |
