Lexmark C760 User Reference
Lexmark C760 Manual
 |
View all Lexmark C760 manuals
Add to My Manuals
Save this manual to your list of manuals |
Lexmark C760 manual content summary:
- Lexmark C760 | User Reference - Page 1
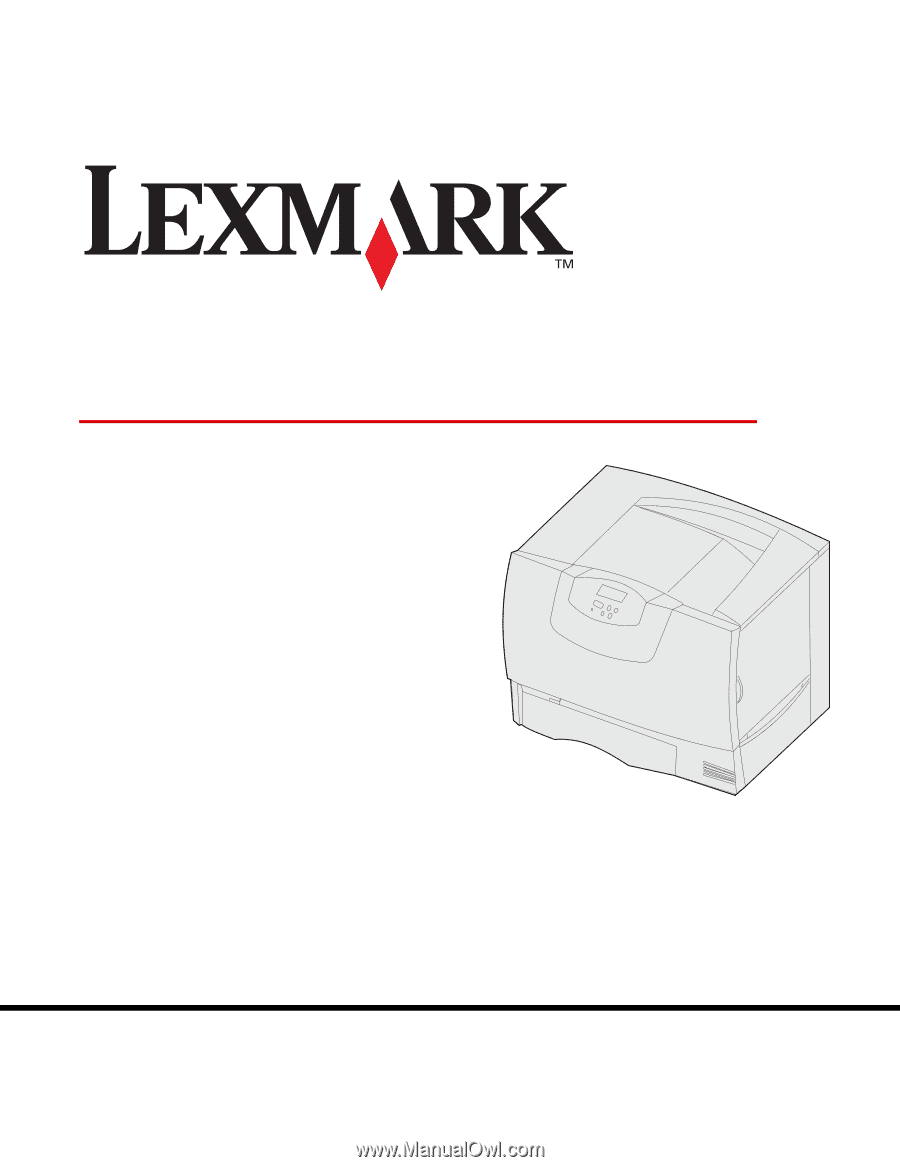
C760, C762 User's Guide June 2004 www.lexmark.com Lexmark and Lexmark with diamond design are trademarks of Lexmark International, Inc., registered in the United States and/or other countries. © 2004 Lexmark International, Inc. 740 West New Circle Road Lexington, Kentucky 40550 - Lexmark C760 | User Reference - Page 2
Laser notice ...12 Chapter 2: More about installing drivers 13 Installing drivers for local printing 13 Installing drivers for network printing 17 Chapter 3: Printing 21 Understanding the printer Linking output bins 32 Holding a job in the printer 32 Tips for successful printing 36 Chapter 4: - Lexmark C760 | User Reference - Page 3
supplies 107 Conserving supplies 107 Ordering supplies and maintenance items 108 Recycling Lexmark products 109 Removing memory and option cards 110 Chapter 9: Troubleshooting 116 User Guide resources 116 Online Technical Support 116 Calling for service 116 Checking an unresponsive printer - Lexmark C760 | User Reference - Page 4
mailbox problems 122 Solving option problems 123 Solving paper feed problems 123 Solving print quality problems 124 Solving color quality problems 128 Restoring factory default settings 132 Aligning the image transfer unit 133 Using the Coverage Estimator 134 Configuring printer alerts - Lexmark C760 | User Reference - Page 5
publication could include technical inaccuracies or typographical errors. Changes are periodically made to the information Lexmark International Ltd., Marketing and Services Department, Westhorpe House, Westhorpe, Marlow Bucks SL7 3RQ. Lexmark may use or distribute any of the information you supply - Lexmark C760 | User Reference - Page 6
Company. PCL is Hewlett-Packard Company's designation of a set of printer commands (language) and functions included in its printer products. This printer is intended to be compatible with the PCL language. This means the printer recognizes PCL commands used in various application programs, and that - Lexmark C760 | User Reference - Page 7
of the document you want to review: BSD License and Warranty statements GNU General Public License The Lexmark modified GNU licensed software is free source code files for the Lexmark modified GNU licensed software, launch the drivers CD that shipped with your printer and click Contact Lexmark. - Lexmark C760 | User Reference - Page 8
described in the operating instructions, to a professional service person. • This product is designed, tested, and approved to meet strict global safety standards with the use of specific Lexmark components. The safety features of some parts may not always be obvious. Lexmark is not responsible for - Lexmark C760 | User Reference - Page 9
user's authority to operate this equipment. Note: To assure compliance with FCC regulations on electromagnetic interference for a Class A computing device, use a properly shielded and grounded cable such as Lexmark part of Manufacturing and Technical Support, Lexmark International, S.A., Boigny, - Lexmark C760 | User Reference - Page 10
The Lexmark C760, C762 instructions user's authority to operate this equipment. Note: To assure compliance with FCC regulations on electromagnetic interference for a Class B computing device, use a properly shielded and grounded cable such as Lexmark part number 1329605 (parallel) or Lexmark part - Lexmark C760 | User Reference - Page 11
limits. A declaration of conformity with the requirements of the directives has been signed by the Director of Manufacturing and Technical Support, Lexmark International, S.A., Boigny, France. This product satisfies the Class B limits of EN 55022 and safety requirements of EN 60950. Japanese VCCI - Lexmark C760 | User Reference - Page 12
with ISO 7779 and reported in conformance with ISO 9296. 1-meter average sound pressure, dBA * Printing 52 dBA Idling 34 dBA * These values are subject to change. See the Lexmark C760, C762 Tech Spec section of the Lexmark Web site for current information. ENERGY STAR The EPA ENERGY STAR - Lexmark C760 | User Reference - Page 13
printer features and functionality. Drivers are also available in downloadable software packages on our Lexmark Web site at www.lexmark.com. Using Windows 95 and Windows 98 (first edition) 1 Turn on your computer. 2 Click Start Settings Printers, and then double-click Add Printer. Note: USB support - Lexmark C760 | User Reference - Page 14
Creating a desktop printer icon (Mac 8.6-9.x) 1 Install a printer PostScript Printer Description (PPD) file on your computer. a Insert the drivers CD. b Double Note: A PPD for your printer is also available in a downloadable software package on our Lexmark Web site at www.lexmark.com. 2 Do one of - Lexmark C760 | User Reference - Page 15
printer is turned on. 6 Select the name of your printer, and then click OK. Your printer appears in the original Printer (USB) window. 7 In the PostScript Printer printer and computer. To do this, you have to 1) set serial parameters in the printer, 2) install a printer driver rate supported is 115 - Lexmark C760 | User Reference - Page 16
Installing a printer driver You must install a printer driver on the computer that is connected to the printer. 1 Insert the drivers CD into your then close all the windows. 7 Print a test page to verify printer installation. a Click Start Settings Printers. b Select the printer you just created. c - Lexmark C760 | User Reference - Page 17
the installation of a printer driver and the creation of a network printer port. Supported printer drivers • Windows system printer driver • Lexmark custom printer driver System drivers are built into Windows operating systems. Custom drivers are available on the drivers CD. Updated system and - Lexmark C760 | User Reference - Page 18
Supported network printer ports • Lexmark network port For basic printer functionality, you can install a system printer driver and use a system network printer port, such as an LPR or a Standard TCP/IP port. The system printer driver and port let you maintain a consistent user interface for use - Lexmark C760 | User Reference - Page 19
. 8 Click Quit when installation is complete. A PPD for your printer is also available in a downloadable software package on our Lexmark Web site at www.lexmark.com. Step 2: Create a desktop printer 1 In the Chooser, select the LaserWriter 8 driver. 2 If you have a routed network, select the default - Lexmark C760 | User Reference - Page 20
Printing Change Setup. - If the PPD file displayed in the PostScript Printer Description (PPD) file portion of the menu is correct for your printer, printer setup is complete. - If the PPD file displayed in the PostScript Printer Description (PPD) file portion of the menu is not correct for your - Lexmark C760 | User Reference - Page 21
paper jams. • Exit Power Saver. If you have changed printer settings from the operator panel menus, press Go before sending a job to print. The printer must display Ready for jobs send a job to print, change printer properties in the printer driver to select the settings you want for your job. 21 - Lexmark C760 | User Reference - Page 22
of the display. • Save the displayed menu item as the new user default setting. • Clear certain messages from the display. • Continue a brief overview of the printer menus available from the operator panel. Sending a job to print To print a job from a typical Windows application: 1 Open the file - Lexmark C760 | User Reference - Page 23
Select. 2 Press Menu until you see Cancel Job, and then press Select. From the Windows taskbar When you send a job to print, a small printer icon appears in the right corner of the taskbar. 1 Double-click the printer icon. A list of print jobs appears. 2 Select the job you want to cancel. 3 Press - Lexmark C760 | User Reference - Page 24
the printer. Loading 500-sheet trays Follow these instructions to load any of the 500-sheet trays. 1 Remove the tray and place it on a flat, level surface. 2 Squeeze the front guide lever and slide the guide to the front of the tray. 3 Squeeze the side guide lever and slide the guide - Lexmark C760 | User Reference - Page 25
or wrinkled paper. Maximum stack height indicator Note: Do not exceed the maximum stack height. Overfilling the tray may cause jams. 6 Squeeze the front guide lever and slide the guide until it firmly touches the stack of paper. 7 Reinstall the tray. Make sure the tray is pushed completely into the - Lexmark C760 | User Reference - Page 26
page 62 for more information. Loading the 2000-sheet tray Follow these instructions to load a 2000-sheet tray. Do not load any print media guide lever, lift the guide, and place it into the appropriate slot for the size paper you are loading. 3 Squeeze the two front guide levers and slide the guide - Lexmark C760 | User Reference - Page 27
4 Slide the bottom support toward the front of the tray until it touches the front guide. 5 Flex the sheets back and forth to loosen them, the tray. Make sure the tray is pushed completely into the printer. Note: Do not exceed the maximum stack height. Overfilling the tray may cause paper jams. 27 - Lexmark C760 | User Reference - Page 28
-As a manual bypass feeder, you send a print job to the feeder while specifying the type and size of media from your computer. The printer then prompts you to load the appropriate print media before it prints. To load the multipurpose feeder: 1 Open the multipurpose feeder. 2 Squeeze the paper guide - Lexmark C760 | User Reference - Page 29
go. Do not force the media. Note: Do not exceed the maximum stack height. Overfilling the feeder may cause jams. 6 Squeeze the paper guide lever and slide the guide until it lightly touches the side of the stack. 7 If you are loading a different type of media than was previously loaded in the - Lexmark C760 | User Reference - Page 30
source according to the media you loaded. Windows a In your word processor, spreadsheet, browser, or other application, select File Print. b Click Properties (or Options, Printer, or Setup, depending on the application) to view the printer driver settings. c Select the tray containing the specialty - Lexmark C760 | User Reference - Page 31
and type of paper or specialty media in more than one tray, the printer automatically links the trays. This means that when one tray is empty, it and type of paper or specialty media loaded in tray 2 and tray 4, the printer feeds from tray 2 until it becomes empty, and then it feeds from the next - Lexmark C760 | User Reference - Page 32
bin configuration default. 4 Press Go to return the printer to the Ready state. For more information, see Configure Bins and Bin Full. Holding a job in the printer When sending a job to the printer, you can specify in the driver that you want the printer to hold the job in memory. When you are - Lexmark C760 | User Reference - Page 33
it is performing. Recognizing when format errors occur If the symbol appears on the display, it indicates that the printer had trouble formatting one or more of the held jobs. These formatting problems are most commonly the result of insufficient printer memory or invalid data that might cause - Lexmark C760 | User Reference - Page 34
, however, that only part of the job may print. • Delete the job. You may want to free up additional printer memory by scrolling through the list of held jobs and deleting others you have sent to the printer. If formatting errors are a recurring problem with held jobs, your printer may require more - Lexmark C760 | User Reference - Page 35
job does not print until you are there to retrieve it, and no one else using the printer can print the job. When you select Confidential Job from the Job Menu and then select your user name, the following prompt is displayed: Enter PIN: =____ Use the buttons on the operator panel - Lexmark C760 | User Reference - Page 36
Storing paper Use the following guidelines to avoid paper feeding problems and uneven print quality. • Store paper in an wrapper until you load it into the printer. Storing supplies Choose a cool, clean storage area for your printer supplies. Store supplies right side up in their original packaging - Lexmark C760 | User Reference - Page 37
in the printer. See the following for loading instructions: • Loading 500-sheet trays • Loading the 2000-sheet tray • Loading the multipurpose feeder The following hints can help you avoid paper jams: • Use only recommended paper. Refer to the Card Stock & Label Guide available on our Lexmark Web - Lexmark C760 | User Reference - Page 38
fuser housing replaced with a web oiler field upgrade kit. 5 Capacity varies with media weight and construction. The printer can print directly on transparencies designed for use in laser printers your printer supports, refer to the Card Stock & Label Guide available on our Lexmark Web site at www - Lexmark C760 | User Reference - Page 39
than 75 g/m2 (20 lb) is limited to simplex only at less than 60% relative humidity and is not supported in duplex. The duplex option supports the same weights and types as the printer except for paper 60-74.9 g/m2 (16-19.9 lb) grain long bond, A5 cardstock, envelopes, transparencies, vinyl labels - Lexmark C760 | User Reference - Page 40
humidity and is not supported in duplex. The duplex option supports the same weights and types as the printer except for paper 60- have chosen is acceptable for laser printers. Preprinted papers such as not affected by the resin in toner or the silicone in the fuser. Inks that are oxidation-set or - Lexmark C760 | User Reference - Page 41
envelope supplier. Labels Your printer can print on many labels designed for use with laser printers. These labels are supplied in letter size, A4 printer, make sure the printer and option are correctly aligned. Refer to the Setup Guide that came with your printer or option for alignment instructions - Lexmark C760 | User Reference - Page 42
5 Using printer menus Select a menu or menu item for more details. Supplies Menu Toner Oiler Waste Bottle Color Menu Color Adjust Color Balance Color Correction Color Samples Color Saver Manual Color Print Mode Print Resolution Toner Darkness Paper Menu Paper Source Paper Size Paper Type - Lexmark C760 | User Reference - Page 43
or humidity. To provide users with the ability to make subtle color adjustments to printed output by increasing or decreasing the amount of toner being used for each color plane individually. Note: This function is only applied to files printed using the PostScript driver. To adjust the printed - Lexmark C760 | User Reference - Page 44
Menu Item Color Samples Color Saver Purpose Values To assist users in selecting colors to be printed. Users can print color samples pages for each of the RGB and CMYK color conversion tables used in the printer. The color samples pages consist of a series of colored boxes along with the RGB or - Lexmark C760 | User Reference - Page 45
Menu Item Purpose Values Manual Color To let users customize the RGB or CMYK color conversions applied to each object on the printed page. Color conversion of the data specified using RGB combinations can be customized based on object type (text, graphics, or image). RGB Image • sRGB Display*: - Lexmark C760 | User Reference - Page 46
as the default for all Off* print jobs. (Select Duplex from the printer driver to duplex only specific On jobs.) Does not print application-generated blank pages as part of your job. Prints application-generated blank pages as part of your job. Prints each page of a job the number of times - Lexmark C760 | User Reference - Page 47
Multipage Border Multipage Order Purpose Values To define the way duplexed pages would be bound, and how the printing on the holes along the edge of all Off* printed output. (Select Hole Punch from the printer driver to punch holes only in output for a specific job.) On Does not punch holes - Lexmark C760 | User Reference - Page 48
driver if you want to staple only On specific jobs.) Does not staple print jobs. Staples each print job sent to the printer. Staple Prime Src To specify the paper source you want the printer to use when it primes the stapler. When a staple cartridge is replaced or a staple jam is cleared, the - Lexmark C760 | User Reference - Page 49
size and type. Lists available supplies. Provides information about print quality problems and solutions. Provides information about how to get the best color performance. Provides details about supported print media Provides instructions about how to connect the printer to a computer or network - Lexmark C760 | User Reference - Page 50
or decrease the number of copies, and then press Select. To print Reserve Print, Repeat Print, or Print All Jobs Verify Print jobs stored in printer memory. Print A Job Prints all held jobs. Prints the specified held job. Press Menu to scroll through the list of held jobs. Press Select to - Lexmark C760 | User Reference - Page 51
Printer To reset the printer to the user default value for each menu item, delete all downloaded resources (fonts, macros, and symbol sets) stored in printer supplied by the specific print server. Select the menu item to see the available values. Note: Refer to the documentation on the drivers CD - Lexmark C760 | User Reference - Page 52
automatically resets the printer. PCL SmartSwitch To configure the printer so it automatically the default printer language. PS SmartSwitch To configure the printer so it default printer language specified in the Setup Menu if PCL SmartSwitch is Off. Values for this menu item are supplied by - Lexmark C760 | User Reference - Page 53
is turned on and off. To temporarily store jobs on the printer hard disk before printing. Note: Changing this menu item automatically resets the printer. Off* On Auto MAC Binary To configure the printer to process On PS Macintosh binary PostScript print jobs. Off Auto* NPA Mode To specify - Lexmark C760 | User Reference - Page 54
requires it, regardless of the default printer language. Off PS To configure the printer so it On* SmartSwitch automatically switches processing of incoming jobs resumes. Printer automatically calculates the Parallel Buffer size (recommended setting). User specifies the Parallel Buffer size. - Lexmark C760 | User Reference - Page 55
the set of fonts displayed Resident* in the Font Name menu item. Displays all fonts resident in printer RAM when the printer ships from the factory. Download Displays all fonts downloaded to printer RAM. Flash Displays all fonts stored in flash memory. Disk Displays all fonts stored on the - Lexmark C760 | User Reference - Page 56
languages or specific applications, such as math symbols for scientific text. Only the symbol sets supported for the selected font name are displayed. To configure your printer to work with printer drivers or applications that use different source assignments for the paper trays. Note: Refer to the - Lexmark C760 | User Reference - Page 57
Bin Letterhead Bin Preprinted Bin Colored Bin Custom Bin (where represents 1 through 6) Disabled* Configure Bins To determine which output bin(s) the printer uses for a particular job. Mailbox* Link Sends print jobs to the output bin designated for that user. Links two or more bins - Lexmark C760 | User Reference - Page 58
printer pulls paper from the multipurpose feeder for the job. Manual Printer treats the multipurpose feeder like a manual feed tray, and displays Load Manual default bin for printed material. Standard Bin* Bin Note: If a user-defined name is available, it is displayed instead of Bin . The - Lexmark C760 | User Reference - Page 59
: If a user-defined name is available, it is displayed instead of Custom Loading. The name is truncated to 14 characters. Card Stock Load Glossy Loading Colored Loading Custom Loading Ltrhead Loading Preprint Loading Bond Loading 2 Select a value. Duplex Notifies the printer that the - Lexmark C760 | User Reference - Page 60
paper that does not match any of the other available sizes. The printer automatically formats the page for the maximum possible size. You can then identify the default paper source. Tray (Tray 1*) MP Feeder Env Feeder Manual Paper If you loaded the same size and type of paper in two paper - Lexmark C760 | User Reference - Page 61
to optimize print quality for your specific paper. 1 Select a paper type. Plain Texture Card Stock Text Trnsprncy Text Preprint Texture Colored Texture Custom Texture Labels Texture Bond Texture Envelope Texture Ltrhead Texture Glossy Texture 2 Select a value. Smooth Normal* Rough - Lexmark C760 | User Reference - Page 62
paper are automatically linked by the printer if you have set the Paper Size Tray Type Manual Pap Type MP Feeder Type Manual Env Type 2 Select Colored Paper The Paper Type default for each envelope source is Envelope. The Paper Type default for each paper tray is as follows: Note: If a user - Lexmark C760 | User Reference - Page 63
that the toner adheres properly to the printed page. 1 Select a paper type. Note: If a user-defined name Colored Weight Custom Weight Bond Weight Envelope Weight Glossy Weight Labels Weight Ltrhead Weight 2 Select a value. Light Normal* Heavy Substitute Size To have the printer - Lexmark C760 | User Reference - Page 64
nor Read/ Flash/Disk Write or Write protected, and Job Buffer Size is not set to 100%. Image Smoothing Print PS Error To enhance the contrast and Off* sharpness of low resolution bitmapped images (such as images downloaded from the World Wide Web) and smooth On their color transitions - Lexmark C760 | User Reference - Page 65
57600 115200 138200 172800 230400 345600 To specify the number of data bits that 7 are sent in each transmission frame. 8* To determine whether the printer uses Off* the Data Set Ready (DSR) signal. DSR is one of the handshaking signals for most serial interface cables. On The serial - Lexmark C760 | User Reference - Page 66
switches to PCL emulation when a print job received through the serial port requires it, regardless of the default printer language. Off PS To configure the printer so it On* SmartSwitch automatically switches to PostScript emulation when a print job received through the serial port - Lexmark C760 | User Reference - Page 67
resume printing until someone clears the error message. Printer waits the specified amount of time, and then automatically resumes printing. This timeout value also applies if the menus are displayed (and the printer is offline) for the specified period of time. Color prints as indicated in print - Lexmark C760 | User Reference - Page 68
pages. On Off Auto* Note: All values may not be available. All downloaded resources are automatically stored in printer memory (RAM). All downloaded resources are automatically stored in flash memory. All downloaded resources are automatically stored on the hard disk. Hole Punch Waste Full is - Lexmark C760 | User Reference - Page 69
the job printed with or without errors, the On print time, the installed, is neither defective nor Read/Write or Write protected, and Job printer goes into Power Saver mode. (Your printer may not support the entire range of values.) The factory default Power Saver setting depends on your printer - Lexmark C760 | User Reference - Page 70
job. Max Yield* The image transfer unit position is engaged based on page content. This may extend the life of certain print supplies. To determine what the printer does Off* with downloaded resources, such as fonts and macros stored in RAM, if the printer receives a job that requires more - Lexmark C760 | User Reference - Page 71
resumes printing after the specified timeout value. Printer stops printing, displays an error message, and sounds three quick beeps. Printer stops printing, displays an error message, and repeats three beeps every 10 seconds until the toner cartridge is replaced. Disables Wait Timeout. Specifies the - Lexmark C760 | User Reference - Page 72
Menu The Supplies Menu provides information about printer supplies that require attention. It is only available when a supply is low or needs replacement. Menu Item Purpose Values Toner To view the status of the color print cartridges. Low Change Cartridge Oiler To view the status - Lexmark C760 | User Reference - Page 73
. Any jobs already buffered on the disk are printed before normal processing of incoming jobs resumes. Printer automatically calculates the USB Buffer size (recommended setting). 3K to maximum size allowed User specifies the USB Buffer size. The maximum size depends on the amount of memory in your - Lexmark C760 | User Reference - Page 74
printer resources, printer settings, and print jobs. Other menu items let you set up printer hardware and troubleshoot printer problems. Menu Item Purpose Values Color Alignment To print a color USB Menu. • All downloaded resources (fonts, macros, and symbol sets) in printer memory (RAM) are - Lexmark C760 | User Reference - Page 75
fonts available for PostScript emulation. Print Menus To print a listing of the current user default values, the installed options, the amount of installed printer memory, and the status of printer supplies. Print Net To print information relating to the internal print server and the network - Lexmark C760 | User Reference - Page 76
printer and indicates possible printer problems you must resolve. This topic provides a list of all printer A color alignment procedure is in progress and the user is being transfer unit Activating Menu Changes The printer is activating changes made Wait for the message to clear. to the printer - Lexmark C760 | User Reference - Page 77
Loading the trays; Setup Guide • Reestablish communication by removing the specified device and reattaching it to the printer. • Press Go printer off and back on. If the error recurs, turn the printer off, remove the specified device, and call for service. Wait for the message to clear. The printer - Lexmark C760 | User Reference - Page 78
to make the menus available to all users. Wait for the message to clear, and then press Menu to view the menus from the operator panel. See also: Enabling the menus The printer is preparing the fuser for printing. Wait for the message to clear. The printer is waiting for you to enter your - Lexmark C760 | User Reference - Page 79
print server. Download valid code to the printer internal print server. Note: You can download network code while this message is displayed. ITU Maint The counter that tracks wear on the image transfer unit has reached its limit. Replace the image transfer unit. ITU/Fuser Maint The counters - Lexmark C760 | User Reference - Page 80
do A request for a manual feed job has been sent to the printer. The printer is ready for insertion of a single sheet into the manual feed slot. • Load a calibration process. The printer is trying to staple a print job, but the stapler is empty. • Install a new staple cartridge in the stapler. - Lexmark C760 | User Reference - Page 81
Power Saver message replaces the Ready message on the display. • Send a job to print. • Press Go to quickly warm the printer to normal operating temperature and display the Ready message. Printer Calibrating The printer is adjusting the color transfer unit Printing Directory List The printer - Lexmark C760 | User Reference - Page 82
, on the hard disk. Wait for the message to clear. Warning: Do not turn the printer off while this message is displayed. An error occurred while the printer was programming code into memory. Correct the problem specified on the second line of the display: • P105-A network file was used to program - Lexmark C760 | User Reference - Page 83
What you can do Remove Cartridge and The packing material has not been ITU Packaging removed from the cartridges and the image transfer unit belt. Remove all packing material from inside the printer. See also: "Step 5: Installing Supplies" in the Setup Guide Remove Paper The - Lexmark C760 | User Reference - Page 84
connections. Turn the printer back on. If the service message recurs, call for service and report the message number and description of the problem. See also: Calling for service The download emulator version on the firmware card does not match the printer code version. This error can occur if you - Lexmark C760 | User Reference - Page 85
Message 30 Toner Cart Missing 31 Defective Cartridge 32 Unsupported Cartridge 33 Calibration Error 34 Incorrect Media 34 Short Paper 35 Res Save Off Deficient Memory 36 Printer Service Required What this message means The specified toner cartridge is either missing or - Lexmark C760 | User Reference - Page 86
Press Menu to open the Job Menu and cancel the current job. • To avoid this error in the future: - Simplify the print job by reducing the amount of text or graphics on a page and deleting unnecessary downloaded fonts or macros. - Install additional printer memory. See also: Canceling a print job 86 - Lexmark C760 | User Reference - Page 87
Go while turning it on. The printer reads the code on the system card and bypasses the code on the firmware card. • Remove the firmware card. See also: Setup Guide Remove the indicated print cartridge and install a new one. The PPDS interpreter has encountered a font error. • Press Go to clear the - Lexmark C760 | User Reference - Page 88
. (For example, a duplex unit is not installed directly underneath the printer, but under a tray instead.) Turn off and unplug the printer. Remove the additional drawers or reconfigure the offending option. Plug in the printer and turn it on. See also: Setup Guide 58 Output Config Error Too many - Lexmark C760 | User Reference - Page 89
Supported The printer detects that an incompatible hard disk is installed. 64 Unsupported Disk The printer detects an unsupported Format disk format. 80 Fuser Maintenance The counter that tracks wear on the fuser has reached its limit. 81 Engine Code Menu. • If the error message remains, the - Lexmark C760 | User Reference - Page 90
Supplies message is displayed until you replace the specified print cartridge. 89 ITU Maintenance The ITU NVRAM is invalid. • Press Go to continue printing. • If print quality is unacceptable, replace the image transfer unit. 900-999 Service Messages 900-999 relate to printer problems - Lexmark C760 | User Reference - Page 91
unit. See Clearing image transfer unit jams for instructions. D, K, L Follow the instructions for clearing Area D, Area K, and Area L. If the jam message persists, paper may be caught in the fuser. See Clearing fuser jams for instructions. K, L Follow the instructions for clearing Area K and - Lexmark C760 | User Reference - Page 92
Front access door 201 Paper Jam Area T1 Standard tray (Tray 1) 200 Paper Jam Area E Duplex mechanism 230 Paper Jam Area T Paper input options: 500-sheet trays or 2000-sheet tray 24 Jam Area K Lower right access door (fuser area) 201 Paper Jam 202 Paper Jam Area J Duplex tray 230 Paper Jam 92 - Lexmark C760 | User Reference - Page 93
Clearing the entire paper path When a paper jam occurs, the printer stops operating and displays 2 Paper Jam and a message to clear certain printer areas. 93 - Lexmark C760 | User Reference - Page 94
media. Area B 1 Open the left access door. 2 Pull down the lever until it stops. 3 Remove all visible media. Note: Remove any torn media from the printer. 4 Return the lever to its upright position. 5 Close the door. Note: Open Tray 1 and make sure the entire media stack is pushed all the way - Lexmark C760 | User Reference - Page 95
the door. Area D 1 Open the front access door. 2 Hold down the lever in the upper left corner. Remove jams in the rollers under the image transfer unit. Note: Any image printed will not be fused to the page. 95 - Lexmark C760 | User Reference - Page 96
inside and remove any paper caught in the rollers. Also, look up inside, as some jams may be above the rollers. 2 Reinstall the duplex mechanism in the printer. Area T 1 If you cannot clear all the 500-sheet drawer jams from Area C: a Carefully open trays 2 through 4 (all 500-sheet trays) and - Lexmark C760 | User Reference - Page 97
Area J 1 Remove the duplex tray. 2 Remove any jams and then reinstall the tray. Area K 1 Open the lower right access door. 2 Remove any jams, and then close the door. Area L 1 Open the upper right access door. 2 Remove jams from the rollers and then close the door. 97 - Lexmark C760 | User Reference - Page 98
1 Open the rear door of the 5-bin mailbox or ouput expander. 2 Pull the jam straight out, and then close the door. Clearing fuser jams 1 Clear the paper path. If the jam error message persists, go to step 2. 2 Open both the upper right and the lower right access doors (Areas K and L). CAUTION: The - Lexmark C760 | User Reference - Page 99
clean, flat surface. 5 Unsnap the housing and set it aside. 6 Lift up the fuser roller cover and remove the jam. 7 Close the fuser roller cover. 8 Snap the housing back onto the fuser. 9 Insert the fuser back into the printer. 10 Slide the latches out, and then pull up to refasten them. 11 Close the - Lexmark C760 | User Reference - Page 100
. 2 While holding down the lever behind the front access door, insert a folded piece of paper as shown to clear the paper sensors under the image transfer unit. Make sure to clear the entire width of the paper path. 3 Close the left access door and the front access door. If the jam - Lexmark C760 | User Reference - Page 101
4 Turn the printer off. Open the front cover. 5 Remove all the print cartridges. a Pull up slightly on the cartridge handhold. b Pull the cartridge straight out and use the handle to lift it off the guides. c Place the cartridges on a clean, flat surface out of direct light. 101 - Lexmark C760 | User Reference - Page 102
6 Release the latches to open the multipurpose feeder (area A) all the way. 7 Remove the image transfer unit. a Raise the lever to unlock the image transfer unit. 102 - Lexmark C760 | User Reference - Page 103
b Pull down on the handle. c Slide the image transfer unit out and place it on a clean, flat surface. Warning: Do not touch the transfer belt. Touching the belt will damage the image transfer unit. 103 - Lexmark C760 | User Reference - Page 104
8 Look inside the printer. Remove all torn paper or other jams. 9 Insert the image transfer unit back into the printer. a Align the guides with the insertion grooves and gently slide the unit in. 104 - Lexmark C760 | User Reference - Page 105
b Rotate the handle up, and gently push the unit into place. c Lower the lever to lock the image transfer unit in place. 105 - Lexmark C760 | User Reference - Page 106
feeder to its working position. Reinstall all the print cartridges. 11 Close the printer door. 12 Turn the printer on. The printer returns to a Ready state. Clearing finisher jams (Areas 1-6) Refer to the Finisher Setup & User's Guide for instructions on clearing finisher jams. If you still need - Lexmark C760 | User Reference - Page 107
8 Maintenance Determining the status of supplies To determine the status of all of the consumables installed in your printer, print the menu settings page. See Printing a menu settings page for detailed instructions. One or two pages print, depending on the number of menu settings you have. Look - Lexmark C760 | User Reference - Page 108
an image transfer unit and transfer roller When the 83 ITU Maintenance message appears on the display, you should order a new image transfer unit and transfer roller. Use P/N 56P1544 to order an image transfer unit and second transfer roller. Ordering a print cartridge When the 88 Toner Low - Lexmark C760 | User Reference - Page 109
Program print cartridge • Magenta high yield Return Program print cartridge • Yellow high yield Return Program print cartridge Recycling Lexmark products To return your Lexmark products to Lexmark for recycling: 1 1. Visit our Web site: www.lexmark.com/recycle 2 2. Follow the instructions on your - Lexmark C760 | User Reference - Page 110
Memory card connector Hard disk connector Accessing the printer system board 1 Turn the printer off. 2 Unplug the printer power cord. 3 Disconnect all cables from the back of the printer. 4 Locate the access cover on the back of the printer. 5 Remove the four access cover screws as shown - Lexmark C760 | User Reference - Page 111
memory and flash memory cards are easily damaged by static electricity. Touch something metal on the printer before you touch a memory card. 1 Remove the system board access cover. See Accessing the printer system board. 2 Locate the memory card you want to remove. 3 Push the latches on both ends - Lexmark C760 | User Reference - Page 112
3 Remove the screw that secures the card to the system board connector slot. 4 Gently pull the card out of the connector. 5 If you saved the metal plate that covers the connector slot and you do not plan to insert another card, attach the plate: a Slide the clip side of the plate in first, making - Lexmark C760 | User Reference - Page 113
a hard disk Warning: Hard disks are easily damaged by static electricity. Touch something metal on the printer before you touch a disk. 1 Remove the system board access cover. See Accessing the printer system board. 2 Locate the hard disk. 3 Gently pull the three posts on the hard disk mounting - Lexmark C760 | User Reference - Page 114
Warning: Optional firmware cards are easily damaged by static electricity. Touch something metal on the printer before you touch an optional firmware card. 1 Remove the system board access cover. See Accessing the printer system board. 2 Grasp the firmware card gently and pull it straight out in one - Lexmark C760 | User Reference - Page 115
Align the slots at the top of the access cover with the screws near the top of the printer. 2 Slide the cover up under the top cover lip as far as it will go, and then bottom of the cover. 4 Reconnect all cables on the back of the printer. 5 Plug in the printer power cord. 6 Turn the printer on. 115 - Lexmark C760 | User Reference - Page 116
Clearing paper jams. Online Technical Support Technical support is available on our Lexmark Web site at www.lexmark.com. Calling for service When you call for printer service, describe the problem you are experiencing, the message on the display, and the troubleshooting steps you have already taken - Lexmark C760 | User Reference - Page 117
off and back on. This often fixes the problem. Printing a menu settings page Print the menu settings page to review the printer settings and to verify that printer options are installed correctly. Note: See Understanding the printer operator panel to identify the display and operator panel buttons - Lexmark C760 | User Reference - Page 118
Ready message if this is the last printer setting you want to change. Note: User default settings remain in effect until you save new settings or restore the factory defaults. Disabling Power Saver Disabling Power Saver in the Setup Menu helps keep your printer ready to print without delays. 1 Press - Lexmark C760 | User Reference - Page 119
you can select the Disabled value from the Power Saver menu item. Note: You can also disable Power Saver by issuing a Printer Job Language (PJL) command. For more information, refer to the Technical Reference available on our Lexmark Web site at www.lexmark.com. Disabling the operator panel menus - Lexmark C760 | User Reference - Page 120
Printing multi-language PDFs Symptom Cause Some maintenance and troubleshooting documents do not print. The documents contain unavailable fonts. Solution 1 Open the document you want to print in Adobe Acrobat. 2 Click the printer icon. The Print dialog box appears. 3 Check the Print as image - Lexmark C760 | User Reference - Page 121
detailed instructions. • Verify that you selected the printer driver associated with the Lexmark C760, C762. • If you are using a USB port, make sure you are running Windows 98/Me, Windows 2000, Windows XP, or Windows Server 2003 and using a Windows 98/Me, Windows 2000, Windows XP, or Windows Server - Lexmark C760 | User Reference - Page 122
Setup Menu. Solving mailbox problems Symptom Paper jams before reaching the mailbox. Cause The mailbox and the printer are misaligned. The mailbox is not connected properly. Solution Realign the mailbox and the printer. Refer to the Setup Guide for instructions. See Clearing mailbox or output - Lexmark C760 | User Reference - Page 123
. Refer to the Setup Guide for instructions. Your printer driver may not automatically recognize that an option is attached to your printer. Look at the driver settings and verify that all the printer configuration settings are correct. Solving paper feed problems Symptom Cause Solution Paper - Lexmark C760 | User Reference - Page 124
to find solutions to print quality problems. Symptom Repeating defects Cause Solution Either the print cartridges are defective, the image transfer unit and transfer roller are defective, or the fuser is defective. Marks occur repeatedly only in one color and multiple times on a page: • Replace - Lexmark C760 | User Reference - Page 125
the image transfer unit and transfer roller are defective, or the fuser is defective. 1 Replace the color print cartridge causing the line. 2 If you still have the problem, replace the image transfer unit and transfer roller. 3 If you still have the problem, replace the fuser. Streaked horizontal - Lexmark C760 | User Reference - Page 126
not meet the printer specifications. • The print cartridges are low on toner. • The print cartridges are defective or have been installed in more than one printer. • Select a different Toner Darkness setting from the printer driver before sending the job to print. • Perform a Color Adjust in the - Lexmark C760 | User Reference - Page 127
• Change Paper Weight from Plain to CardStock (or other appropriate weight). • Replace the fuser. • The Toner Darkness setting is too dark. • The print cartridges are defective. • Select a different Toner Darkness setting from the printer driver before sending the job to print. • Replace the print - Lexmark C760 | User Reference - Page 128
media specifications Blank pages • The print cartridges are defective or empty. • Replace the print cartridges. Solid color pages • The print cartridges are • Replace the print cartridges. defective. • Call for service. • Your printer requires servicing. The paper curls badly once it - Lexmark C760 | User Reference - Page 129
computer screen that cannot be physically reproduced on a color laser printer. Color match can also be affected by monitor variations and lighting conditions. Read the response to the question "How can I match a particular color (such as a color in a corporate logo)?" on page 130 for recommendations - Lexmark C760 | User Reference - Page 130
the printer cannot exactly reproduce the desired color, users should be able to identify adequate color matches for the majority of cases. The Color Samples menu items can provide useful information in helping to solve this particular type of color matching problem. The eight Color Samples options - Lexmark C760 | User Reference - Page 131
table identifies which Color Samples pages to use: Color specification of Classification of Printer Color object being printed object being printed Correction setting Color Samples pages to print and use for color matching RGB Text Auto sRGB Vivid Off Off - RGB Manual sRGB Vivid*, Vivid - Lexmark C760 | User Reference - Page 132
the operator panel while Restoring Factory Defaults appears. - All downloaded resources (fonts, macros, and symbol sets) in printer memory (RAM) are deleted. (Resources residing in flash information about changing menu settings or selecting new user default settings, see Changing menu settings. 132 - Lexmark C760 | User Reference - Page 133
unit For best print quality, make sure you align the image transfer unit after replacement or if colors print too lightly. To align the image transfer unit: 1 Make sure the printer is on and the Ready message appears. 2 Press Menu until you see Utilities Menu, and then press Select. 3 Press Menu - Lexmark C760 | User Reference - Page 134
values may vary from printer to printer. The accuracy of the estimates may be affected by how full the print cartridges are, environmental conditions, the media type, the software application, software settings, the driver, driver settings, and the content of the page. Lexmark makes no claim as - Lexmark C760 | User Reference - Page 135
Lexmark's network printer management utility, indicates when it is time to replace supplies and points out actual or potential problems. When a printer about MarkVision Professional, refer to the drivers CD that shipped with your printer. Using MarkVision Messenger MarkVision Messenger lets you - Lexmark C760 | User Reference - Page 136
the buttons when Performing Self Test appears on the display. When the printer self test completes, Config Menu appears. 4 Press Menu until you see Size Sensing, and then press Select. Note: Only paper trays that support auto size sensing are displayed on the operator panel. 5 Press Menu until - Lexmark C760 | User Reference - Page 137
) 43 Color Correction (Color Menu) 43 Color Menu 43 Color Adjust 43 Color Balance 43 Color Correction 43 Color Samples 44 Manual Color 45 Print Mode 45 Print Resolution 45 Toner Darkness 46 Color Samples (Color Menu) 44 Toner (Supplies Menu) 72 toner status 72 complex page errors 69 - Lexmark C760 | User Reference - Page 138
2 Paper Jam 84 30 Toner Cart Missing 85 30 ITU Error 84 31 Defective Cartridge 85 32 Unsupported Cartridge 85 33 Calibration Error 85 34 Incorrect Media 85 34 Short Paper 85 35 Res Save Off Deficient Memory 85 36 Printer Service Required 85 37 Insufficient Collation Area - Lexmark C760 | User Reference - Page 139
Full 90 82 Waste Toner Bottle Full 90 82 Waste Toner Bottle Missing 90 83 ITU Maintenance 90 84 Oiler Nearly Exhausted 90 84 Replace Oiler 90 85 ITU Maintenance 90 86 ITU Maintenance 90 87 Fuser Missing 90 88 Toner Low 90 89 ITU Maintenance 90 900-999 Service 90 Activating Menu - Lexmark C760 | User Reference - Page 140
fuser assembly 108 image transfer unit 108 print cartridge 108 transfer roller 108 web oiler 108 ordering supplies 73 PCL SmartSwitch, setting See also printer language network port 52 parallel port PS errors 64 PostScript Menu 64 Font Priority 64 Image Smoothing 64 power saver configuring 69 Power - Lexmark C760 | User Reference - Page 141
Trace mode 74 print defaults 75 print hardware statistics 75 Printer Usage (Setup Menu) 70 printing menu settings page 117 problem solving clearing operator panel error messages 21 stopping printer 22 problems calling for service 116 color quality 128 incorrect characters print 122 job didn't print - Lexmark C760 | User Reference - Page 142
Supplies Menu 72 Toner 72 Oiler 72 Waste Toner Bottle 72 supplies, status of toner 72 oiler 72 waste toner bottle 72 Symbol Set (PCL Emul Menu) 56 T taking printer PCL SmartSwitch 73 PS SmartSwitch 73 user default settings current 118 Utilities Menu 74 Color Alignment 74 Defragment - Lexmark C760 | User Reference - Page 143
143
-
 1
1 -
 2
2 -
 3
3 -
 4
4 -
 5
5 -
 6
6 -
 7
7 -
8
-
9
-
10
-
11
-
12
-
13
-
14
-
15
-
16
-
17
-
18
-
19
-
20
-
21
-
22
-
23
-
24
-
25
-
26
-
27
-
28
-
29
-
30
-
31
-
32
-
33
-
34
-
35
-
36
-
37
-
38
-
39
-
40
-
41
-
42
-
43
-
44
-
45
-
46
-
47
-
48
-
49
-
50
-
51
-
52
-
53
-
54
-
55
-
56
-
57
-
58
-
59
-
60
-
61
-
62
-
63
-
64
-
65
-
66
-
67
-
68
-
69
-
70
-
71
-
72
-
73
-
74
-
75
-
76
-
77
-
78
-
79
-
80
-
81
-
82
-
83
-
84
-
85
-
86
-
87
-
88
-
89
-
90
-
91
-
92
-
93
-
94
-
95
-
96
-
97
-
98
-
99
-
100
-
101
-
102
-
103
-
104
-
105
-
106
-
107
-
108
-
109
-
110
-
111
-
112
-
113
-
114
-
115
-
116
-
117
-
118
-
119
-
120
-
121
-
122
-
123
-
124
-
125
-
126
-
127
-
128
-
129
-
130
-
131
-
132
-
133
-
134
-
135
-
136
-
137
-
138
-
139
-
140
-
141
-
142
-
143
 |
 |
www.lexmark.com
User’s Guide
June 2004
Lexmark and Lexmark with diamond design are trademarks of Lexmark International, Inc.,
registered in the United States and/or other countries.
© 2004 Lexmark International, Inc.
740 West New Circle Road
Lexington, Kentucky 40550
C760, C762