Lexmark MB2442 Embedded Web Server Administrator s Guide - Page 32
Configuring 802.1x authentication
 |
View all Lexmark MB2442 manuals
Add to My Manuals
Save this manual to your list of manuals |
Page 32 highlights
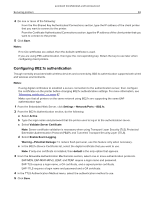
Lexmark Confidential until announced Securing printers 32 4 Do one or more of the following: • From the Pre‑Shared Key Authenticated Connections section, type the IP address of the client printer that you want to connect to the printer. • From the Certificate Authenticated Connections section, type the IP address of the client printer that you want to connect to the printer. 5 Click Save. Notes: • If no CA certificates are added, then the default certificate is used. • If you are using PSK authentication, then type the corresponding key. Retain the key to use later when configuring client printers. Configuring 802.1x authentication Though normally associated with wireless devices and connectivity, 802.1x authentication supports both wired and wireless environments. Notes: • If using digital certificates to establish a secure connection to the authentication server, then configure the certificates on the printer before changing 802.1x authentication settings. For more information, see "Managing certificates" on page 47. • Make sure that all printers on the same network using 802.1x are supporting the same EAP authentication type. 1 From the Embedded Web Server, click Settings > Network/Ports > 802.1x. 2 From the 802.1x Authentication section, do the following: a Select Active. b Type the login name and password that the printer uses to log in to the authentication server. c Select Validate Server Certificate. Note: Server certificate validation is necessary when using Transport Layer Security (TLS), Protected Extensible Authentication Protocol (PEAP), and Tunneled Transport Security Layer (TTLS). d Select Enable Event Logging. Warning-Potential Damage: To reduce flash part wear, use this feature only when necessary. e In the 802.1x Device Certificate list, select the digital certificate that you want to use. Note: If only one certificate is installed, then default is the only option that appears. 3 From the Allowable Authentication Mechanisms section, select one or more authentication protocols. • EAP‑MD5, EAP‑MSCHAPv2, LEAP, and PEAP require a login name and password. • EAP‑TLS requires a login name, a CA certificate, and a signed printer certificate. • EAP‑TTLS requires a login name and password and a CA certificate. 4 In the TTLS Authentication Method menu, select the authentication method to use. 5 Click Save.
-
 1
1 -
2
-
3
-
4
-
5
-
6
-
7
-
8
-
9
-
10
-
11
-
12
-
13
-
14
-
15
-
16
-
17
-
18
-
19
-
20
-
21
-
22
-
23
-
24
-
25
-
26
-
 27
27 -
 28
28 -
 29
29 -
 30
30 -
 31
31 -
 32
32 -
 33
33 -
 34
34 -
 35
35 -
 36
36 -
 37
37 -
38
-
39
-
40
-
41
-
42
-
43
-
44
-
45
-
46
-
47
-
48
-
49
-
50
-
51
-
52
-
53
-
54
-
55
-
56
-
57
-
58
-
59
-
60
-
61
-
62
-
63
-
64
-
65
-
66
-
67
-
68
-
69
-
70
-
71
 |
 |