Lexmark MX6500e 6500e Quick Reference - Page 24
Understanding jam messages and, locations
 |
View all Lexmark MX6500e 6500e manuals
Add to My Manuals
Save this manual to your list of manuals |
Page 24 highlights
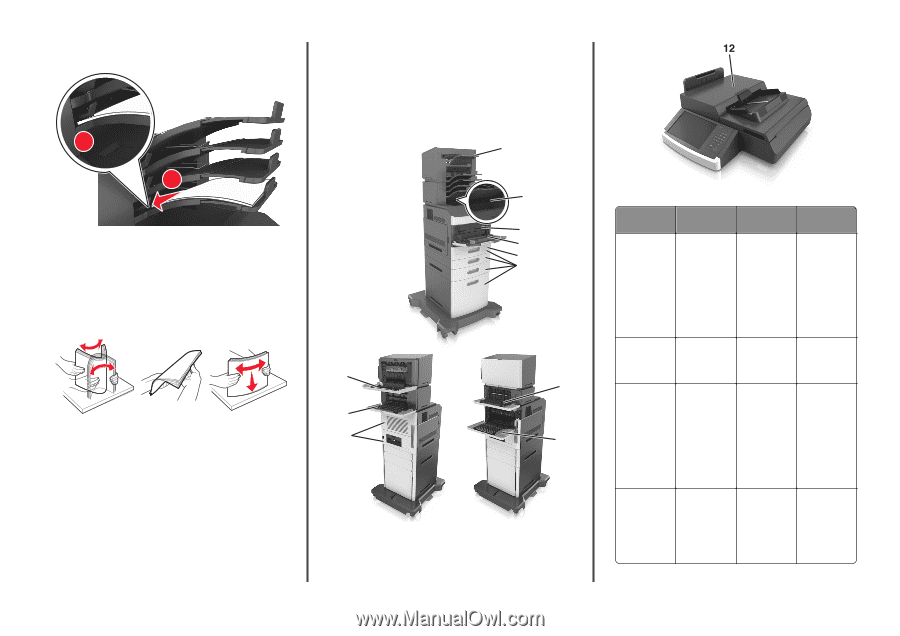
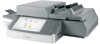
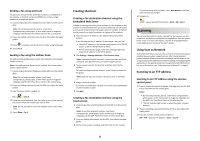
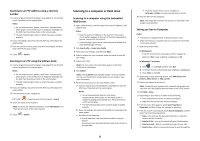
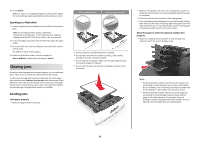
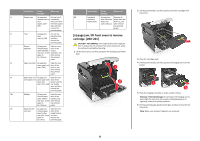
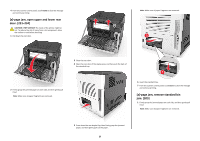
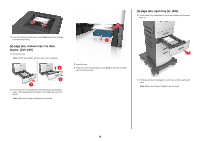
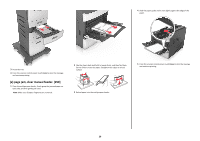
• If paper needs to be returned to the mailbox bin, then insert the paper under the bin arm, and then push the paper all the way back. 2 1 Notes: • When Jam Assist is set to On, the printer flushes blank pages or pages with partial prints to the standard bin after a jammed page has been cleared. Check your printed output for blank pages. • When Jam Recovery is set to On or Auto, the printer reprints jammed pages. However, the Auto setting reprints jammed pages if adequate printer memory is available. 1 2 Note: If the paper is not under the bin arm, then a jam occurs due to an overfilled bin. Use recommended paper • Use only recommended paper or specialty media. • Do not load wrinkled, creased, damp, bent, or curled paper. • Flex, fan, and straighten paper or specialty media before loading it. 11 10 • Do not use paper that has been cut or trimmed by hand. • Do not mix paper sizes, weights, or types in the same tray. 9 • Make sure the paper size and type are set correctly on the computer or printer control panel. • Store paper per manufacturer recommendations. Understanding jam messages and locations When a jam occurs, a message indicating the jam location and information to clear the jam appears on the printer display. Open the doors, covers, and trays indicated on the display to remove the jam. 3 4 1 5 6 2 7 3 8 4 24 Jam location Staple finisher Standard bin Inside the printer Multipurpose feeder Printer message What to do [x]‑page jam, remove paper, open stapler door. Leave paper in bin. [455-457] Remove paper from the stapler bin, open the stapler door, then remove the staple cartridge, and then remove the jammed staples. [x]‑page jam, remove standard bin jam. [203] Remove jammed paper from the standard bin. [x]‑page jam, lift Open the front front cover to cover and the remove multipurpose cartridge. [200- feeder, then 201] remove the toner cartridge and the imaging unit, and then remove the jammed paper. [x]‑page jam, clear manual feeder. [250] Remove all paper from the multipurpose feeder, and then remove the jammed paper.
-
 1
1 -
2
-
3
-
4
-
5
-
6
-
7
-
8
-
9
-
10
-
11
-
12
-
13
-
14
-
15
-
16
-
17
-
18
-
 19
19 -
 20
20 -
 21
21 -
 22
22 -
 23
23 -
 24
24 -
 25
25 -
 26
26 -
 27
27 -
 28
28 -
 29
29 -
30
-
31
-
32
-
33
 |
 |