Lexmark MX6500e User's Guide - Page 394
Set Date and Time menu, Security Audit Log menu
 |
View all Lexmark MX6500e manuals
Add to My Manuals
Save this manual to your list of manuals |
Page 394 highlights
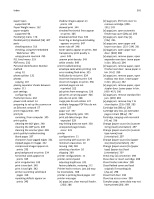
Index 394 restoring factory default settings 272 RJ‑11 adapter 133 S safety information 7, 8 Save As Shortcut copy options 116 e‑mail options 122 scan options 152 saving paper 112 Scan document too long 313 scan options darkness 153 file name 152 original size 152 page setup 154 resolution 153 Save As Shortcut 152 send as 153 scan screen content source 153 content type 153 Scan to Computer setting up 151 Scan to Network setting up 24 using 147 Scan to Sharepoint setting up 26 scan troubleshooting cannot scan from a computer 361 partial document or photo scans 361 scan job was not successful 363 scanner unit does not close 354, 364 scanning takes too long or freezes the computer 364 scanner Automatic Document Feeder (ADF) 12 connecting with printer 29 functions 12 minimum clearances 10 moving 266, 267 scanner glass 12 selecting a location 10 shipping 267 Scanner automatic feeder cover open 313 scanner communications card installing 29 scanner control panel 14 indicator light 15 Sleep button light 15 Scanner disabled by admin [840.01] 313 Scanner disabled. Contact system administrator if problem persists. [840.02] 313 scanner glass cleaning 248 copying using 107 scanner hard disk disposing of 243 encrypting 245 wiping 244 scanner hard disk encryption 245 scanner hard disk memory erasing 244 scanner home screen buttons and icons description 15 scanner information where to find 9 scanner IP address finding 19 Scanner jam, remove all originals from the scanner [2yy.xx] 313 Scanner jam, remove jammed originals from the scanner [2yy.xx] 313 Scanner locked, release lock under scanner 314 Scanner maintenance required soon, use ADF Kit [80] 314 scanner messages Cartridge nearly low [88.xy] 297 scanner options troubleshooting internal option is not detected 319 USB/parallel interface card 322 scanner software, installing 55 scanning from a flash drive 152 to a computer 151 to a computer using the Embedded Web Server 150 to an FTP address 148, 149 scanning to a computer 151 using the Embedded Web Server 150 scanning to a flash drive 152 scanning to an FTP address creating shortcuts using the computer 148 using a shortcut number 149 using the address book 149 using the scanner control panel 148 scanning to network destinations 147 security modifying confidential print settings 104 Security Audit Log menu 187 security Web page where to find 246 selecting paper 89 send as e‑mail options 122 scan options 153 sending a fax from the computer 139 sending a fax using shortcuts 139 sending a fax using the touch screen 138 sending fax using shortcuts 139 using the address book 140 sending fax at a scheduled time 140 sending fax using the address book 140 separator pad replacing 259 separator roller ordering 256 Serial [x] menu 180 Serial option [x] error [54] 314 Serial port [x] disabled [56] 314 serial printing setting up 64 Set Date and Time menu 187 setting paper size 67 paper type 67 TCP/IP address 173 setting the fax number or station number 137 setting the outgoing fax name or station name 137 setting the Universal paper size 67
-
 1
1 -
2
-
3
-
4
-
5
-
6
-
7
-
8
-
9
-
10
-
11
-
12
-
13
-
14
-
15
-
16
-
17
-
18
-
19
-
20
-
21
-
22
-
23
-
24
-
25
-
26
-
27
-
28
-
29
-
30
-
31
-
32
-
33
-
34
-
35
-
36
-
37
-
38
-
39
-
40
-
41
-
42
-
43
-
44
-
45
-
46
-
47
-
48
-
49
-
50
-
51
-
52
-
53
-
54
-
55
-
56
-
57
-
58
-
59
-
60
-
61
-
62
-
63
-
64
-
65
-
66
-
67
-
68
-
69
-
70
-
71
-
72
-
73
-
74
-
75
-
76
-
77
-
78
-
79
-
80
-
81
-
82
-
83
-
84
-
85
-
86
-
87
-
88
-
89
-
90
-
91
-
92
-
93
-
94
-
95
-
96
-
97
-
98
-
99
-
100
-
101
-
102
-
103
-
104
-
105
-
106
-
107
-
108
-
109
-
110
-
111
-
112
-
113
-
114
-
115
-
116
-
117
-
118
-
119
-
120
-
121
-
122
-
123
-
124
-
125
-
126
-
127
-
128
-
129
-
130
-
131
-
132
-
133
-
134
-
135
-
136
-
137
-
138
-
139
-
140
-
141
-
142
-
143
-
144
-
145
-
146
-
147
-
148
-
149
-
150
-
151
-
152
-
153
-
154
-
155
-
156
-
157
-
158
-
159
-
160
-
161
-
162
-
163
-
164
-
165
-
166
-
167
-
168
-
169
-
170
-
171
-
172
-
173
-
174
-
175
-
176
-
177
-
178
-
179
-
180
-
181
-
182
-
183
-
184
-
185
-
186
-
187
-
188
-
189
-
190
-
191
-
192
-
193
-
194
-
195
-
196
-
197
-
198
-
199
-
200
-
201
-
202
-
203
-
204
-
205
-
206
-
207
-
208
-
209
-
210
-
211
-
212
-
213
-
214
-
215
-
216
-
217
-
218
-
219
-
220
-
221
-
222
-
223
-
224
-
225
-
226
-
227
-
228
-
229
-
230
-
231
-
232
-
233
-
234
-
235
-
236
-
237
-
238
-
239
-
240
-
241
-
242
-
243
-
244
-
245
-
246
-
247
-
248
-
249
-
250
-
251
-
252
-
253
-
254
-
255
-
256
-
257
-
258
-
259
-
260
-
261
-
262
-
263
-
264
-
265
-
266
-
267
-
268
-
269
-
270
-
271
-
272
-
273
-
274
-
275
-
276
-
277
-
278
-
279
-
280
-
281
-
282
-
283
-
284
-
285
-
286
-
287
-
288
-
289
-
290
-
291
-
292
-
293
-
294
-
295
-
296
-
297
-
298
-
299
-
300
-
301
-
302
-
303
-
304
-
305
-
306
-
307
-
308
-
309
-
310
-
311
-
312
-
313
-
314
-
315
-
316
-
317
-
318
-
319
-
320
-
321
-
322
-
323
-
324
-
325
-
326
-
327
-
328
-
329
-
330
-
331
-
332
-
333
-
334
-
335
-
336
-
337
-
338
-
339
-
340
-
341
-
342
-
343
-
344
-
345
-
346
-
347
-
348
-
349
-
350
-
351
-
352
-
353
-
354
-
355
-
356
-
357
-
358
-
359
-
360
-
361
-
362
-
363
-
364
-
365
-
366
-
367
-
368
-
369
-
370
-
371
-
372
-
373
-
374
-
375
-
376
-
377
-
378
-
379
-
380
-
381
-
382
-
383
-
384
-
385
-
386
-
387
-
388
-
 389
389 -
 390
390 -
 391
391 -
 392
392 -
 393
393 -
 394
394 -
 395
395 -
 396
396
 |
 |
