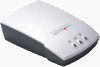
Lexmark MarkNet N4050e User's Guide for Macintosh - Page 12
Installing your printer on the network
 |
View all Lexmark MarkNet N4050e manuals
Add to My Manuals
Save this manual to your list of manuals |
Page 12 highlights
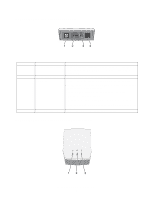
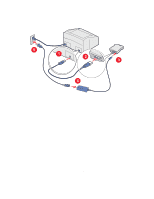
8 Change the listed network settings for the N4050e wireless print server to match your wireless network, including: • SSID • BSS type • Channel Number • Encryption Mode For information on accessing your current wireless network parameters, refer to your wireless network documentation, or contact the person who set up your network. Note: The SSID must be entered exactly as it is used on your network. SSIDs are case-sensitive, so if the SSID is entered incorrectly, the print server will not be able to communicate on the network and must be reset to factory defaults so the configuration process can be repeated. For information on resetting the print server to factory defaults, see the Test Button description in the Understanding the print server ports section. 9 Click Submit. 10 Wait 10 seconds while the print server resets. 11 In the Applications folder, open Internet Connect, and click the AirPort icon in the toolbar. 12 In the Network pop-up menu, select your original wireless network to restore your computer's wireless network settings back to the original values. Installing your printer on the network Once the print server has been configured, use the printer drivers CD or printer software CD that came with your printer to install your network printer on the computers attached to your network. Make sure that your printer drivers CD or printer software CD is inserted into the computer you want to install the printer for. Installing your network printer on additional network computers If you are installing your network printer for use with multiple computers on the network, you will need to repeat the Installing your printer on the network process for each computer you want to have access to the printer. The wireless print server does not need to be reconfigured for each successive installation. Configuring your wireless print server 7
-
 1
1 -
2
-
3
-
4
-
5
-
6
-
 7
7 -
 8
8 -
 9
9 -
 10
10 -
 11
11 -
 12
12 -
 13
13 -
 14
14 -
 15
15 -
 16
16 -
 17
17 -
18
 |
 |