Lexmark P706 User's Guide for Mac OS X - Page 48
Using the CD that comes with your printer, Using the World Wide Web, Lexmark Z700-P700 Series CD - printer driver
 |
View all Lexmark P706 manuals
Add to My Manuals
Save this manual to your list of manuals |
Page 48 highlights
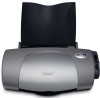
To connect your printer to a network with a Lexmark adapter, refer to the documentation that comes with your adapter. Using the CD that comes with your printer 1 Close all open software programs. 2 When your desktop appears, insert the printer software CD. The Lexmark Z700-P700 Series CD icon appears on your desktop. 3 Double-click the Lexmark Z700-P700 Series CD icon. 4 Double-click Install. 5 Click Install and Agree. 6 Choose the country or region closest to you, and then click Continue. Note: If the Printer Selection or the New Network Printer Found dialog appears, follow the instructions displayed. Click ? on the screen or contact your network administrator for help. 7 Follow the instructions on the screen to complete printer software installation. 8 When printer software installation is complete, you can: • Register your printer on the Internet. • Print a test page to observe your printer in action. • Check the Lexmark Web site for offers (United States and Canada only). 9 Click Finished when you are done. 10 The Z700-P700 Series Printer folder is automatically created on your desktop. You are now ready to start using your Lexmark Z700-P700 Series printer. Using the World Wide Web Installing the printer software from the Web is as easy as: 1 Make sure Stuffit Expander is loaded on your system. 2 Access the Lexmark Web site, www.lexmark.com. 3 On the home page, navigate through the menu selection and click Drivers & Downloads. 4 Select the printer and the printer driver for your operating system. 5 Follow the instructions on the screen to download the driver and install the printer software. Solving printer software installation problems 48
-
 1
1 -
2
-
3
-
4
-
5
-
6
-
7
-
8
-
9
-
10
-
11
-
12
-
13
-
14
-
15
-
16
-
17
-
18
-
19
-
20
-
21
-
22
-
23
-
24
-
25
-
26
-
27
-
28
-
29
-
30
-
31
-
32
-
33
-
34
-
35
-
36
-
37
-
38
-
39
-
40
-
41
-
42
-
 43
43 -
 44
44 -
 45
45 -
 46
46 -
 47
47 -
 48
48 -
 49
49 -
 50
50 -
 51
51 -
 52
52 -
 53
53 -
54
-
55
-
56
-
57
-
58
-
59
-
60
-
61
-
62
-
63
-
64
-
65
-
66
-
67
 |
 |