Lexmark P706 User's Guide for Mac OS X - Page 52
Printing a test Test does not print, Z700-P700 Series Printer, Z700-P700 Series, Utility
 |
View all Lexmark P706 manuals
Add to My Manuals
Save this manual to your list of manuals |
Page 52 highlights
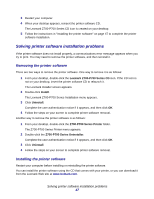
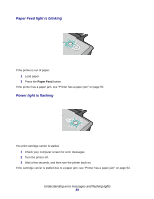
Printing a test page 1 Access the printer utility by double-clicking the Z700-P700 Series Printer folder on your desktop, and then double-clicking Z700-P700 Series Utility. You can also access the Z700-P700 Series Utility from Printer Services in the Print dialog menu. 2 From the Cartridges tab, click Print Test Page. • If the test page prints, the printer is working properly. • If the test page does not print, continue with the following section or refer to the printer software Help for further troubleshooting information. Test page does not print For help, first see "Troubleshooting checklist" on page 45, and then: • If the paper is jammed, see "Clearing paper misfeeds or jams" on page 53. • Make sure the printer is not held or paused. To check the printer status: 1 From the Dock, click the Print Center icon. The Printer List dialog appears. Note: If the Print Center icon is not on the Dock, from the Finder window choose Go Applications Utilities Print Center. 2 Highlight the Z700-P700 Series in the list. 3 From the Queue drop-down menu, choose Start Queue. 4 From the Printers drop-down menu, choose Show Queue or Show Jobs. 5 Select your job from the list. 6 Click Resume. 7 Print your test page again. If it still does not print, see "Solving printer software installation problems" on page 47. Alignment page does not print Make sure: • You completely removed the transparent tape and sticker from the back and bottom of each print cartridge. • You installed the cartridges correctly. For help, see "Install the cartridges" on page 39. • You loaded the paper correctly and did not force the paper into the printer. • If you are connected to a network with a Lexmark adapter, the indicator lights are on. For more information, see the adapter documentation. Resolving unsuccessful or slow printing 52
-
 1
1 -
2
-
3
-
4
-
5
-
6
-
7
-
8
-
9
-
10
-
11
-
12
-
13
-
14
-
15
-
16
-
17
-
18
-
19
-
20
-
21
-
22
-
23
-
24
-
25
-
26
-
27
-
28
-
29
-
30
-
31
-
32
-
33
-
34
-
35
-
36
-
37
-
38
-
39
-
40
-
41
-
42
-
43
-
44
-
45
-
46
-
 47
47 -
 48
48 -
 49
49 -
 50
50 -
 51
51 -
 52
52 -
 53
53 -
 54
54 -
 55
55 -
 56
56 -
 57
57 -
58
-
59
-
60
-
61
-
62
-
63
-
64
-
65
-
66
-
67
 |
 |