Lexmark Platinum Pro905 Quick Reference - Page 18
Scanning, Tips for scanning, Scanning to a local or network computer - software download
 |
View all Lexmark Platinum Pro905 manuals
Add to My Manuals
Save this manual to your list of manuals |
Page 18 highlights
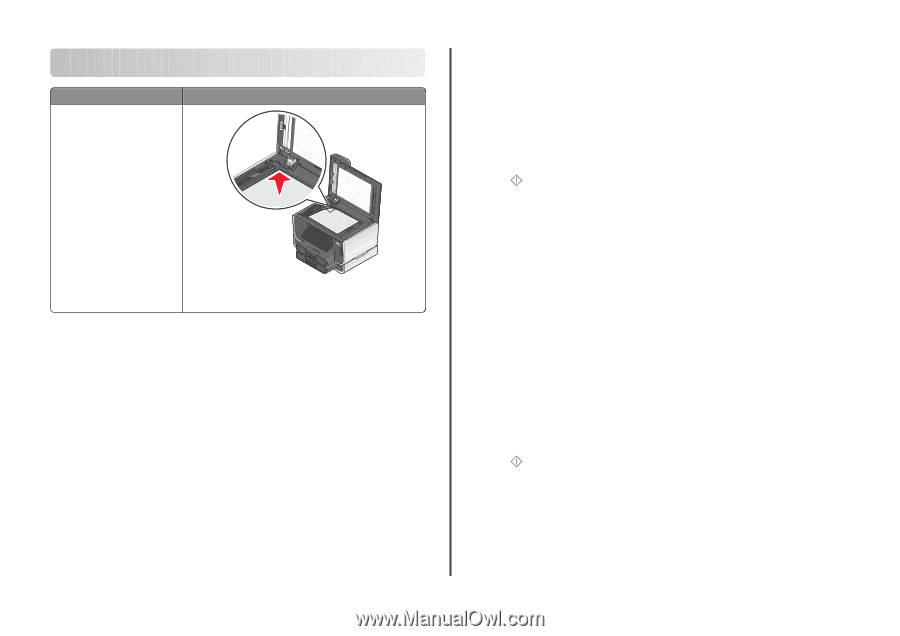
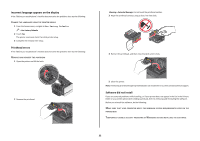
Scanning ADF Scanner glass Use the ADF for multiple-page documents. Note: The ADF is available only on select models. If you purchased a printer without an ADF, then load original documents or photos on the scanner glass. Use the scanner glass for single pages, small items (such as postcards or photos), transparencies, photo paper, or thin media (such as magazine clippings). Tips for scanning • When using the ADF, adjust the ADF paper guide to the width of the original document. • When using the scanner glass, close the scanner lid to avoid dark edges on the scanned image. • Do not load postcards, photos, small items, transparencies, photo paper, or thin media (such as magazine clippings) into the ADF. Place these items on the scanner glass. • Select the PDF file type if you want to scan multiple pages and save them as one file. • To initiate network scanning from the printer, make sure that "Enable network scan to computer" is selected in the General tab of the Scan Center. This is available only in Mac OS X version 10.6. Scanning to a local or network computer 1 Load an original document faceup into the ADF or facedown on the scanner glass. 2 From the home screen, navigate to Scan to Computer: Scan > Scan to Computer 3 Touch USB-Connected Computer or the name of a network computer. The local or network computer is the destination that will receive the scan. Wait until the printer has finished downloading a list of the scan applications available on the selected computer. Notes: • If the printer is connected only to a local computer, then the printer will automatically download a list of the scan applications. • You may be prompted to enter a PIN if the computer requires it. Enter the PIN using the keypad. • To assign a computer name and a PIN to the computer, see the Help for the printer software associated with your operating system. 4 Select an application, and then touch Accept. 5 Select the color, resolution quality and the original image size. If necessary, touch Accept each time you make a selection. 6 Press to start scanning. The scan is complete when the application you selected in step 4 opens on the destination computer, and the scan appears within the application as a new file. Scanning to a flash drive or memory card Before you begin, make sure your flash drive or memory card is not write protected. 1 Load an original document faceup into the ADF or facedown on the scanner glass. 2 From the home screen, navigate to Scan to Memory Device: Scan > Scan to Memory Device 3 Insert the flash drive or memory card. Notes: • The printer reads only one memory device at a time. • If a flash drive is inserted into the USB port while a memory card is in the card slot, then a message appears on the display prompting you to select which memory device to use. 4 Select the output file type you want to create. Note: Select the PDF file type if you want to scan multiple pages and save them as one file. 5 Select the color, resolution quality, and original image size. If necessary, touch Accept each time you make a selection. 6 Press to start scanning. The scan is complete when a message appears on the printer control panel indicating that the file you scanned has been saved. Scanning directly to e-mail using the printer software For Windows users 1 Load an original document faceup into the ADF or facedown on the scanner glass. 18
-
 1
1 -
2
-
3
-
4
-
5
-
6
-
7
-
8
-
9
-
10
-
11
-
12
-
 13
13 -
 14
14 -
 15
15 -
 16
16 -
 17
17 -
 18
18 -
 19
19 -
 20
20 -
 21
21 -
 22
22 -
 23
23 -
24
-
25
-
26
-
27
 |
 |