Lexmark S315 Quick Reference - Page 12
Using the printer control panel, Warning-Potential Damage - install
 |
View all Lexmark S315 manuals
Add to My Manuals
Save this manual to your list of manuals |
Page 12 highlights
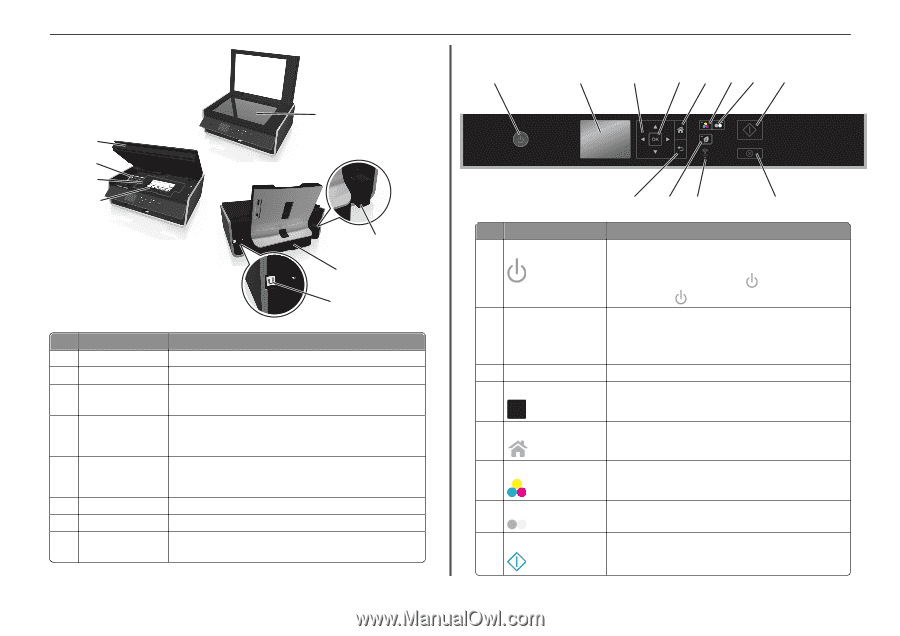
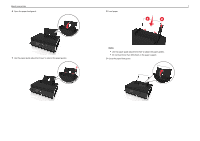
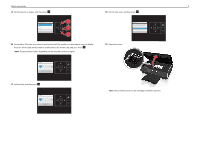
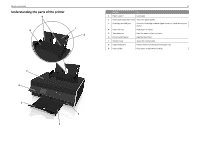
About your printer 10 17 16 15 14 11 12 13 Use the To 10 Scanner glass Scan or copy photos and documents. 11 Power supply with port Connect the printer to the power cord. 12 Duplex unit • Print on both sides of a sheet of paper. • Clear paper jams. 13 USB port Connect the printer to a computer using a USB cable. Warning-Potential Damage: Do not touch the USB port except when plugging in or removing a USB cable or installation cable. 14 Printhead access area Install the printhead. Note: The carrier moves to the printhead access area when no printhead is installed in the printer. 15 Jam clearance cover Access and clear paper jams. 16 Ink cartridge access area Install, replace, or remove ink cartridges. 17 Scanner unit • Access the ink cartridges and printhead. • Clear paper jams. 12 Using the printer control panel 1 2 3 4 5 67 8 12 11 10 9 Use 1 Power To • Turn the printer on and off. • Switch to Sleep mode. Note: When the printer is on, press to switch to Sleep mode. Press and hold for three seconds to turn off the printer. 2 Display View: Note: The display is turned off in Sleep mode. • Printer status • Messages • Menus 3 Arrow buttons Navigate through menu items that appear on the display. 4 Select OK • Select menu options. • Save settings. 5 Home Return to the home screen. 6 Color Switch to color mode. 7 Black 8 Start Switch to black‑and‑white mode. Start a job, depending on which mode is selected.
-
 1
1 -
2
-
3
-
4
-
5
-
6
-
 7
7 -
 8
8 -
 9
9 -
 10
10 -
 11
11 -
 12
12 -
 13
13 -
 14
14 -
 15
15 -
 16
16 -
 17
17 -
18
-
19
-
20
-
21
-
22
-
23
-
24
-
25
-
26
-
27
-
28
-
29
-
30
-
31
-
32
-
33
-
34
-
35
-
36
-
37
-
38
 |
 |