Lexmark T614 Setup Guide (1.4 MB) - Page 8
Installing a Duplex Unit
 |
UPC - 734646289009
View all Lexmark T614 manuals
Add to My Manuals
Save this manual to your list of manuals |
Page 8 highlights
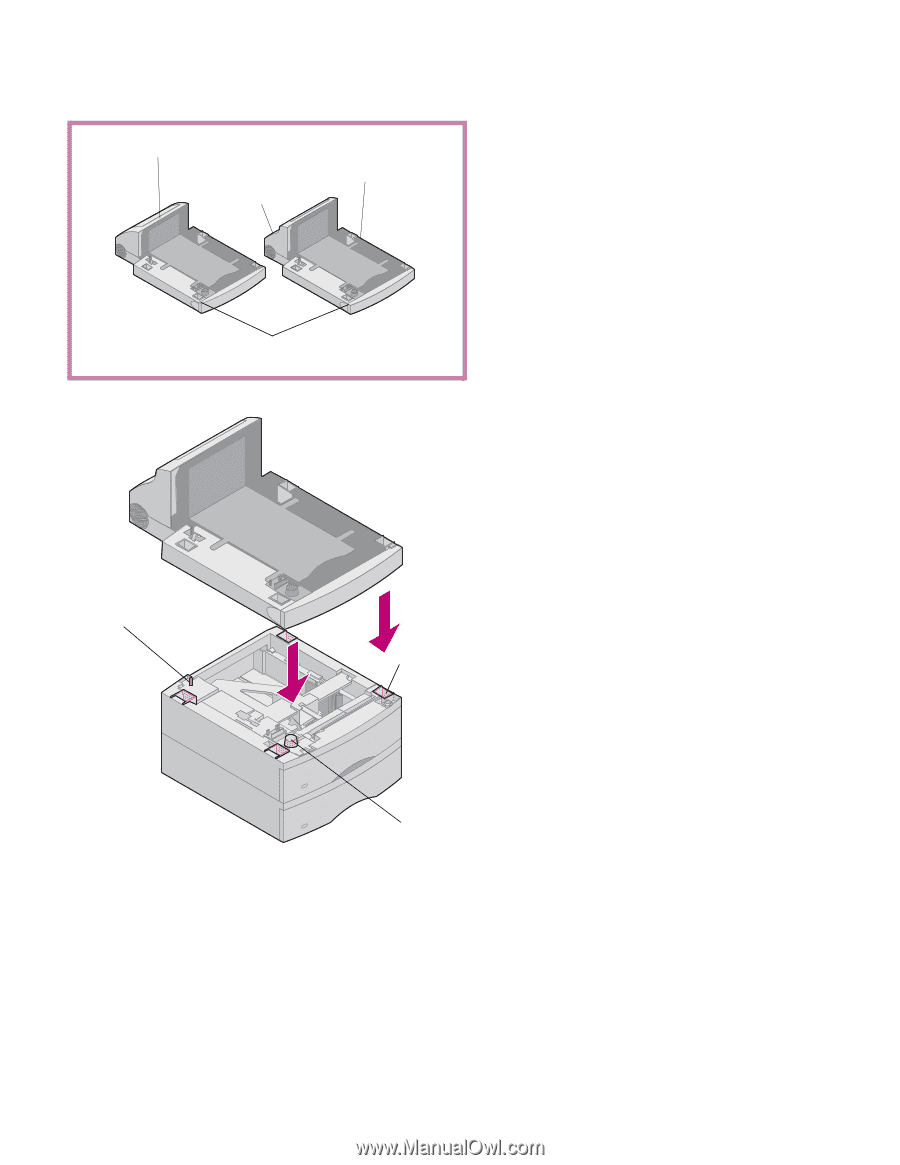
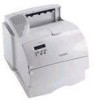
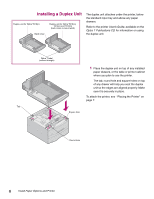
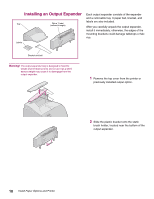
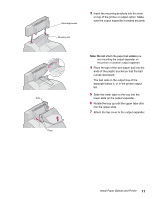
Installing a Duplex Unit Duplex unit for Optra T610(n) Back cover Duplex unit for Optra T616(n), T614(n) and T612(n) (back cover curves inward) The duplex unit attaches under the printer, below the standard input tray and above any paper drawers. Refer to the printer User's Guide, available on the Optra T Publications CD, for information on using the duplex unit. Optra T label (colored triangle) 1 Place the duplex unit on top of any installed paper drawers, or the table or printer cabinet where you plan to use the printer. The tab, round hole and square holes on top of any drawer will help you seat the duplex unit so the edges are aligned properly. Make sure it is securely in place. To attach the printer, see "Placing the Printer" on page 7. Tab Square hole Round hole 6 Install Paper Options and Printer
-
 1
1 -
2
-
 3
3 -
 4
4 -
 5
5 -
 6
6 -
 7
7 -
 8
8 -
 9
9 -
 10
10 -
 11
11 -
 12
12 -
 13
13 -
14
-
15
-
16
-
17
-
18
-
19
-
20
-
21
-
22
-
23
-
24
-
25
-
26
-
27
-
28
-
29
-
30
-
31
-
32
-
33
-
34
-
35
-
36
-
37
 |
 |