Lexmark X4875 User's Guide - Page 29
Installing the printer software, What do the Wi-Fi indicator lights mean? - driver
 |
UPC - 734646316996
View all Lexmark X4875 manuals
Add to My Manuals
Save this manual to your list of manuals |
Page 29 highlights
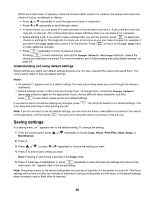
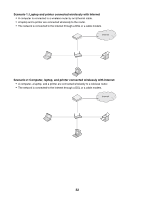
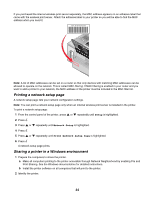
Installing the printer software Using the installation software CD (Windows users only) Using the CD that came with the printer: 1 Start Windows. 2 When the desktop appears, insert the software CD. The software installation screen appears. 3 Click Install. Using the installation software CD (Macintosh users only) 1 Close all open software applications. 2 Insert the software CD. 3 From the Finder desktop, double-click the printer CD icon that automatically appears. 4 Double-click the Install icon. 5 Follow the instructions on the computer screen. Using the World Wide Web 1 Go to the Lexmark Web site at www.lexmark.com. 2 From the home page, navigate through the menu selection, and then click Drivers & Downloads. 3 Choose the printer and the printer driver for your operating system. 4 Follow the instructions on the computer screen to download the driver and install the printer software. What do the Wi-Fi indicator lights mean? • Off indicates that the printer is not turned on, or a wireless print server is not installed. Select this option: - If you want to connect the printer to the computer using a USB cable. - If the printer does not have a wireless print server installed and you want to connect the printer to the computer using a USB cable. • Orange indicates that the printer is ready to be configured for wireless printing, but it is not connected to a wireless network. Select this option if you want to set up the printer on your wireless network. • Orange blinking indicates that the printer is configured, but it is unable to communicate with the wireless network. Select this option if you want to modify the wireless settings of the printer. • Green indicates that the printer is connected to a wireless network. Select this option to start using the printer that is already set up on your wireless network. Turning printing voice notification on or off The printer has a voice notification feature that tells you when printing starts and when it is completed. 29
-
 1
1 -
2
-
3
-
4
-
5
-
6
-
7
-
8
-
9
-
10
-
11
-
12
-
13
-
14
-
15
-
16
-
17
-
18
-
19
-
20
-
21
-
22
-
23
-
 24
24 -
 25
25 -
 26
26 -
 27
27 -
 28
28 -
 29
29 -
 30
30 -
 31
31 -
 32
32 -
 33
33 -
 34
34 -
35
-
36
-
37
-
38
-
39
-
40
-
41
-
42
-
43
-
44
-
45
-
46
-
47
-
48
-
49
-
50
-
51
-
52
-
53
-
54
-
55
-
56
-
57
-
58
-
59
-
60
-
61
-
62
-
63
-
64
-
65
-
66
-
67
-
68
-
69
-
70
-
71
-
72
-
73
-
74
-
75
-
76
-
77
-
78
-
79
-
80
-
81
-
82
-
83
-
84
-
85
-
86
-
87
-
88
-
89
-
90
-
91
-
92
-
93
-
94
-
95
-
96
-
97
-
98
-
99
-
100
-
101
-
102
-
103
-
104
-
105
-
106
-
107
-
108
-
109
-
110
-
111
-
112
-
113
-
114
-
115
-
116
-
117
-
118
-
119
-
120
-
121
-
122
-
123
-
124
-
125
-
126
-
127
-
128
-
129
-
130
-
131
-
132
-
133
-
134
-
135
-
136
-
137
-
138
-
139
-
140
-
141
-
142
-
143
-
144
-
145
-
146
-
147
-
148
-
149
-
150
-
151
-
152
-
153
-
154
-
155
-
156
-
157
-
158
-
159
-
160
-
161
-
162
-
163
-
164
-
165
-
166
-
167
-
168
-
169
-
170
-
171
-
172
-
173
-
174
-
175
-
176
 |
 |
