Lexmark X5075 User's Guide (Mac) - Page 132
Cannot print from digital camera using PictBridge - driver download
 |
View all Lexmark X5075 manuals
Add to My Manuals
Save this manual to your list of manuals |
Page 132 highlights
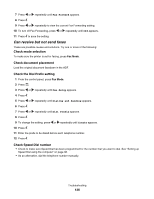
5 Plug the power cord into the wall outlet. 6 Press to turn the printer on. Reinstall software 1 Uninstall the printer software, and then reinstall it. For more information, see "Removing and reinstalling the software" on page 133. 2 If the software still does not install correctly, visit our Web site at www.lexmark.com to check for the latest software. a In all countries or regions except the United States, select your country or region. b Click the links for drivers or downloads. c Select your printer family. d Select your printer model. e Select your operating system. f Select the file you want to download, and then follow the directions on the computer screen. Cannot print from digital camera using PictBridge These are possible solutions. Try one or more of the following: Enable PictBridge printing from camera Enable PictBridge printing on the camera by selecting the correct USB mode. For more information, see the digital camera documentation. Make sure the camera is a PictBridge-enabled digital camera 1 Disconnect the camera. 2 Connect a PictBridge-enabled digital camera to the PictBridge port. See the digital camera documentation to determine whether it is PictBridge-enabled. Check USB cable Use only the USB cable that came with the camera. Check messages If an error message appears on the display, see "Error messages" on page 163. Printer is not able to communicate with the computer The printer and computer are not able to exchange data. Verify that the printer is plugged in, and the light is on. For more information, see the related topic below. Understanding Warning levels • A green check indicates system requirements were met. • A yellow question mark indicates system requirements were not met. Most major functions will work, but you may experience some performance impact. • A red question mark indicates system requirements were not met. Most major functions may not work. • A red X indicates system requirements were not met. Installation will not continue. For proper installation, make sure the computer supports all system requirements. System requirements are located on the printer box. Troubleshooting 132
-
 1
1 -
2
-
3
-
4
-
5
-
6
-
7
-
8
-
9
-
10
-
11
-
12
-
13
-
14
-
15
-
16
-
17
-
18
-
19
-
20
-
21
-
22
-
23
-
24
-
25
-
26
-
27
-
28
-
29
-
30
-
31
-
32
-
33
-
34
-
35
-
36
-
37
-
38
-
39
-
40
-
41
-
42
-
43
-
44
-
45
-
46
-
47
-
48
-
49
-
50
-
51
-
52
-
53
-
54
-
55
-
56
-
57
-
58
-
59
-
60
-
61
-
62
-
63
-
64
-
65
-
66
-
67
-
68
-
69
-
70
-
71
-
72
-
73
-
74
-
75
-
76
-
77
-
78
-
79
-
80
-
81
-
82
-
83
-
84
-
85
-
86
-
87
-
88
-
89
-
90
-
91
-
92
-
93
-
94
-
95
-
96
-
97
-
98
-
99
-
100
-
101
-
102
-
103
-
104
-
105
-
106
-
107
-
108
-
109
-
110
-
111
-
112
-
113
-
114
-
115
-
116
-
117
-
118
-
119
-
120
-
121
-
122
-
123
-
124
-
125
-
126
-
 127
127 -
 128
128 -
 129
129 -
 130
130 -
 131
131 -
 132
132 -
 133
133 -
 134
134 -
 135
135 -
 136
136 -
 137
137 -
138
-
139
-
140
-
141
-
142
-
143
-
144
-
145
-
146
-
147
-
148
-
149
-
150
-
151
-
152
-
153
-
154
-
155
-
156
-
157
-
158
-
159
-
160
-
161
-
162
-
163
-
164
-
165
-
166
-
167
-
168
-
169
-
170
-
171
-
172
-
173
-
174
-
175
-
176
-
177
-
178
-
179
-
180
-
181
-
182
-
183
-
184
-
185
-
186
 |
 |
