Lexmark X5470 User's Guide - Page 97
Power button is not lit, Software does not install, Cancel, My Computer, Start, CD-ROM drive - and windows 8
 |
View all Lexmark X5470 manuals
Add to My Manuals
Save this manual to your list of manuals |
Page 97 highlights
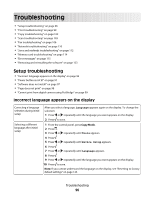
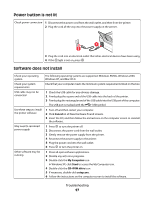
Power button is not lit Check power connection 1 Disconnect the power cord from the wall outlet, and then from the printer. 2 Plug the cord all the way into the power supply on the printer. 3 Plug the cord into an electrical outlet that other electrical devices have been using. 4 If the light is not on, press . Software does not install Check your operating system The following operating systems are supported: Windows 98/Me, Windows 2000, Windows XP, and Mac OS X. Check your system requirements Check that your computer meets the minimum system requirements listed on the box. USB cable may not be connected 1 Check the USB cable for any obvious damage. 2 Firmly plug the square end of the USB cable into the back of the printer. 3 Firmly plug the rectangular end of the USB cable into the USB port of the computer. The USB port is marked with the USB symbol. Use these steps to install the printer software 1 Turn off and then restart your computer. 2 Click Cancel on all New Hardware Found screens. 3 Insert the CD, and then follow the instructions on the computer screen to reinstall the software. May need to reconnect power supply 1 Press to turn the printer off. 2 Disconnect the power cord from the wall outlet. 3 Gently remove the power supply from the printer. 4 Reconnect the power supply to the printer. 5 Plug the power cord into the wall outlet. 6 Press to turn the printer on. Other software may be running 1 Close all open software applications. 2 Disable any anti-virus programs. 3 Double-click the My Computer icon. In Windows XP, click Start to access the My Computer icon. 4 Double-click the CD-ROM drive icon. 5 If necessary, double-click setup.exe. 6 Follow the instructions on the computer screen to install the software. Troubleshooting 97
-
 1
1 -
2
-
3
-
4
-
5
-
6
-
7
-
8
-
9
-
10
-
11
-
12
-
13
-
14
-
15
-
16
-
17
-
18
-
19
-
20
-
21
-
22
-
23
-
24
-
25
-
26
-
27
-
28
-
29
-
30
-
31
-
32
-
33
-
34
-
35
-
36
-
37
-
38
-
39
-
40
-
41
-
42
-
43
-
44
-
45
-
46
-
47
-
48
-
49
-
50
-
51
-
52
-
53
-
54
-
55
-
56
-
57
-
58
-
59
-
60
-
61
-
62
-
63
-
64
-
65
-
66
-
67
-
68
-
69
-
70
-
71
-
72
-
73
-
74
-
75
-
76
-
77
-
78
-
79
-
80
-
81
-
82
-
83
-
84
-
85
-
86
-
87
-
88
-
89
-
90
-
91
-
 92
92 -
 93
93 -
 94
94 -
 95
95 -
 96
96 -
 97
97 -
 98
98 -
 99
99 -
 100
100 -
 101
101 -
 102
102 -
103
-
104
-
105
-
106
-
107
-
108
-
109
-
110
-
111
-
112
-
113
-
114
-
115
-
116
-
117
-
118
-
119
-
120
-
121
-
122
-
123
-
124
-
125
-
126
-
127
-
128
-
129
-
130
-
131
-
132
-
133
-
134
-
135
-
136
-
137
 |
 |
