Lexmark X644E Troubleshooting Guide - Page 6
Solving copy quality, problems, Solving scan quality, Solving fax problems - scanner
 |
UPC - 734646093156
View all Lexmark X644E manuals
Add to My Manuals
Save this manual to your list of manuals |
Page 6 highlights
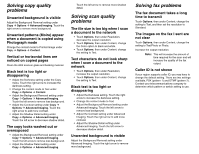
Solving copy quality problems Unwanted background is visible Adjust the Background Removal setting under Copy Options Advanced Imaging. Touch the right arrow to remove more background. Unwanted patterns (Moire) appear when a document is copied using Photograph mode Change the content mode to Printed Image under Copy Options Content. Vertical or horizontal lines are noticed on copied pages Clean the ADF scanner glass and backing material. Black text is too light or disappearing • Adjust the Darkness setting under the Copy menu. Touch the right arrow to increase the darkness setting. • Change the content mode to Text under Copy Options Content. • Adjust the Background Removal setting under Copy Options Advanced Imaging. Touch the left arrow to remove less background. • Adjust the Contrast setting under Copy Options Advanced Imaging. Touch the right arrow to add more contrast. • Adjust the Shadow Detail setting under Copy Options Advanced Imaging. Touch the left arrow to decrease shadow detail. The copy looks washed out or overexposed • Adjust the Background Removal setting under Copy Options Advanced Imaging. Touch the left arrow to remove less background. • Adjust the Shadow Detail setting under Copy Options Advanced Imaging. Touch the left arrow to remove more shadow detail. Solving scan quality problems The file size is too big when I scan a document to the network • Touch Options, then under Resolution, decrease the output resolution. • Touch Options, then under Content, change the Color option to black and white. • Touch Options, then under Content, change the setting to Text. Text characters do not look sharp when I scan a document to the network • Touch Options, then under Resolution, increase the output resolution. • Touch Options, then under Content, change the setting to Text. Black text is too light or disappearing • Adjust the Darkness setting. Touch the right arrow to increase the darkness setting. • Change the content mode to Text. • Adjust the Background Removal setting under Advanced Imaging. Touch the left arrow to remove less background. • Adjust the Contrast setting under Advanced Imaging. Touch the right arrow to add more contrast. • Adjust the Shadow Detail setting under Advanced Imaging. Touch the left arrow to decrease shadow detail. Unwanted background is visible Adjust the Background Removal setting under Advanced Imaging. Touch the right arrow to remove more background. Solving fax problems The fax document takes a long time to transmit Touch Options, then under Content, change the setting to Text, and then set the resolution to Standard. The images on the fax I sent are not clear Touch Options, then under Content, change the setting to Text/Photo or Photo. Increase the output resolution. Note: This will increase the amount of time required for the scan and will increase the quality of the fax output. Caller ID is not shown If your region supports caller ID, you may have to change the default setting. There are two settings available, FSK (pattern 1) and DTMF (pattern 2). Contact your telecommunications company to determine which pattern or switch setting to use.
-
 1
1 -
 2
2 -
 3
3 -
 4
4 -
 5
5 -
 6
6
 |
 |