Lexmark X792 Maintenance Guide - Page 7
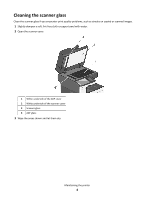
Cleaning the printhead lenses
 |
View all Lexmark X792 manuals
Add to My Manuals
Save this manual to your list of manuals |
Page 7 highlights
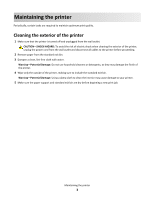
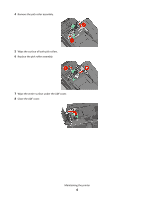
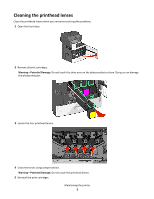
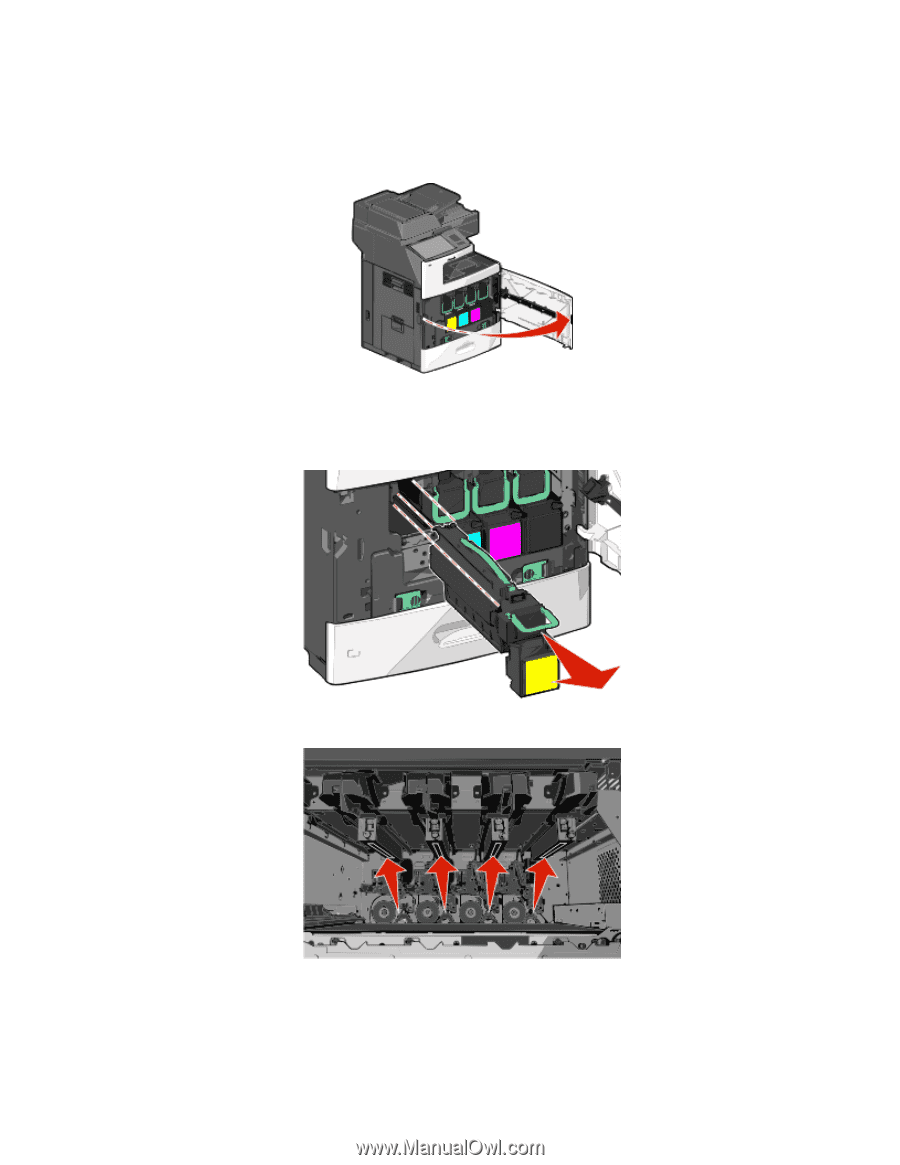
Cleaning the printhead lenses Clean the printhead lenses when you encounter print quality problems. 1 Open the front door. 2 Remove all print cartridges. Warning-Potential Damage: Do not touch the shiny area on the photoconductor drum. Doing so can damage the photoconductor. 3 Locate the four printhead lenses. 4 Clean the lenses using compressed air. Warning-Potential Damage: Do not touch the printhead lenses. 5 Reinstall the print cartridges. Maintaining the printer 7
-
 1
1 -
 2
2 -
 3
3 -
 4
4 -
 5
5 -
 6
6 -
 7
7 -
 8
8 -
 9
9 -
 10
10 -
 11
11 -
 12
12 -
13
-
14
-
15
-
16
 |
 |
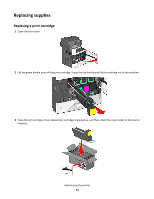
Cleaning the printhead lenses
Clean the printhead lenses when you encounter print quality problems.
1
Open the front door.
2
Remove all print cartridges.
Warning—Potential Damage:
Do not touch the shiny area on the photoconductor drum. Doing so can damage
the photoconductor.
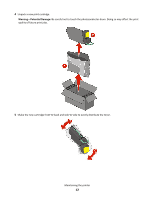
3
Locate the four printhead lenses.
4
Clean the lenses using compressed air.
Warning—Potential Damage:
Do not touch the printhead lenses.
5
Reinstall the print cartridges.
Maintaining the printer
7