Linksys PCMPC100U User Guide - Page 14
Windows Millennium Installation, and Setup - pcmpc100 drivers
 |
UPC - 745883549399
View all Linksys PCMPC100U manuals
Add to My Manuals
Save this manual to your list of manuals |
Page 14 highlights
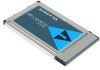
Instant EtherFast® Series Windows Millennium Installation and Setup Overview The instructions provided in this section will help you to install the EtherFast 10/100 PC Card on Microsoft Windows Millennium. After installing the EtherFast 10/100 PC Card hardware in your computer, follow these instructions to install the EtherFast 10/100 PC Card's Windows Millenium network driver from the card's driver disk. Note: Screen shots used in this Installation and Setup section are from installation of the standard EtherFast 10/100 PC Card (PCMPC100 v3). If you are installing the EtherFast 10/100 Integrated PC Card (PCM100 v2), the installation process will be unchanged, however, the product name will be different. Installing the PC Card's Driver To install the network driver, Start up your computer. 1. Start your computer. Windows will automatically detect the presence of the EtherFast 10/100 PC Card in your computer and display the Update Device Driver Wizard window. 2. Insert the EtherFast 10/100 PC Card Driver Disk into your Notebook PC's floppy disk drive and click Next. 3. Select the Specify the location of the driver (Advanced) option. Click Next. EtherFast® 10/100 PC Cards 4. If you are asked to supply a path for the driver, type A:\WINME in the drop-down box that appears and click Next. 5. Once Windows has located the driver, a message will appear that reads Windows is now ready to install the Linksys EtherFast 10/100 PC Card V3 driver. Click Next. Windows will begin copying the necessary files onto your computer. If Windows asks you to supply the original Windows ME CD-ROM, insert it now and direct Windows to the proper location for the disk (e.g., "c:\windows\options\Install" or "D:\Win9x"). If Windows asks you to supply a driver containing the letters "pc100", enter "a:\" in the Copy Files From box and click Enter. 22 23
-
 1
1 -
2
-
3
-
4
-
5
-
6
-
7
-
8
-
 9
9 -
 10
10 -
 11
11 -
 12
12 -
 13
13 -
 14
14 -
 15
15 -
 16
16 -
 17
17 -
 18
18 -
 19
19 -
20
-
21
-
22
-
23
-
24
-
25
-
26
-
27
-
28
-
29
-
30
-
31
-
32
 |
 |
