Linksys WAP55AG User Guide - Page 16
Connect to the Power, IMPORTANT, Check the LEDs, the Access Point. - setup
 |
UPC - 745883553907
View all Linksys WAP55AG manuals
Add to My Manuals
Save this manual to your list of manuals |
Page 16 highlights
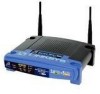
Dual-Band Wireless A + G Access Point 4. Connect the other end of the network cable to the Ethernet port on the back of the Access Point. Click the Next button to continue, or the Back button to return to a previous screen. 5. Connect the power adapter to the Access Point's Power port. Then connect the other end to an electrical outlet. Only use the power adapter supplied with the Access Point. Use of a different adapter can cause product damage. IMPORTANT: Make sure that you use the power adapter that is supplied with the Access Point. Use of a different power adapter could damage the Access Point. Click the Next button to continue, or the Back button to return to a previous screen. 6. The Access Point's LEDs should be lit. If not, re-check the connections. Click the Next button to continue or Exit to exit the Setup Wizard. Chapter 5: Setting Up the Dual-Band Wireless A + G Access Point Setup Wizard Figure 5-3: Connect to the Ethernet Port Figure 5-4: Connect to the Power Figure 5-5: Check the LEDs 10
-
 1
1 -
2
-
3
-
4
-
5
-
6
-
7
-
8
-
9
-
10
-
 11
11 -
 12
12 -
 13
13 -
 14
14 -
 15
15 -
 16
16 -
 17
17 -
 18
18 -
 19
19 -
 20
20 -
 21
21 -
22
-
23
-
24
-
25
-
26
-
27
-
28
-
29
-
30
-
31
-
32
-
33
-
34
-
35
-
36
-
37
-
38
-
39
-
40
-
41
-
42
-
43
-
44
-
45
-
46
-
47
-
48
-
49
-
50
-
51
-
52
-
53
-
54
-
55
 |
 |
