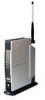
Linksys WMA11B User Guide - Page 20
on your PC. For instructions, go to Appendix E: Setting a Static IP Address on Your PC after
 |
UPC - 745883555772
View all Linksys WMA11B manuals
Add to My Manuals
Save this manual to your list of manuals |
Page 20 highlights
Wireless-B Media Adapter 11. On the screen shown in Figure 4-10, choose whether the Adapter will be connected to your wireless or wired network AFTER you have configured it. If you will connect the Adapter to your PC or router wirelessly, then click the Yes button for the Wireless network choice. If you will connect the Adapter to your PC or router using an Ethernet network cable, then click the Yes button for the Wired network choice. Note: For more information, refer to "Appendix C: Planning Your Use of the Wireless-B Media Adapter." Click the Next button. 12. On the Basic Settings screen, shown in Figure 4-11, enter a unique name for the Adapter in the Device Name field. If you network has a router or other DHCP server, select Automatically for the Network Setting, and click the Next button. If the Adapter requires a static IP address, select Static IP for the Network Setting. Enter a unique IP Address that is in the range of IP addresses appropriate for your network. In the Subnet Mask field, enter the Subnet Mask of your network; all devices on your network must use the same Subnet Mask. You must specify an IP Address and Subnet Mask for the Adapter on this screen. Then click the Next button. Note: If you set a static IP address on the Adapter, then you may also need to set a static IP address on your PC. For instructions, go to "Appendix E: Setting a Static IP Address on Your PC" after you have set up the Adapter. Figure 4-10: Connection after Setup Screen Figure 4-11: Basic Settings Screen Static IP address: a fixed address assigned to a computer or device connected to a network. Chapter 4: Setting up the Wireless-B Media Adapter 13 Running the Setup Wizard
-
 1
1 -
2
-
3
-
4
-
5
-
6
-
7
-
8
-
9
-
10
-
11
-
12
-
13
-
14
-
 15
15 -
 16
16 -
 17
17 -
 18
18 -
 19
19 -
 20
20 -
 21
21 -
 22
22 -
 23
23 -
 24
24 -
 25
25 -
26
-
27
-
28
-
29
-
30
-
31
-
32
-
33
-
34
-
35
-
36
-
37
-
38
-
39
-
40
-
41
-
42
-
43
-
44
-
45
-
46
-
47
-
48
-
49
-
50
-
51
-
52
-
53
-
54
-
55
-
56
-
57
-
58
-
59
-
60
-
61
-
62
-
63
-
64
-
65
-
66
-
67
-
68
 |
 |
