Logitech Harmony 620 User Manual - Page 4
Getting to Know Your Harmony Remote - remote control
 |
UPC - 097855048875
View all Logitech Harmony 620 manuals
Add to My Manuals
Save this manual to your list of manuals |
Page 4 highlights
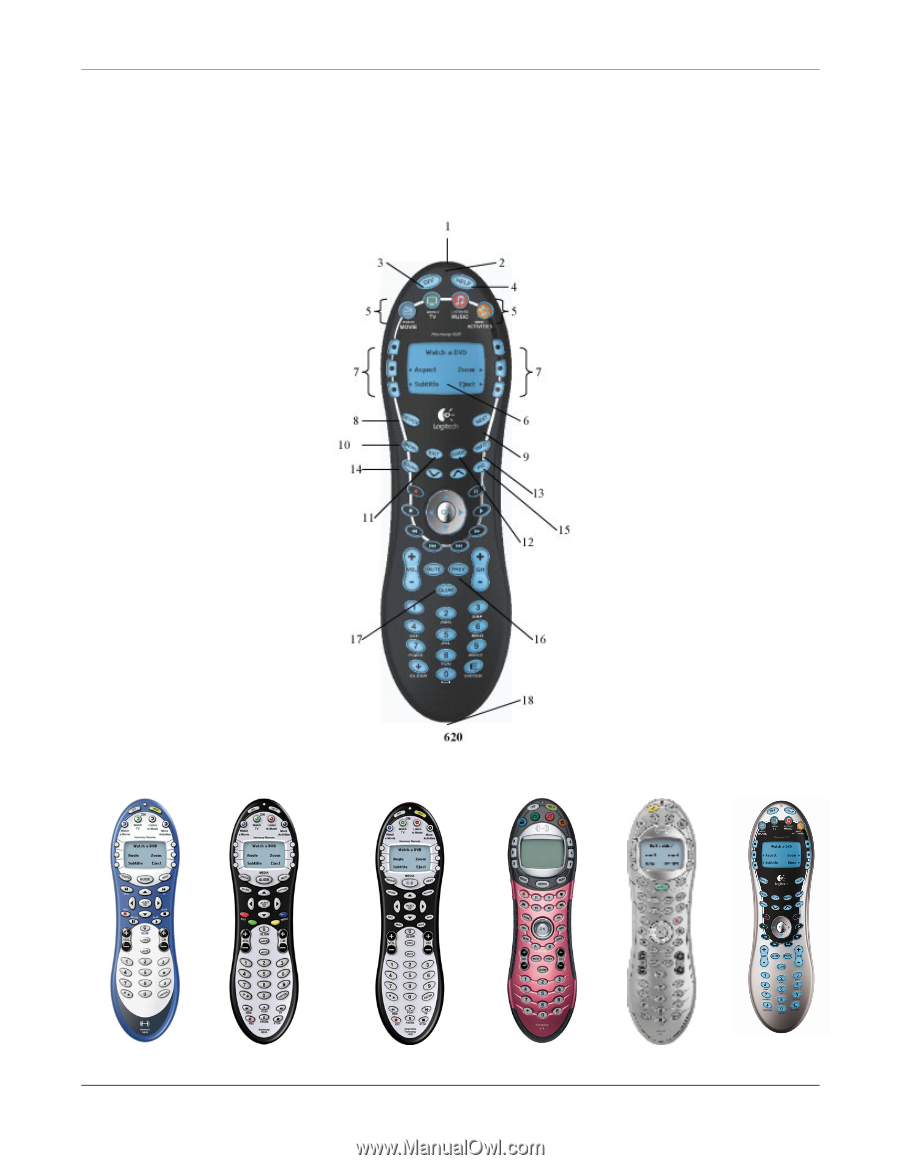
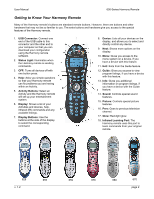
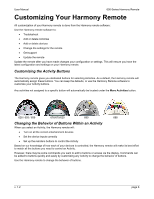
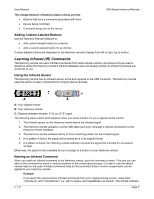
User Manual 600-Series Harmony Remote Getting to Know Your Harmony Remote Many of the Harmony remote's buttons are standard remote buttons. However, there are buttons and other hardware that may not be so familiar to you. The extra buttons and hardware give you access to the special features of the Harmony remote. 1. USB Connector: Connect one end of the USB cable to this connector and the other end to your computer so that you can download your configuration using the Harmony remote software. 2. Status Light: Illuminates when the Harmony remote is sending commands. 3. OFF: Turns all devices off with one button press. 4. Help: Asks you simple questions so that your Harmony remote can fix problems you are having within an Activity. 5. Activity Buttons: Select an Activity and the Harmony remote will set up your entertainment system. 6. Display: Shows a list of your Activities and devices, help, infrared (IR) commands and any available listings. 7. Display Buttons: Use the buttons at the side of the display to select the corresponding command. 8. Device: Lists all your devices on the display, and allows you to select and directly control any device. 9. Next: Shows more options on the display. 10. Menu: Gives you access to the menu system on a device, if you have a device with this feature. 11. Exit: Exits from the Guide feature. 12. Guide: Gives you access to view program listings, if you have a device with this feature. 13. Info: Gives you additional information on program listings, if you have a device with the Guide feature. 14. Sound: Controls special sound features. 15. Picture: Controls special picture features. 16. Prev: Goes to previous television channel. 17. Glow: Backlight glow. 18. Infrared Learning Port: The Harmony remote uses this port to learn commands from your original remote. 628 655 v. 1.2 659 676 680 670 page 2
-
 1
1 -
 2
2 -
 3
3 -
 4
4 -
 5
5 -
 6
6 -
 7
7 -
 8
8 -
 9
9 -
 10
10 -
11
 |
 |