Lowrance Link-8 DSC VHF Link-8 VHF Installation Manual EN - Page 8
Mounting bracket installation, attach the nuts
 |
View all Lowrance Link-8 DSC VHF manuals
Add to My Manuals
Save this manual to your list of manuals |
Page 8 highlights
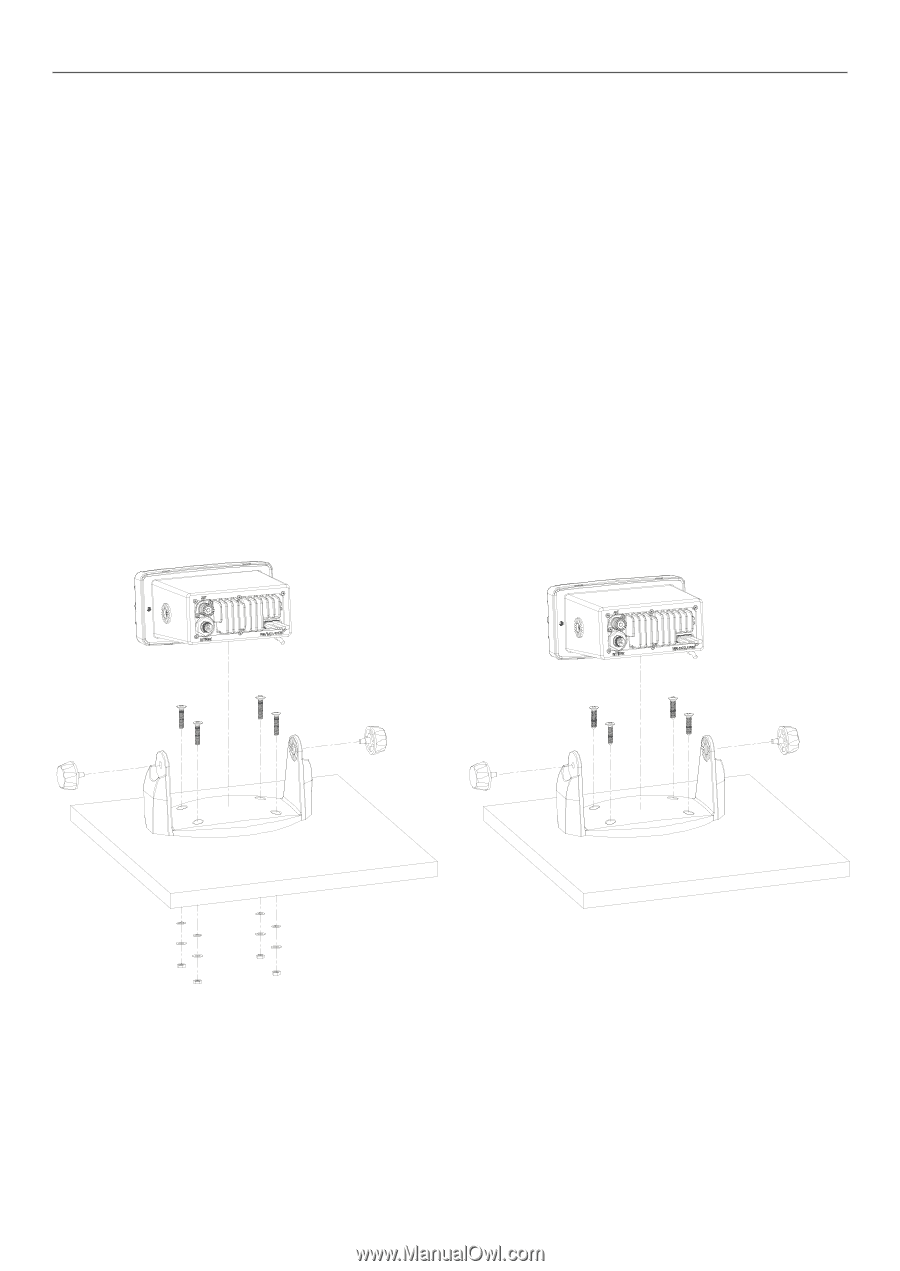
2.3.1 Mounting bracket installation 1. Hold the supplied mounting bracket at the chosen location and use a soft pencil to mark the 4 screw hole positions onto the mounting surface. 2. Drill the 4 screw holes where marked. Drill completely through the mounting surface. Note: If you are drilling into fiberglass, use a small drill bit to drill pilot holes before drilling the screw holes. 3. Use the flat screws, spring washers, plain washers, and nuts to attach the mounting bracket to the location site OR, if you cannot reach behind the mounting surface to attach the nuts, use the self-tapping screws instead of the flat screws. 4. Slide the radio into the mounting bracket. 5. Insert the 2 mounting knobs through the holes and tighten them sufficiently to hold the radio at your preferred viewing angle. 6. You can adjust the viewing angle at any time. The viewing angle has a 20º tilt range. 7. Now install the microphone wall hanger. 8 Lowrance - Link-8 Installation Instructions
-
 1
1 -
2
-
 3
3 -
 4
4 -
 5
5 -
 6
6 -
 7
7 -
 8
8 -
 9
9 -
 10
10 -
 11
11 -
 12
12 -
 13
13 -
14
-
15
-
16
-
17
-
18
-
19
-
20
 |
 |