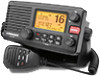
Lowrance Link-8 DSC VHF Link-8 VHF Installation Manual EN - Page 9
Recessed installation, total area that will be covered by the radio fascia after installation.
 |
View all Lowrance Link-8 DSC VHF manuals
Add to My Manuals
Save this manual to your list of manuals |
Page 9 highlights
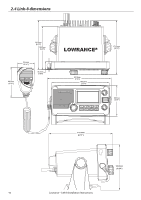
2.3.2 Recessed installation 1. Tape the supplied mounting template to the chosen location. Ensure that the template is smooth and taut. 2. Drill the 2 screw holes where marked. Drill completely through the mounting surface. Note: If you are drilling into fiberglass, use a small drill bit to drill pilot holes before drilling the screw holes. 3. Drill through the corners of the hatched area where marked, then cut out the hatched area to create a cavity in the mounting surface. (The dashed line shows the total area that will be covered by the radio fascia after installation). 4. Remove the mounting template and slide the radio into the cavity. 5. Working from the rear of the bulkhead, screw the radio firmly to the mounting surface using the 2 M5 x 32 screws with the plain washers and nuts. (The screws should not be visible from the front of the radio). 6. Now install the microphone wall hanger. Lowrance - Link-8 Installation Instructions 9
-
 1
1 -
2
-
3
-
 4
4 -
 5
5 -
 6
6 -
 7
7 -
 8
8 -
 9
9 -
 10
10 -
 11
11 -
 12
12 -
 13
13 -
 14
14 -
15
-
16
-
17
-
18
-
19
-
20
 |
 |
