MSI B85M User Guide
MSI B85M Manual
 |
View all MSI B85M manuals
Add to My Manuals
Save this manual to your list of manuals |
MSI B85M manual content summary:
- MSI B85M | User Guide - Page 1
Preface B85M-E45 Motherboard G52-78171X2 - MSI B85M | User Guide - Page 2
. Trademarks All trademarks in this manual are properties of their respective owners. ■ MSI® is registered trademark of Micro-Star trademarks of AMD Corporation. ■ Intel® is registered trademarks of Intel Corporation. ■ Windows® is V2.0 Revision History First release Date 2013/ 06 Preface - MSI B85M | User Guide - Page 3
or local distributor. Alternatively, please try the following help resources for further guidance. Visit the MSI website for technical guide, BIOS updates, driver updates, and other information: http://www.msi.com/service/download/ Contact our technical staff at: http://support.msi.com iii Preface - MSI B85M | User Guide - Page 4
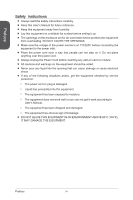
■ Always read the safety instructions carefully. ■ Keep this User's Manual for future reference. ■ Keep this equipment away ■ If any of the following situations arises, get the equipment checked by service personnel: ◯ The power cord or plug is damaged. ◯ Liquid has penetrated into the equipment. ◯ - MSI B85M | User Guide - Page 5
accordance with the instructions, may cause harmful interference to radio communications. However, there is no guarantee that interference will not occur 's authority to operate the equipment. Notice 2 Shielded interface cables and A.C. power cord, if any, must be used in order to comply with the - MSI B85M | User Guide - Page 6
Preface Radiation Exposure Statement This equipment complies with FCC radiation exposure limits set forth for an uncontrolled environment. This equipment and its antenna should be installed and operated with minimum distance 20 cm between the radiator and your body. This equipment and its antenna - MSI B85M | User Guide - Page 7
Information In compliance with chemical substances regulations, such as the EU REACH Regulation (Regulation EC No. 1907/2006 of the European Parliament and the Council), MSI provides the information of chemical substances in products at: http://www - MSI B85M | User Guide - Page 8
of "electrical and electronic equipment" cannot be discarded as municipal wastes anymore, and manufacturers of covered electronic equipment will be obligated to take back such products at the end of their useful life. MSI will comply with the product take back requirements at the end of life of - MSI B85M | User Guide - Page 9
a hacerse cargo de dichos productos al termino de su período de vida. MSI estará comprometido con los términos de recogida de sus productos vendidos en la Uni recogida de estos residuos. NEDERLANDS Om het milieu te beschermen, wil MSI u eraan herinneren dat.... De richtlijn van de Europese Unie (EU - MSI B85M | User Guide - Page 10
Tyto výrobky můžete odevzdat v místních sběrnách. MAGYAR Annak érdekében, hogy környezetünket megvédjük, illetve környezetvédőként fellépve az MSI emlékezteti Önt, hogy ... Az Európai Unió („EU") 2005. augusztus 13-án hatályba lépő, az elektromos és elektronikus berendezések hulladékairól szóló 2002 - MSI B85M | User Guide - Page 11
History ii Smartphone Application iii Technical Support iii Safety Instructions iv FCC-B Radio Frequency Interference Statement Motherboard Specifications 1-4 Connectors Quick Guide 1-6 Back Panel Quick Guide 1-8 CPU (Central Processing Unit 1-10 Introduction to the LGA 1150 CPU 1-10 CPU - MSI B85M | User Guide - Page 12
~2: Fan Power Connectors 1-20 JFP1, JFP2: System Panel Connectors 1-21 JUSB1~2: USB 2.0 Expansion Connector 1-22 JUSB3: USB 3.0 Drivers and Utilities 1-26 Total Installer 1-26 Chapter 2 Quick Installation 2-1 CPU Installation 2-2 Memory Installation 2-4 Motherboard Installation 2-5 Power - MSI B85M | User Guide - Page 13
Preface Security 3-14 Save & Exit 3-15 OC 3-16 M-FLASH 3-22 OC PROFILE 3-23 HARDWARE MONITOR 3-24 Appendix A Intel SBA A-1 Prerequisites A-2 Installing Intel SBA A-3 Software Configuration A-3 Software panel overview A-3 Password settings A-4 Help Button A-4 xiii Preface - MSI B85M | User Guide - Page 14
- MSI B85M | User Guide - Page 15
Thank you for choosing the B85M-E45 Series (MS-7817 v2.X) Micro-ATX motherboard. The B85M-E45 Series motherboards are based on Intel® B85 chipset for optimal system efficiency. Designed to fit the advanced Intel® LGA1150 processor, the B85M-E45 Series motherboards deliver a high performance and - MSI B85M | User Guide - Page 16
Chapter 1 Packing Contents Motherboard Drivers & Utilities Disc Motherboard User Guide I/O Shield SATA Cable Software & Application User Guide Optional Accessories USB 3.0 Bracket M-Connector * These pictures are for reference only and may vary without notice. * The packing contents may - MSI B85M | User Guide - Page 17
following instructions to ensure successful computer assembly. ■ Always turn off the power supply and unplug the power cord from the power outlet before on the motherboard or anywhere within the computer case. ■ Do not use the computer in a high-temperature environment. ■ Do not boot the computer - MSI B85M | User Guide - Page 18
Chapter 1 Motherboard Specifications CPU Support Chipset Memory Support Expansion Slots Onboard Graphics Storage USB Audio LAN Back Panel Connectors ■ 4th Generation Intel® Core™ i7 / Core™ i5 / Core™ i3 / Pentium® / Celeron® processors for LGA 1150 socket ■ Intel® B85 Express Chipset ■ 4x DDR3 - MSI B85M | User Guide - Page 19
4 ■ OC Genie 4 ■ CLICK BIOS 4 ■ SBA(Small Business Advantage) ■ All Solid CAPs ■ PCI Express Gen 3 ■ USB 3.0 ■ SATA 6Gb/s ■ HDMI ■ Command Center ■ Live Update ■ M-Flash ■ Drivers ■ MSI - Command Center - Super Charger - Super RAID - Live Update 5 - Fast Boot ■ 7-ZIP ■ Intel Turbo Boost Monitor - MSI B85M | User Guide - Page 20
Chapter 1 Connectors Quick Guide SYSFAN2 CPUFAN DIMM4 DIMM3 JPWR1 JCOM1 CPU Socket DIMM2 DIMM1 Back Panel PCI_E1 PCI_E2 PCI_E3 JTPM1 PCI1 JAUD1 SYSFAN1 JPWR2 JLPT1 JUSB1 JUSB2 SATA3 SATA4 JFP1 JFP2 JCI1 JBAT1 SATA2 SATA5_6 JUSB3 SATA1 Getting Started 1-6 - MSI B85M | User Guide - Page 21
Port Type Back Panel CPU Socket LGA1150 CPU Socket CPUFAN,SYSFAN1~2 Fan Power Connectors DIMM1~4 DDR3 1-17 1-17 1-19 1-19 For the latest information about CPU, please visit http://www.msi.com/service/cpu-support/ For more information on compatible components, please visit http://www - MSI B85M | User Guide - Page 22
USB 2.0 devices. It supports data transfer rate up to 5 Gbit/s (SuperSpeed). Important In order to use USB 3.0 devices, you must connect to a USB 3.0 port. If a USB cable is used, it must be USB 3.0 compliant. ▶ HDMI Port The High-Definition Multimedia Interface (HDMI) is an all-digital audio-video - MSI B85M | User Guide - Page 23
Chapter 1 Important This platform supports dual-display and triple-display function. Extend mode (Extend the desktop to the second and third monitor) HDMI+VGA VGA+DVI-D DVI-D+HDMI ◯ ◯ ◯ Clone mode ( - MSI B85M | User Guide - Page 24
's power cord to ensure the safety of the CPU. Overclocking This motherboard is designed to support overclocking. Before attempting to overclock, please make sure that all other system components can tolerate overclocking. Any attempt to operate beyond product specifications is not recommend. MSI - MSI B85M | User Guide - Page 25
can damage both the CPU and the motherboard. Video Demonstration Watch the video to learn how to install CPU & heatsink. at the address below. http://youtu.be/bf5La099urI 1. Push the load lever down to unclip it and lift to the fully open position. 2. The load plate will automatically lift up as - MSI B85M | User Guide - Page 26
Chapter 1 Alignment Key Retention knob 5. When you press down the load lever the PnP cap will automatically pop up from the CPU socket. Do not discard the PnP cap. Always replace the PnP cap if the CPU is removed from the socket. 6. Evenly spread a thin layer of thermal paste (or thermal tape - MSI B85M | User Guide - Page 27
11. Finally, attach the CPU fan cable to the CPU fan connector on the motherboard. Motherboard Fastener-end Important • Confirm that the CPU heatsink has formed a tight seal with the CPU before booting your system. • Whenever the CPU is not installed, always protect the CPU socket pins by covering - MSI B85M | User Guide - Page 28
please visit http://www.msi.com/service/test-report/ Chapter 1 DIMM1 DIMM2 DIMM3 DIMM4 Video Demonstration Watch the video to learn how to install and density in Dual-Channel mode. • Due to chipset resource usage, the system will only detect up to 31+ GB of memory (not full 32 GB) when all DIMM - MSI B85M | User Guide - Page 29
with the screws provided with your computer case. The locations of the screw holes on the motherboard are shown below. For more information, please refer to the manual that came with the computer case. The I/O ports should be facing toward the rear of the computer case. They should line up - MSI B85M | User Guide - Page 30
supply cable with the connector and firmly press the cable into the connector. If done correctly, the clip on the power cable should be hooked on the motherboard's power connector. 2.G1.rGouronudnd JPWR1 4.+31.+21V2V 1.+23.+3.33.G4V.3.r+5Vo.5uG6Vn.r7+do.5uG8Vn.rP9do.Wu51nV0R1d.S1+O1B.1+K2211 - MSI B85M | User Guide - Page 31
PCI Expansion Slot The PCI slot supports additional LAN, SCSI, USB, and other add-on cards that comply with PCI specifications. Important When adding or removing expansion cards, always turn off the power supply and unplug the power supply power cable from the power outlet. Read the expansion card - MSI B85M | User Guide - Page 32
expansion slot(s) that will lock in place. 4. If needed, screw the edge of the graphics card to the computer case. Some video cards might require a power cable directly from the power supply. 5. Please consult your video card's manual for further instructions regarding driver installation or other - MSI B85M | User Guide - Page 33
SATA devices, such as HDDs, SSDs, and optical drives, be screwed down into the case. Refer to the manual that came with your computer case or your SATA device for further installation instructions. • Please do not fold the SATA cable at a 90-degree angle. Data loss may result during transmission - MSI B85M | User Guide - Page 34
on-board, you must use a specially designed fan with a speed sensor to take advantage of the CPU fan control. Remember to connect all system fans. Some system fans may not connect to the motherboard and will instead connect to the power supply directly. A system fan can be plugged into any available - MSI B85M | User Guide - Page 35
with the Intel® Front Panel I/O Connectivity Design Guide. When installing the front panel connectors, please use the optional M-Connector to simplify installation. Plug all the wires from the computer case into the M-Connector and then plug the M-Connector into the motherboard. Video Demonstration - MSI B85M | User Guide - Page 36
Note that the VCC and GND pins must be connected correctly to avoid possible damage. JUSB3: USB 3.0 Expansion Connector The USB 3.0 port is backwards compatible with USB 2.0 devices. It supports data transfer rates up to 5Gbits/s (SuperSpeed). 111.U2S1.U3B1S.2G4B.1.0rU25o+..Su10Un6B-S1d.3G7B_1 - MSI B85M | User Guide - Page 37
you must enter the BIOS utility and clear the record. 2.C1.IGNTroRuUnd JAUD1: Front Panel Audio Connector This connector allows you to connect the front audio panel located on your computer case. This connector is compliant with the Intel® Front Panel I/O Connectivity Design Guide. 2.G4r.oN6uC.Mn8d - MSI B85M | User Guide - Page 38
Module) Module. Please refer to the TPM security platform manual for more details and usages. 2.34V.36S..3tS8aVe.n15Prd0iVaob1 optional parallel port bracket. The parallel port is a standard printer port that supports Enhanced Parallel Port (EPP) and Extended Capabilities Parallel Port (ECP) mode. - MSI B85M | User Guide - Page 39
CMOS RAM onboard that is external powered from a battery located on the motherboard to save system configuration data. With the CMOS RAM, the system can automatically boot into the operating system (OS) every RAM while the system is on because it will damage the motherboard. 1-25 Getting Started - MSI B85M | User Guide - Page 40
and Utilities After you install the operating system you will need to install drivers to maximize the performance of the new computer you just built. MSI motherboard comes with a Driver Disc. Drivers allow the computer to utilize your motherboard more efficiently and take advantage of any special - MSI B85M | User Guide - Page 41
Chapter 2 Quick Installation This chapter provides demonstration diagrams about how to install your computer. Some of the installations also provide video demonstrations. Please link to the URL to watch it with the web browser on your phone or tablet. You may have even link to the - MSI B85M | User Guide - Page 42
CPU Installation http://youtu.be/bf5La099urI 1 2 Chapter 2 3 4 5 6 Quick Installation 2-2 - MSI B85M | User Guide - Page 43
7 Chapter 2 8 9 2-3 Quick Installation - MSI B85M | User Guide - Page 44
Memory Installation http://youtu.be/76yLtJaKlCQ 1 Chapter 2 2 3 Quick Installation 2-4 - MSI B85M | User Guide - Page 45
Motherboard Installation 1 Chapter 2 2 2-5 Quick Installation - MSI B85M | User Guide - Page 46
3 Chapter 2 Quick Installation 2-6 - MSI B85M | User Guide - Page 47
Power Connectors Installation 1 http://youtu.be/gkDYyR_83I4 Chapter 2 2 E6M88SMIC4 E6M88SMIC4 E6M88SMIC4 E6M88SMIC4 E6M88SMIC4 E6M88SMIC4 or E6M88SMIC4 E6M88SMIC4 E6M88SMIC4 2-7 Quick Installation - MSI B85M | User Guide - Page 48
3 E6M88SMIC4 E6M88SMIC4 E6M88SMIC4 Chapter 2 Quick Installation 2-8 - MSI B85M | User Guide - Page 49
SATA HDD Installation http://youtu.be/RZsMpqxythc 1 or Chapter 2 2 E6M88SMIC4 E6M88SMIC4 E6M88SMIC4 E6M88SMIC4 E6M88SMIC4 E6M88SMIC4 E6M88SMIC4 E6M88SMIC4 E6M88SMIC4 E6M88SMIC4 E6M88SMIC4 E6M88SMIC4 E6M88SMIC4 E6M88SMIC4 E6M88SMIC4 E6M88SMIC4 or 2-9 Quick Installation - MSI B85M | User Guide - Page 50
mSATA SSD Installation Chapter 2 Quick Installation 2-10 - MSI B85M | User Guide - Page 51
Front Panel Connector Installation JFP1 Connecotr Installation http://youtu.be/DPELIdVNZUI POWER SW POWER LED H.D.D. LED REST SW PWR_SWPWR_SW+ FP PWR/SLP FP PWR/SLP HD_LED+ HD_LEDRST_SWRST_SW+ RSVD_DNU HD_LED+ HD_LEDRST_SWRST_SW+ RSVD_DNU Chapter 2 E6M88SMIC4 E6M88SMIC4 E6M88SMIC4 - MSI B85M | User Guide - Page 52
E6M88SMIC4 E6M88SMIC4 E6M88SMIC4 USB3.0 Connector Installation E6M88SMIC4 E6M88SMIC4 E6M88SMIC4 E6M88SMIC4 E6M88SMIC4 E6M88SMIC4 USB E6M88SMIC4 E6M88SMIC4 E6M88SMIC4 E6M88SMIC4 Chapter 2 Quick Installation E6M88SMIC4 E6M88SMIC4 E6M88SMIC4 E6M88SMIC4 E6M88SMIC4 E6M88SMIC4 - MSI B85M | User Guide - Page 53
Graphics Card Installation http://youtu.be/mG0GZpr9w_A 1 2 Chapter 2 2-13 Quick Installation - MSI B85M | User Guide - Page 54
3 4 Chapter 2 5 Quick Installation 2-14 - MSI B85M | User Guide - Page 55
for optimum use. Using your mouse and keyboard, users can change BIOS settings, monitor CPU temperature, select the boot device priority and view system information such as the CPU name, DRAM capacity, the OS version and the BIOS version. Users can import and export parameter data for backup or for - MSI B85M | User Guide - Page 56
we recommend that you keep the default settings to avoid possible system damage or failure booting due to inappropriate BIOS configuration. Entering BIOS Setup Power on the computer and the system will start the Power On Self Test (POST) process. When the message below appears on the screen, please - MSI B85M | User Guide - Page 57
to update BIOS with a USB flash disk. ■ OC PROFILE -This menu is used to set various overclocking profiles. ■ HARDWARE MONITOR - This menu is used to set the speeds of fans and monitors voltages of system. ■ BOARD EXPLORER - It will provide the information of the installed devices on the motherboard - MSI B85M | User Guide - Page 58
will be light. Enabling OC Genie function can automatically overclock with MSI optimized overclocking profile. Important We recommend that you do not to make any modification in OC menu and do not to load defaults after enabling the OC Genie function. ▶ Model Name Shows the model name of motherboard - MSI B85M | User Guide - Page 59
Operation You can control BIOS settings with the mouse and the keyboard. The changes Decrease the numeric value or make changes General Help CPU Specifications Enter Memory-Z Load optimized defaults OC Profile Load From USB OC Profile Save to USB Save Change and Reset Save a screenshot to a - MSI B85M | User Guide - Page 60
of connected SATA device. Important If the connected SATA device is not displayed, turn off computer and re-check SATA cable and power cable connections of the device and motherboard. ▶ System Information Shows detailed system information, including CPU type, BIOS version, and Memory (read only - MSI B85M | User Guide - Page 61
UEFI network stack. ▶ Ipv4 PXE Support [Enabled] When "Enabled", the system UEFI network stack will support Ipv4 protocol. This item will appear when "Network Stack" is enabled. [Enabled] Enables the Ipv4 PXE boot support. [Disabled] Disables the Ipv4 PXE boot support. Chapter 3 3-7 BIOS Setup - MSI B85M | User Guide - Page 62
[Enabled] When "Enabled", the system UEFI network stack will support Ipv6 protocol. This item will appear when "Network Stack" is enabled. [Enabled] Enables the Ipv6 PXE boot support. [Disabled] Disables the Ipv6 PXE boot support. ▶ SATA Mode [AHCI Mode] Sets the operation mode of the onboard - MSI B85M | User Guide - Page 63
when wakened. [Enabled] Enables this function. [Disabled] Disables this function. ▶ RapidStart Display Type [BIOS Save/Restore] Selects the screen type of Intel Rapid Start Display. [BIOS Save/Restore] The BIOS POST splash screen will be saved/ restored. [DeskTop Save/Restore] The desktop image - MSI B85M | User Guide - Page 64
CPU supports this function and "Intel C-State" is enabled. [Enabled] Enhance the dynamic IO load adjusted performance for accelerating the SSD speed. [Disabled] Disables this feature. ▶ USB Configuration Sets the onboard USB BIOS will optimize the IRQ automatically or you can set it manually. - MSI B85M | User Guide - Page 65
: When enabled, the system will not support RTC wake up event functions. ▶ Restore after AC Power Loss [Power Off] Sets the system behaviors while encountering the AC power loss. [Power Off] Leaves the system in power off state after restoring AC power. [Power On] Boot up the system after restoring - MSI B85M | User Guide - Page 66
you want to enter BIOS with enabled "MSI Fast Boot" mode or enabled "Fast Boot" mode, you have to click the "GO2BIOS" tab on MSI Fast Boot utility screen or press the "GO2BIOS" button (optional) on the motherboard. And then the system will enter to BIOS setup directly at next boot. ▶ Internal GOP - MSI B85M | User Guide - Page 67
event by BIOS or operating system. [BIOS] Activates the following items, and use these items to set the wake up events. [OS] The wake up events will be defined by OS. ▶ Resume By RTC Alarm [Disabled] Disables or enables the system wake up by RTC Alarm. [Enabled] Enables the system to boot up on - MSI B85M | User Guide - Page 68
long pressing the power button about 2~4 seconds when the system is off. [Disabled] Disables this function. ▶ Boot Mode Select [LEGACY+UEFI] Sets the system boot mode from legacy or UEFI architecture depending on OS installation requirement. [UEFI] Enables UEFI BIOS boot mode support only. [LEGACY - MSI B85M | User Guide - Page 69
to discard current all changes and restore to the previous values. ▶ Restore Defaults This item is used to restore/ load all default values by the BIOS vendor. ▶ Boot Override The installed boot-able devices will appear on this menu, you can select one of them be - MSI B85M | User Guide - Page 70
Enhanced Intel® SpeedStep Technology. This item will be available when "Adjust CPU Ratio" is set to [Auto]. [Enabled] Enables the EIST to adjust CPU voltage and core frequency dynamically. It can decrease average power consumption and average heat production. [Disabled] Disables EIST. BIOS Setup - MSI B85M | User Guide - Page 71
Intel® Turbo Boost. This item appears when the installed CPU supports this function. [Enabled] Enables this function to boost CPU performance CPU. This item appears when a CPU that supports this adjustment is installed. ▶ DRAM Frequency [Auto] Sets the DRAM frequency. Please note the overclocking - MSI B85M | User Guide - Page 72
. [Override Mode] Allows you to set this voltages manually. ▶ CPU Core Voltage [Auto] Sets CPU core voltage. If set to "Auto", BIOS will set the voltages automatically or you can set it manually. ▶ Current CPU Core Voltage Shows the current CPU core voltage. Read-only. ▶ DRAM Voltage [Auto] Sets - MSI B85M | User Guide - Page 73
. Read only. ▶ CPU Features Press to Intel Hyper-Threading technology treats the multi cores inside the processor as multi logical processors that can execute instructions BIOS will limit the maximum CPUID input value to circumvent boot problems with older operating system that do not support - MSI B85M | User Guide - Page 74
▶ Package C State limit [Auto] This item allows you to select a CPU C-state mode for power-saving when system is idle. This item appears when "Intel C-State" is enabled. [Auto] This setting will be configured automatically by BIOS. [C0~C7s] The power-saving level from high to low is C7s, C7, C6 - MSI B85M | User Guide - Page 75
items will appear when "Intel Turbo Boost " is enabled. ▶ Long Duration Power Limit (W) [Auto] Sets the long duration TDP power limit for CPU in These items only appear when a CPU that support this function is installed. These items allow you to set the CPU ratios for different number of active - MSI B85M | User Guide - Page 76
the system to boot from the BIOS within ROM on motherboard. *This may cause system unstable, MSI recommend it only for power users. ▶ Select one file to boot Selects a BIOS file in the USB flash disk (NTFS/ FAT 32 format) to boot the system. This item will selectable when the "BIOS Boot function" is - MSI B85M | User Guide - Page 77
Clears the current overclocking profile. ▶ OC Profile Save to USB Saves OC profile to the USB flash disk drive. The USB flash disk should be FAT32 format only. ▶ OC Profile Load from USB Loads OC profile from the USB flash disk drive. The USB flash disk should be FAT32 format only. 3-23 BIOS Setup - MSI B85M | User Guide - Page 78
over the maximum temperature, the CPU/ system fan will run at the maximum speed. When the current CPU temperature is under the minimum temperature, the CPU/ system fan will run at the minimum speed. In this field, you can set the CPU and system fans' speeds and target temperatures. BIOS Setup 3-24 - MSI B85M | User Guide - Page 79
set the temperatures and fan speeds. a b d c e f ■ a - Selects a fan you want to symbol to set the minimum fan speed in percentage. ■ e - Slides the arrow symbol to set the maximum fan speed in percentage. ■ . • The changed settings will become effective after you save the changes and - MSI B85M | User Guide - Page 80
- MSI B85M | User Guide - Page 81
Appendix A Intel SBA Intel® Small Business Advantage (Intel® SBA) provides an out-of-the-box hardware-based security and productivity suite designed for the small business user. Intel® SBA includes a customizable user interface and several bundled Intel applications. - MSI B85M | User Guide - Page 82
Appendix A Prerequisites ■ Supported Operating Systems Intel SBA supports following OS: ■ Windows 7 Professional 64-bit and 32-bit ■ Windows 7 Enterprise 64-bit ■ Windows 8 PRO 64-bit and 32-bit ■ Required User Permissions You must run the installer and the customization wizard with a user that has - MSI B85M | User Guide - Page 83
ROM drive. The setup screen will automatically appear. 3. Click OTHERS tab. 4. Select Intel SBA to start installing. 5. Follow the on-screen instructions to install. Software Configuration After installation of the Intel SBA software is complete, the Intel SBA service is started. The desktop, system - MSI B85M | User Guide - Page 84
main menu of the GUI. Appendix A Fill out the form to create the new password and click "Save". You will be asked to enter the password when you want to start using Intel SBA. Important • Upon completion of the password settings, please keep your password secure. • Please remember your answers to
-
 1
1 -
 2
2 -
 3
3 -
 4
4 -
 5
5 -
 6
6 -
 7
7 -
8
-
9
-
10
-
11
-
12
-
13
-
14
-
15
-
16
-
17
-
18
-
19
-
20
-
21
-
22
-
23
-
24
-
25
-
26
-
27
-
28
-
29
-
30
-
31
-
32
-
33
-
34
-
35
-
36
-
37
-
38
-
39
-
40
-
41
-
42
-
43
-
44
-
45
-
46
-
47
-
48
-
49
-
50
-
51
-
52
-
53
-
54
-
55
-
56
-
57
-
58
-
59
-
60
-
61
-
62
-
63
-
64
-
65
-
66
-
67
-
68
-
69
-
70
-
71
-
72
-
73
-
74
-
75
-
76
-
77
-
78
-
79
-
80
-
81
-
82
-
83
-
84
 |
 |

B85M-E45
Motherboard
G52-78171X2
Preface