MSI MS-7222-020 User Guide - Page 23
Memory - motherboard
 |
View all MSI MS-7222-020 manuals
Add to My Manuals
Save this manual to your list of manuals |
Page 23 highlights
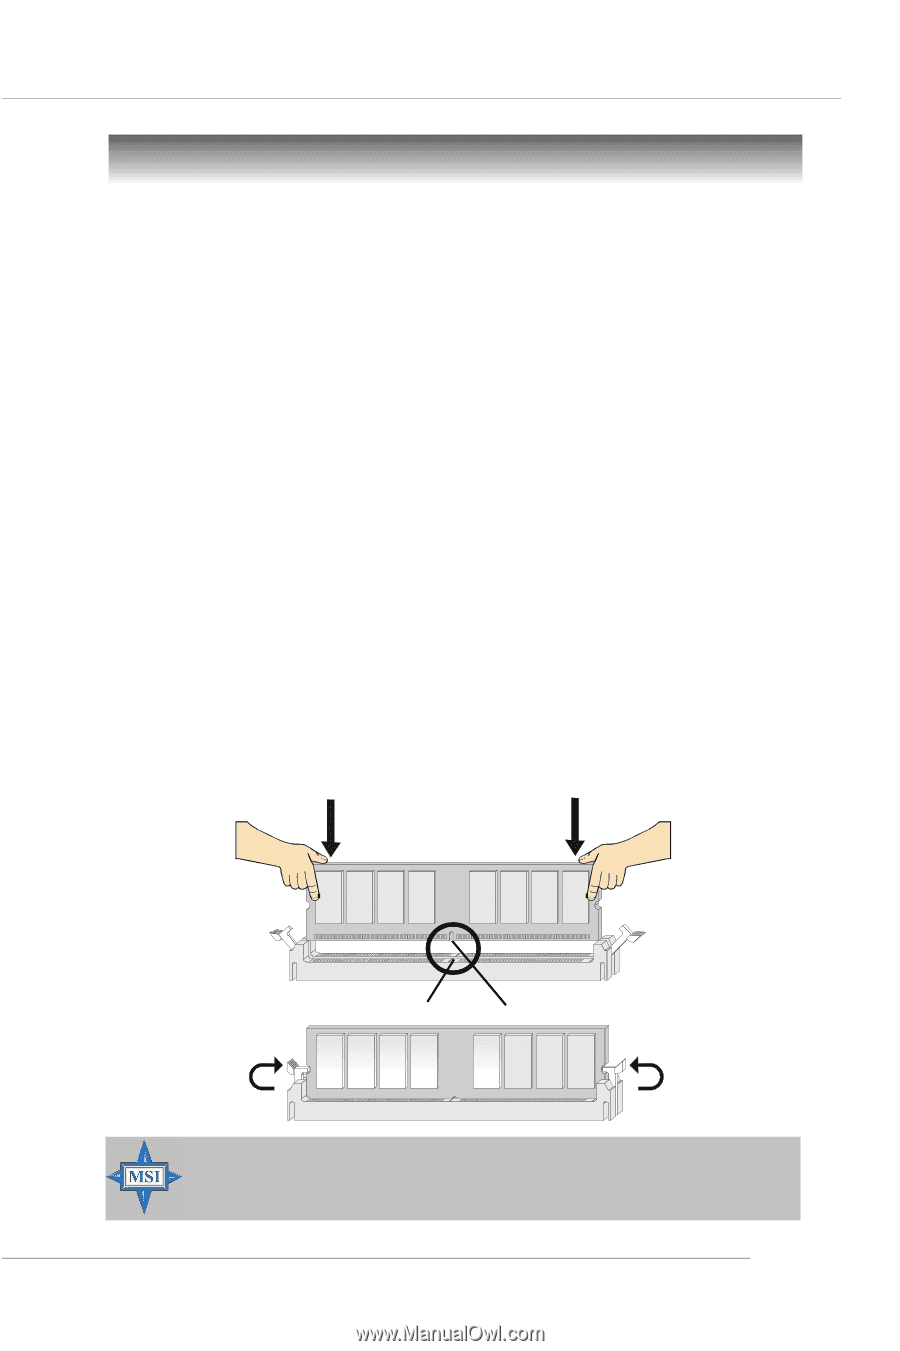
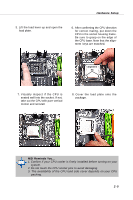
Hardware Setup Memory The mainboard provides 2 slots for 240-pin DDR2 DIMM, which supports the memory size up to 2GB. Since DDR2 modules are not interchangeable with DDR1 and the DDR2 standard is not backward compatible, you should always install DDR2 memory module in the DDR2 slot. Otherwise, you are not able to boot up your system and your mainboard might be damaged. Introduction to DDR2 SDRAM DDR2 is a new technology of memory module, and its speed is the top limit of current DDR1 technology. DDR2 uses a 1.8V supply for core and I/O voltage, compared to 2.5V for DDR1, and requires 28% less power than DDR1 chips. DDR2 truly is the future of memory, but will require some changes as the technology is not backwardly compatible and only motherboards specifically designed for DDR2 memory will be able to support these chips. DDR2 incorporates new features at the chip level that give it better signal integrity, thereby enabling higher clock speeds. DDR2 modules have 240 pins, versus 184 pins on a DDR1 module, and the length of DDR2 module is 5.25". DDR2 modules have smaller and tighter spaced pins. The height of DDR2 modules varies, but they will typically be less than 1.3" in height. Installing DDR2 Modules 1. The DDR2 DIMM has only one notch on the center of module. The module will only fit in the right orientation. 2. Insert the DIMM memory module vertically into the DIMM slot. Then push it in until the golden finger on the memory module is deeply inserted in the socket. 3. The plastic clip at each side of the DIMM slot will automatically close. Volt Notch MSI Reminds You... You can barely see the golden finger if the module is properly inserted in the socket. 2-7
-
 1
1 -
2
-
3
-
4
-
5
-
6
-
7
-
8
-
9
-
10
-
11
-
12
-
13
-
14
-
15
-
16
-
17
-
 18
18 -
 19
19 -
 20
20 -
 21
21 -
 22
22 -
 23
23 -
 24
24 -
 25
25 -
 26
26 -
 27
27 -
 28
28 -
29
-
30
-
31
-
32
-
33
-
34
-
35
-
36
-
37
-
38
-
39
-
40
-
41
-
42
-
43
-
44
-
45
-
46
-
47
-
48
-
49
-
50
-
51
-
52
-
53
-
54
-
55
-
56
-
57
-
58
-
59
-
60
-
61
-
62
-
63
-
64
-
65
-
66
-
67
-
68
-
69
-
70
-
71
-
72
-
73
-
74
-
75
-
76
-
77
-
78
-
79
-
80
-
81
-
82
-
83
-
84
-
85
-
86
-
87
 |
 |