MSI S260 User Manual
MSI S260 Manual
 |
View all MSI S260 manuals
Add to My Manuals
Save this manual to your list of manuals |
MSI S260 manual content summary:
- MSI S260 | User Manual - Page 1
MSI MEGA BOOK S260 Notebook PC User's Guide G52-B1012X1 - MSI S260 | User Manual - Page 2
installation. This equipment generates, uses and can radiate radio frequency energy and, if not installed and used in accordance with the instructions, may cause harmful interference to radio communications. However, there is no guarantee that interference will not occur in a particular installation - MSI S260 | User Manual - Page 3
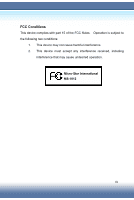
conditions: 1. This device may not cause harmful interference. 2. This device must accept any interference received, including interference that may cause undesired operation. Micro-Star International MS-1012 III - MSI S260 | User Manual - Page 4
replaced. Replace only with the same or equivalent type recommended by the equipment manufacturer. Discard used batteries according to manufacturer's instructions. (Finnish) VAROITUS: Paristo voi räjähtää, jos se on virheellisesti asennettu. Vaihda paristo ainoastaan valmistajan suosittelemaan - MSI S260 | User Manual - Page 5
is classified as a "CLASS 1 LASER PRODUCT." To use this model properly, read the instruction manual carefully and keep this manual for your future reference. In case of any trouble with this model, please contact your nearest "AUTHORIZED service station." To prevent direct exposure to the laser beam - MSI S260 | User Manual - Page 6
1. Read the safety instructions carefully and thoroughly. 2. Save this User Guide for possible use later. 3. Keep this equipment away from humidity and high temperature. 4. Lay this equipment on a stable surface before setting it up. 5. The openings - MSI S260 | User Manual - Page 7
situations arises, get the equipment checked by a service personnel: z The power cord or plug is has not work well or you can not get it work according to User Guide. z The equipment was dropped and damaged. z The equipment has obvious battery replacement, use the same or equivalent type of - MSI S260 | User Manual - Page 8
guide. If you are not sure about these information, such as the computer specification and equipment, please ask your local vendor for help. Trademarks All trademarks are the properties of their respective owners. Microsoft is a registered trademark of Microsoft Corporation. Windows®98/ME, 2000/XP - MSI S260 | User Manual - Page 9
Technical Support z Visit the MSI website for FAQ, technical guide, driver and software updates, and other information: http://www.msi.com.tw/. z Contact our technical staff at: [email protected]. Release History Version 1.0 Revision Note First Release Date January 2005 IX - MSI S260 | User Manual - Page 10
Table of Content Product View UNPACKING 2 SPECIFICATION 3 Physical Characteristic 3 CPU 3 Core Chips 3 Memory 3 Power 3 Storage 4 I/O Port 4 Communication Port 4 PCMCIA 5 Display 5 Video 5 Audio 6 Software & BIOS 6 Other 6 X - MSI S260 | User Manual - Page 11
View THE BATTERY PACK 20 Releasing the Battery Pack 21 Replacing the Battery Pack 22 Turning On/Off the Notebook PC 19 THE AC ADAPTER 23 Connecting the AC Power 23 Using the Battery Pack 24 Battery Safety Tips 24 Conserving Battery Power 24 Charging the Battery Pack 25 Disconnecting - MSI S260 | User Manual - Page 12
the Top Cover 27 Turning On the Computer 27 CONFIGURATION WINDOWS SYSTEM 28 TURNING OFF THE NOTEBOOK PC 30 BASIC OPERATION Safety and Comfort Tips 32 Safety Comfort Tips 32 Have a Good Work Habit 33 Knowing the Keyboard 34 Typewriter Keys 35 Cursor Keys 36 Numeric Keys 37 Function - MSI S260 | User Manual - Page 13
The Hard Disk Drive 43 Using the Optical Storage 44 Inserting the CD 45 Removing the CD 46 Releasing the CD Manually 47 Peripheral Device Connecting the External Devices 50 Connecting the Peripheral Devices 50 Connecting the Communication Devices 54 Using the LAN 54 Using the Modem 54 - MSI S260 | User Manual - Page 14
Setup Utility 60 When to Use BIOS Setup 60 How to Run BIOS Setup 60 Control Keys 61 BIOS SETUP MENU 62 MAIN MENU 63 System Overview 63 System Memory 63 System Time 64 System Date 64 Advanced Settings 65 Primary IDE Master/Slave 65 Legacy USB Support 65 Intel® SpeedStep™ Technology 66 - MSI S260 | User Manual - Page 15
Need the Utility CD 76 How to Use the Utility CD 76 The Setup program includes 77 MSI Live UpdateTM3 78 Using MSI Live UpdateTM3 78 Updating BIOS 79 Updating Driver 80 Updating Utility 80 Norton Internet SecurityTM2005 81 Registering Norton Internet SecurityTM2005 81 Advanced Software 83 - MSI S260 | User Manual - Page 16
CyberLink Multimedia Launcher 93 PowerDirector 93 PowerProducer 94 Power2Go 95 PowerDVD 96 Control Panel Functions 98 XVI - MSI S260 | User Manual - Page 17
Product View 1 - MSI S260 | User Manual - Page 18
future. The package should contain the following items: One Notebook PC 1012 One Recovery CD. One Software CD containing the drivers and utilities. One User's Manual and one Quick Guide. One Warranty Card. Accessories: High-capacity Li-ion battery pack. AC adapter and power cord. Phone cable/Phone - MSI S260 | User Manual - Page 19
400MHz Support Enhance Speed Step III North Bridge Intel® 915GM South Bridge y Memory Intel® ICH6-M Technology DDR 333 Memory DDR Battery Type I 8 cells (Li-lon)(4400mAh) 4 cells (Li-lon)(2200mAh) Battery Type I Life Battery mark 2.5Hr/5Hr (4/8) Battery Type I Life In 4 days (S3, battery - MSI S260 | User Manual - Page 20
Stand by Mode RTC Battery Power Management y Storage HDD form factor IDE Controller Optical Device y I/O Port Monitor(VGA) USB SPDIF Out Headphone Out IEEE1394 Mic-in Lin-in RJ11 RJ45 y Communication Port 56K Fax/MODEM MDC (AC'97) 5 Years (non-rechargeable) Support ACPI 1.0b & 2.0 SMBIOS 2.3X 9.5mm - MSI S260 | User Manual - Page 21
on S3/S4/S5 state LAN Boot --- Yes Wfm 2.0 support IEEE 802.11b/g RICOH R5C593 MMC/SD/MS 3 in one card reader x1 Type II x 1 Support 12.1" WXGA Brightness controlled by K/B hot-keys Embedded in Intel 915GM Shared System Memory 1280 x 800 WXGA 800x600, max, 32bit color 1024x768, max, 32bit color - MSI S260 | User Manual - Page 22
y Audio Sound Controller Sound Codec chip Internal Speaker SoundBlaster Sound Volume y Software & BIOS Support OS USB Flash Boot BIOS y Other AMP: TI TPA0202) SoundBlaster compatible (Not support DOS) Adjust by volume button, K/B hot-key & SW Win XP Home and Professional edition Yes, USB floppy - MSI S260 | User Manual - Page 23
CONFIGURATION This section provides you the description of basic aspects of your Notebook PC. It will help you to know more about the appearance of this computer before using it. Top-open of top-open view and description showing below will lead you to browse the main operating area of your PC. 7 - MSI S260 | User Manual - Page 24
you to do works more efficient. Keyboard The built-in keyboard provides all the functions of a full-sized 86-key (US-defined) keyboard. (See Basic Operation for more information) Besides, the location of CPU/Hard Disk Drive/Memory is under the keyboard panel, please refer to the following positions - MSI S260 | User Manual - Page 25
CPU Memory Hard Disk Drive Note: In this Notebook PC, the CPU compartment and Memory compartment locate under the keyboard panel. If the CPU and Memory compartments of this Notebook PC need to be fixed or upgraded, they should be reached by lifting the keyboard panel. Touchpad It is the pointing - MSI S260 | User Manual - Page 26
The IEEE 1394 port is a high-speed bus that allows you to connect high-end digital devices such as the DV (digital video camera). Audio Port Connectors Make high quality sound blaster with stereo system and Hi-Fi function supported. a. Line In: Used for external CD player, Tape recorder or other - MSI S260 | User Manual - Page 27
hard disk drive. AC Power On: Glowing Blue when the AC Power is activated and blinking Blue when computer is getting into sleep mode. Battery Status: Blinking Green when the battery Low Battery status). (Note: The status would show when AC adapter connected). Wireless LAN: Glowing Blue when wireless - MSI S260 | User Manual - Page 28
The USB 2.0 port allows you to connect USB-interface peripheral devices, such as the mouse, keyboard, modem, portable hard disk module, printer and more. RJ-11 Connector The computer provides a built-in modem that allows you to connect an RJ-11 telephone line through this connector. With the 56K - MSI S260 | User Manual - Page 29
VGA Port The 15-pin-D-sub VGA port allows you to connect an external monitor or other standard VGA-compatible device (such as a projector) for a great view of the computer display. Power Connector To connect the AC adapter and supply power for the computer. 13 - MSI S260 | User Manual - Page 30
DVD-ROM/CD-RW/DVD Combo/DVD Dual drive is available in the computer, depending on the model you purchased. The optical device allows you to . PC Card Slot The computer provides a PC card slot to support one Type-II PC card for expansion functions, such as LAN/WLAN card, modem card, memory card - MSI S260 | User Manual - Page 31
Rear View Kensington Lock This port is used to lock the computer to location for security Battery Pack (Rear View) To supply power to your computer when the AC adapter is not connected (See Preparation for more information). 15 - MSI S260 | User Manual - Page 32
Bottom View Battery Lock/Unlock Button Battery can not be moved when the button is positioned on lock status. Once the button is pushed to unlock position, the battery is removable. Ventilator The ventilator is designed to cool the system. DO NOT block the ventilator for air circulation. 16 - MSI S260 | User Manual - Page 33
with the other. Ventilator The ventilator is designed to cool the system. DO NOT block the ventilator for air circulation. Battery Pack Supply power to your computer when the AC adapter is not connected. (See Preparation for more information) Screw Box for releasing Optical Device Use screwdriver - MSI S260 | User Manual - Page 34
18 - MSI S260 | User Manual - Page 35
Preparation 1 - MSI S260 | User Manual - Page 36
THE BATTERY PACK Your Notebook PC is equipped with a high-capacity 4-cell/8-cell Li-ion Battery pack. The rechargeable Li-ion battery pack is an internal power source of the computer. A fully charged battery pack can supply power to the computer up to 2.5 hours (Using 4-cell battery) or up to 5 - MSI S260 | User Manual - Page 37
have to worry about the lack of battery power. It's recommend to buy a battery pack from your local dealer. To remove the battery pack: 1. Make sure the computer is turned off. 2. Check the Lock/Unlock button ( ) is in unlocked status. 3. Locate the Battery Release Button on the bottom side. 4. Push - MSI S260 | User Manual - Page 38
place. 3. After the right side of the battery pack fitting the right track, then slightly press the left side of battery pack into the battery chamber ( ). 4. Make sure the Lock/Unlock Button is in lock position. 1. Do not try to disassemble THE BATTERY PACK. 2. Please follow your local laws and - MSI S260 | User Manual - Page 39
AC adapter and use the AC power. When the AC adapter is connected, the battery is charged immediately. Please NOTE that the AC adapter included in the package is correct for your Notebook PC; using other adapter model may damage the computer or other devices on the computer. Connecting the AC Power - MSI S260 | User Manual - Page 40
incorrectly may present a risk of fire or explosion, which could cause serious injury. Only replace the main battery pack with the same or equivalent type of battery. Do not disassemble, short-circuit or incinerate batteries or expose them to temperatures above +60° C (+140° F). Do not temper with - MSI S260 | User Manual - Page 41
. The battery pack uses Lithium-ion battery cells that have no "memory effect." You do not need to discharge the battery pack before you begin charging. However, to optimized the life of battery, we suggest that once a month the power is consumed entirely. If you do not use the Notebook PC for - MSI S260 | User Manual - Page 42
Disconnecting the AC Power When you disconnect the AC adapter, you should: 1. Unplug the power cord from the electrical outlet first ( ). 2. Unplug the connector from the computer ( ). 3. Disconnect the power cord and the connector of AC adapter ( ). 4. When unplugging the power cord, always hold - MSI S260 | User Manual - Page 43
, when the AC adapter is connected, the Notebook PC is ready for use. Operating the Top Cover First, open the top cover by that is called Power-On Self Test (POST). Then, the operating system (such as Microsoft Windows XP in this manual) should start. You can start working with your Notebook PC. 27 - MSI S260 | User Manual - Page 44
using your computer, you need to activate the Windows XP operating system by the following steps. 1. Welcome to Microsoft Windows. After the computer is ready for the pre-use configuration, the screen will show the Welcome to Microsoft Windows message. Click Next to continue. 2. What time zone - MSI S260 | User Manual - Page 45
PC right away or click No to skip it. After setting up the connection, click Finish to exit. 7. Thank you! Congratulations, you're ready to surf with your PC! Click Finish to exit. 8. The Windows Login dialog box appears on the screen, click OK to login. 9. That's right. You can use your Notebook PC - MSI S260 | User Manual - Page 46
TURNING OFF THE NOTEBOOK PC In Windows operating system, always use the "Shut Down" command of the system to turn off the computer. This is the normal operating procedure that can prevent the system problems. 1. Click Start ( ) from the taskbar, and then select the Turn Off Computer option ( ). 2. - MSI S260 | User Manual - Page 47
Basic operation 1 - MSI S260 | User Manual - Page 48
proper position (about 90-degree) when operating. Put your hands on the desk naturally to support your wrists. Adjust the angle/position of the LCD panel, so that you can have the optimal view. Avoid using your Notebook PC in the space where may cause your discomfort (such as on the bed). The - MSI S260 | User Manual - Page 49
the desk's height. Adjust the chair's height. Have a Good Work Habit Have a good work habit is important if you have to work with your Notebook PC for long periods of time; otherwise, it may cause discomfort or injury to you. Please keep the following tips in mind when operating. Change your - MSI S260 | User Manual - Page 50
KNOWING THE KEYBOARD The Notebook PC's keyboard provides all the functions of a full-sized 86-key keyboard and an additional [Fn] key for specific functions on the computer. How to use keyboard can divide into four categories: Typewriter keys, Cursor keys, Numeric keys and Function keys. Keyboard 34 - MSI S260 | User Manual - Page 51
Typewriter Keys Typewriter Keys The function of these Typewriter keys is the major function of the keyboard, which is similar to the keys on a typewriter. It also provides several keys for special purposes, such as the [Ctrl], [Alt] and [Esc] key. When - MSI S260 | User Manual - Page 52
Cursor Keys The keyboard provides four cursor (arrow) keys and [Home], [PgUp], [PgDn], [End] keys at the lower right corner, which are used to control the cursor movement. Cursor - MSI S260 | User Manual - Page 53
. Press this key to delete one character to the left of the cursor and move the following text left for one space. Numeric Keys The keyboard provides a 15-key numeric keypad, which is embedded in the typewriter keys. When the Num Lock is activated, you can use these numeric keys to - MSI S260 | User Manual - Page 54
( ) and one Application Logo key ( ) on the keyboard, which are used to perform Windows-specific functions, such as opening the Start menu and launching the shortcut menu. For more information of the two keys, please refer to your Windows manual or online help. [Fn] Key Switch the display - MSI S260 | User Manual - Page 55
KNOWING THE TOUCHPAD The touchpad integrated in your computer is a pointing device that compatible with standard mouse, allowing you to control the computer by pointing the location of the cursor on the screen and making selection with its two buttons. Cursor Movement Area This pressure-sensitive - MSI S260 | User Manual - Page 56
tap slightly on the touchpad or press the left button to select. This procedure, called as point and click is the basics of operating your Notebook PC. Unlike the traditional pointing device such as the mouse, the whole touchpad can act as a left button, so that your each tap on the touchpad - MSI S260 | User Manual - Page 57
Drag and Drop You can move files or objects in your computer by using drag-and-drop. To do so, place the cursor on the desired item and slightly tap twice on the touchpad, and then keep your fingertip in contact with the touchpad on the second tap. Now, you can drag the selected item to the - MSI S260 | User Manual - Page 58
, moving speed and other advanced features of the cursor on the screen. To configure the touchpad, you can use the standard Microsoft or IBM PS/2 driver in your Windows operating system. The Mouse Properties in Control Panel allows you to change the configuration. Mouse Properties - MSI S260 | User Manual - Page 59
is usually used to install the operating system and software applications. The hard disk drive is a non-removable storage device in your computer. However, you can upgrade it by replacing a lager capacity hard disk drive. 1. To avoid unexpected data loss in your system, please backup your critical - MSI S260 | User Manual - Page 60
the CD/DVD-ROM, CD-RW, DVD Combo and DVD Dual drive. The actual device installed in your computer depends on the model you purchased. CD-ROM Drive: Allow you to read CD disks, including audio CDs and CD-R/RW disks. DVD-ROM Drive: Allow you to read DVD disks and CD disks, including movie - MSI S260 | User Manual - Page 61
Inserting the CD The following instruction describes the general procedure when operating the optical storage device, including the DVD-ROM drive. 1. Confirm that the computer is turned on. 2. Press the Eject Button on the drive's panel ( ) and the CD tray will slide out partially. Then, gently pull - MSI S260 | User Manual - Page 62
the computer is turned off. 2. Press the Eject Button on the drive's panel and the CD tray will slide out partially. Then, your fingers and lift it up from the tray ( ). 4. Push the tray back into the drive. 1. Confirm that the CD is placed correctly and securely in the tray before closing the tray. - MSI S260 | User Manual - Page 63
CD tray can not be open as usual, you can release it manually. 1. Confirm that the computer is turned off. 2. Insert a pointed object (e.g. a straightened clip) into the Emergency Eject Hole ( ) and the CD tray will slide out partially. - MSI S260 | User Manual - Page 64
48 - MSI S260 | User Manual - Page 65
Peripheral Device 1 - MSI S260 | User Manual - Page 66
Connecting the External Devices The I/O (input/output) ports on the rear panel of the computer allow you to connect peripheral devices. For the information of these I/O ports, please refer to Product View. Connecting the Peripheral Devices 50 - MSI S260 | User Manual - Page 67
. 2. Connect your mouse to the computer. 3. The computer may auto detect your mouse driver and enable the mouse function. If there is no detection of you mouse you can manually enable the mouse by going to Start Menu Æ Control Panel Æ Add Hardware to add the new device. Connecting the WebCam You - MSI S260 | User Manual - Page 68
the printer. 3. Connect the power cord and turn on the printer. 4. Turn on the computer and the system will detect a new device. Install the required driver. For further instructions, please refer to your printer's manual. 52 - MSI S260 | User Manual - Page 69
change the display mode by configuring the settings in Display Properties of Windows operating system. Connecting the IEEE 1394 The IEEE 1394 port of your such as the DV (digital video camera). The IEEE 1394 standard interface supports "plug-and-play" technology, so that you can connect and remove - MSI S260 | User Manual - Page 70
and gateway, to build a network connection. This built-in 10/100 Base-T LAN module supports data transfer rate up to 100Mbps. The following diagram describes the basic connection in a network environment. For more instructions or detailed steps on connecting to the LAN, please ask your MIS staff or - MSI S260 | User Manual - Page 71
more instructions or detailed steps on dialing-up through the modem, please ask your MIS staff or Internet service provider (ISP) for help. 1. To reduce the risk of fire, use only No. 26 AWG or larger telecommunication lone cord. 2. You are strongly recommended to install the modem driver included - MSI S260 | User Manual - Page 72
card, modem card and memory card. The following instruction provides you with a basic installation for the PC card, including how to install and remove it. For more information, please refer to the manual of your PC card. Installing the PC card 1. Locate the PC card slot on your notebook computer - MSI S260 | User Manual - Page 73
Button ( ) and the PC card will slide out. Pull it out of the slot ( ). 1. Do not hold the "golden finger" when installing the PC card; otherwise, it may cause interference or damage to the PC card. 2. Before removing the PC card, you should stop the device in Windows operating system. Things to - MSI S260 | User Manual - Page 74
Safely Remove Hardware If you connect any peripheral device to your system, the Safely Remove Hardware icon ( ) will appear on the taskbar. Duble-click the icon to bring up the Safely Remove Hardware dialog box. You can see all connected peripheral devices here. If you want to remove any of the - MSI S260 | User Manual - Page 75
BIOS Setup 1 - MSI S260 | User Manual - Page 76
change the default settings for customized features. ” You want to reload the default BIOS settings. ˆ How to Run BIOS Setup? To run the BIOS Setup Utility, turn on the computer and press the [Del] key during the options on your computer may be different because of BIOS update. Things to know... 60 - MSI S260 | User Manual - Page 77
ˆ Control Keys You can use only the keyboard to control the cursor in the BIOS Setup Utility. Press left arrow to select one menu title. Press right . Bring up help screen providing the information of control keys. 1) Exit the BIOS Setup Utility. 2) Return to the previous screen in a sub-menu. 61 - MSI S260 | User Manual - Page 78
on the screen. The Main menu displays the system information, including the basic configuration. Main menu Show System Overview information about BIOS version, CPU features, Memory size and setting of System Time and Date. Advanced menu Configure IDE and USB settings. Security menu Install or clear - MSI S260 | User Manual - Page 79
will show you BIOS version and other information about its build date and update notes. Following is CPU's information about its Type and Speed. The variable settings in Main menu are Share Memory, System Time and System Date. y Share Memory Some devices need to share with PC's memory to accelerate - MSI S260 | User Manual - Page 80
system time. The system clock will go on no matter you shut down the PC or get into sleep mode. The set format is [hour:minute:second]. y :date:year]. Day Day of the week, from Sun to Sat, which is determined by BIOS (read-only). Month The month from 01 (January) to 12 (December). Date The date - MSI S260 | User Manual - Page 81
installed in the computer. Press [Enter] to bring up a window showing the detailed information of the device, including the device name, vendor, LBA mode, PIO mode and more. y Legacy USB Support If you want to use USB device, like mouse, keyboard, portable disk, in DOS system or boot your system by - MSI S260 | User Manual - Page 82
y Intel (R) SpeedStep (tm) tech. This item allows you to enable or disable Intel SpeedStep technology. When set to Disabled, the system always operates in a conserve power mode (the processor works at FSB400-600MHz or FSB533-800MHz). If you want optimize the processor, set this item to Enabled, so - MSI S260 | User Manual - Page 83
the password you want, up to six characters in length and press [Enter]. The password typed now will replace any previously set password from CMOS memory. You may also press [ESC] to abort the selection and not enter a password. 67 - MSI S260 | User Manual - Page 84
Level item. Setting options: No Access, View Only, Limited and Full Access. The Password Check item is used to specify the type of BIOS password protection that is implemented. Settings are described below: Setup The password prompt appears only when end users try to run Setup. Always A password - MSI S260 | User Manual - Page 85
. The default setting is Enabled. y 1st, 2nd and 3rd Boot Device Setting The three items allow you to set the sequence of boot devices where BIOS attempts to load the disk operating system. 69 - MSI S260 | User Manual - Page 86
ˆ Exit Setting Save Changes and Exit Save the changes you have made and exit the utility. Discard Changes and Exit Exit the utility without saving the changes you have made. Discard Changes Abandon your changes and reload the previous configuration before running the utility. Load Optimal Defaults - MSI S260 | User Manual - Page 87
Additional Information 1 - MSI S260 | User Manual - Page 88
using your computer, you need to activate the Windows XP operating system by the following steps. 1. Welcome to Microsoft Windows. After the computer is ready for the pre-use configuration, the screen will show the Welcome to Microsoft Windows message. Click Next to continue. 2. What time zone - MSI S260 | User Manual - Page 89
PC right away or click No to skip it. After setting up the connection, click Finish to exit. 7. Thank you! Congratulations, you're ready to surf with your PC! Click Finish to exit. 8. The Windows Login dialog box appears on the screen, click OK to login. 9. That's right. You can use your Notebook PC - MSI S260 | User Manual - Page 90
and can be used to restore the hard disk to its original state. When drive. Press the [Del] key on the keyboard to enter the BIOS Setup Utility when the system boots up. In the BIOS Setup Utility, set the CD/DVDVD-ROM drive as the first boot device (See Boot Menu in BIOS Setup for more instruction - MSI S260 | User Manual - Page 91
The system will resume the factory default settings after reboots. After resuming the operating system, you should reactivate the operating system as like the first time to use the computer. 75 - MSI S260 | User Manual - Page 92
and software applications for your Notebook PC. When do I Need the Utility CD? You want to install the operating system from your Windows Setup CD, but not from the Recovery CD that included in the package. You want to install the drivers and software applications manually. How to Use the Utility - MSI S260 | User Manual - Page 93
for Wireless, CyberLink DVD Solution, CyberLink Power DVD, CyberLink Power Director, MSI System Control Manager, MSI Live Update 3, and Adobe Reader. Autorun - Utility Screen 1. If your computer is pre-installed with the Windows operating system when purchased, the required drivers should - MSI S260 | User Manual - Page 94
MSI Live Update™3 MSI Live Update™3 is a useful utility for enhancing the performance of your Notebook PC. With its auto-search and scheduling function, MSI Live Update™3 saves your efforts and time to find the required BIOS or drivers on the Internet. Moreover, MSI Live Update™3 supports - MSI S260 | User Manual - Page 95
on the webpage. If it has found one (or more) supported BIOS for you system, click the InstallShield Wizard button on the right side of the table to download and update the desired BIOS automatically. Follow the on-screen instructions to complete the procedure. 1. It is recommended to close all - MSI S260 | User Manual - Page 96
. If it has found one (or more) supported drivers for your system. Click the InstallShield Wizard button on the right side of the table to download and update the desired drivers automatically. Follow the on-screen instructions to complete the procedure. Updating Utility Live Utility is a tool that - MSI S260 | User Manual - Page 97
2005 to scan your e-mail, block unnecessary websites and protect your PC from virus infected. Registering Norton Internet Security ™2005 It is real-time updates, technical support and product updates. To register your software: On the Norton Internet Security ™2005 main window, click "Next - MSI S260 | User Manual - Page 98
Security includes a complimentary 90 days subscription to Norton Internet Security Protection updates. When the complimentary subscription expires, you can purchase a renewal good Option on the Norton Internet Security main window. Then click "Finish" to complete the registration process. 82 - MSI S260 | User Manual - Page 99
you buy it. You may re-install this program in the future by the software CD bundled with the package of your Notebook PC. When you turn on your Notebook PC, MSI System Control Manager will automatically launch and display a status icon ( ) on the taskbar. By click on the right button of your mouse - MSI S260 | User Manual - Page 100
to use Search Key Define, you can also click the Search Key button ( ) on the keyboard panel to activate the Search Key Define. Without any search key defined, the default screen of clicking right field of the screen and a message "Windows default" shows you the status of the current definition. 84 - MSI S260 | User Manual - Page 101
To add a Search Key in the list, just search and select an item from the left field. An item can be a program, a media or a web page. For example, point the Nero StartSmart ( ) and press the ">>" button ( ), the path where Nero StartSmart locates will be add in the right field. Because there is only - MSI S260 | User Manual - Page 102
the system standby period to turn off monitor and HDD after using the notebook; to enable the hibernation mode or not; to control CPU operating performance you select select Exit Energy Station mode It shows you the current PC status Click here to bring up configuration menu and you can set each - MSI S260 | User Manual - Page 103
Power schemes Display Power Scheme Full Performance High Performance Presentation (with LCD) Presentation (with Projector) Office/E-Mail High Battery Performance DVD Movie CD Audio 87 - MSI S260 | User Manual - Page 104
How to adjust the individual setting value in the configuration menu? (Take "Full Performance" for example) Firstly, select Full Performance icon within the power schemes display, then click Configuration button to bring up the following configuration menu. You can adjust each setting option - MSI S260 | User Manual - Page 105
Mail Properties Power schemes: you won't need to turn on and off the mail box many times to check out coming emails and know how many mails you have got. Right click the icon ( ) on the taskbar and select "Mail Properties". It leads you to the setup screen of Mail Properties showing as below. You - MSI S260 | User Manual - Page 106
Take a look at this figure. If your mail settings are correct and your network is connecting successfully. The mail-checking function of Mail Properties will automatically do checking as the duration you set. When you have mails, the SCM (System Control Manager) icon will deliver a pop-up message - MSI S260 | User Manual - Page 107
OSD (On-Screen Display) Your Notebook PC is already installed a special OSD interface. It gives you vivid and friendly displays on your screen when you are enabling Function Keys and Quick Launch - MSI S260 | User Manual - Page 108
quick launch button and starting Outlook Express or Microsoft Outlook. Reminder between clicking Internet quick launch button and Webpage opening. Toggle between enable and disable wireless connection. Reminder before opening the Search Key function. 92 - MSI S260 | User Manual - Page 109
CyberLink Multimedia Launcher To launch CyberLink Multimedia Launcher, double-click Cyberlink Multimedia Launcher icon on Windows desktop. As you ever operated this function before, the following CyberLink list will appear on the desktop as you rebooting next time. It includes: PowerDirector , - MSI S260 | User Manual - Page 110
PowerProducer PowerProducer allows you to finalize your digital video productions and burn them to disc. You can use PowerProducer for light editing tasks and to capture new media, and when it's time to polish your movie. To launch PowerProducer, double-click PowerProducer icon ( ) on the - MSI S260 | User Manual - Page 111
Power2Go CyberLink Power2Go is a disc-burning program, which is a handy utility for burning discs containing movies made using CyberLink's movie-making software, or when you want to make music discs, dara discs, and even bootable discs. The Cyberlink Power2Go program can run in either of two - MSI S260 | User Manual - Page 112
Power2Go Express ( ) Drag any file here to make a data disc Drag audio files here to make an Audio CD Drag video files here to make a DVD/VCD Copy disc content onto another disc PowerDVD Whether watching DVD movies on your Notebook PC as you travel, using your computer as a second DVD player for - MSI S260 | User Manual - Page 113
Display: Display DVD/VCD on the screen. Control Panel: Contains lots of control functions of the program. 97 - MSI S260 | User Manual - Page 114
PowerDVD. In most cases, all you have to do is inserting the DVD disc. PowerDVD starts automatically and determines the type of disc in the drive. But sometimes there's more to viewing a DVD title than letting a movie start and play through to the end without stopping. PowerDVD lets you control - MSI S260 | User Manual - Page 115
E Ctrl-A F (1) (2) (3) (4) (5) (2) Hot key: Space key (3) Hot key: T (4) Hot key: Ctrl-B (5) Hot key: S (7) Hot key: N (8) Hot key: Enter (9) Hot key: P G F1 H Ctrl-E I Ctrl-N J Ctrl-X K how many time it has played PowerDVD version and related inforamtion (6) (7) (1) Fast Rewind (8) (2) - MSI S260 | User Manual - Page 116
chapter of the DVD L C Capture frame, to snap shot the screen M R Shuttle N H Next audio stream O U Next subtitle P Z Full screen Q Ctrl-C Configuration R F3 i-power (click here to connect to CyberLink homepage) S Ctrl-T Skin toggle Menu (click here to open T L PowerDVD
-
 1
1 -
 2
2 -
 3
3 -
 4
4 -
 5
5 -
 6
6 -
 7
7 -
8
-
9
-
10
-
11
-
12
-
13
-
14
-
15
-
16
-
17
-
18
-
19
-
20
-
21
-
22
-
23
-
24
-
25
-
26
-
27
-
28
-
29
-
30
-
31
-
32
-
33
-
34
-
35
-
36
-
37
-
38
-
39
-
40
-
41
-
42
-
43
-
44
-
45
-
46
-
47
-
48
-
49
-
50
-
51
-
52
-
53
-
54
-
55
-
56
-
57
-
58
-
59
-
60
-
61
-
62
-
63
-
64
-
65
-
66
-
67
-
68
-
69
-
70
-
71
-
72
-
73
-
74
-
75
-
76
-
77
-
78
-
79
-
80
-
81
-
82
-
83
-
84
-
85
-
86
-
87
-
88
-
89
-
90
-
91
-
92
-
93
-
94
-
95
-
96
-
97
-
98
-
99
-
100
-
101
-
102
-
103
-
104
-
105
-
106
-
107
-
108
-
109
-
110
-
111
-
112
-
113
-
114
-
115
-
116
 |
 |

MSI MEGA BOOK
S260 Notebook PC
User’s Guide
G52-B1012X1